- Catalogs
- 3B Scientific
- Quick Start Guide Atlas
- Company
- Products
- Catalogs
- News & Trends
- Exhibitions
Quick Start Guide Atlas
1 /4Pages
Quick Start Guide Atlas
1 /4Pages
Catalog excerpts
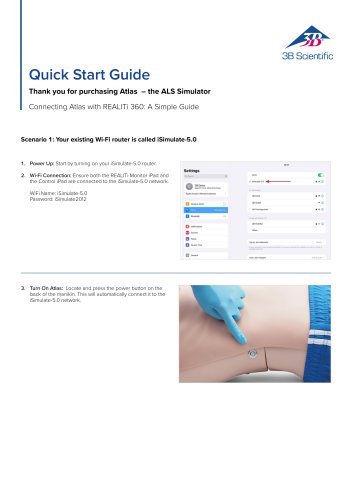
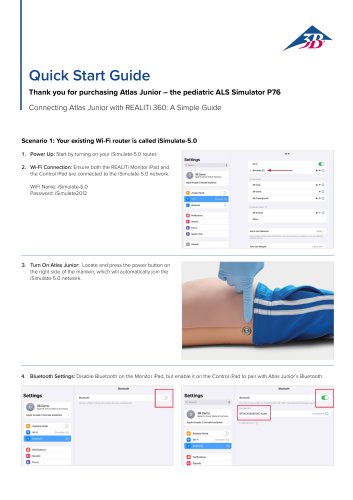
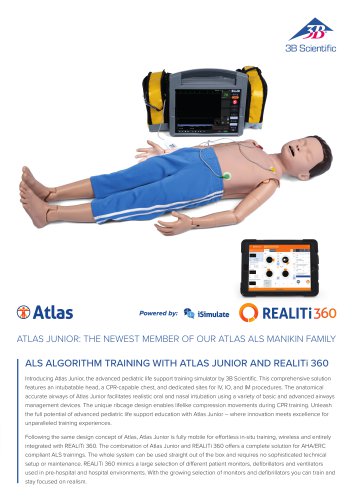
Quick Start GuideThank you for purchasing Atlas - the ALS SimulatorConnecting Atlas with REALITi 360: A Simple Guide Scenario 1: Your existing Wi-Fi router is called iSimulate-5.0 1. Power Up: Start by turning on your iSimulate-5.0 router. 2. Wi-Fi Connection: Ensure both the REALITi Monitor iPad and the Control iPad are connected to the iSimulate-5.0 network. WiFi Name: iSimulate-5.0 Password: iSimulate2012 WiClOM IMliMlaM *Cp4« 3 Mon*« kottariot 3. Turn On Atlas: Locate and press the power button on the back of the manikin. This will automatically connect it to the iSimulate-5.0 network.
Open the catalog to page 1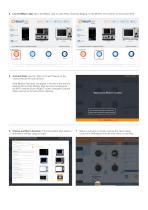
4. Launch REALITi App: Open the REALITi app on both iPads, selecting ‘Staging’ on the Monitor and ‘Control’ on the Control iPad. Welcome to REALITi Control 5. Connect iPads: Use the ‘Tap to Connect’ feature on the Control iPad to link both devices. If the Monitor iPad does not appear in the list, check that the Staging iPad and the Monitor iPad are both connected to the Wi-Fi network of your REALITi router: iSimulate-5.0 (both iPads must be on the same Wi-Fi network). 6. Choose and Start a Scenario: From the Control iPad, select a scenario or monitor setup to begin. 7. Select a scenario or monitor...
Open the catalog to page 2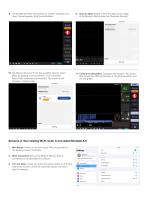
8. On the Monitor iPad, the scenario or monitor selected from step 7 should appear. Start the defibrillator. 9. Scan for Atlas: Swipe in from the right screen edge of the Monitor iPad to show the “Available Devices”. 10. Tap ‘Rescan Devices’. From the available devices select ‘Atlas’ by tapping ‘Connect Device’. The connected Atlas will be calibrated automatically. The manikins will simulate a carotid pulse. 11. Commence Simulation: Compress the manikin. You will be able to see the CPR compression in the ECG waveform and the bar graph. Scenario 2: Your existing Wi-Fi router is not called iSimulate-5.0...
Open the catalog to page 3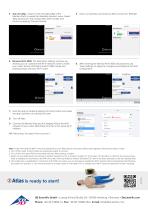
3. Scan for Atlas : swipe in from the right edge of the Monitor iPad’s to reveal the ‘Available Devices’ menu. Select ‘Rescan Devices’ and choose Atlas Wi-Fi Config’ from the list by tapping ‘Connect Device.’ 4. Upon successfully connecting to ‘Atlas’ access the ‘Settings’. Rmcjt Drrtcat 5. Rename Wi-Fi SSID: The Atlas Wi-Fi settings will show up, allowing you to customize the Wi-Fi network name to match your router. Ensure that both the Wi-Fi SSID (name) and password align with your Wi-Fi router. 6. After entering the desired Wi-Fi SSID and password, tap ‘Save Settings’ to apply the changes...
Open the catalog to page 4All 3B Scientific catalogs and technical brochures
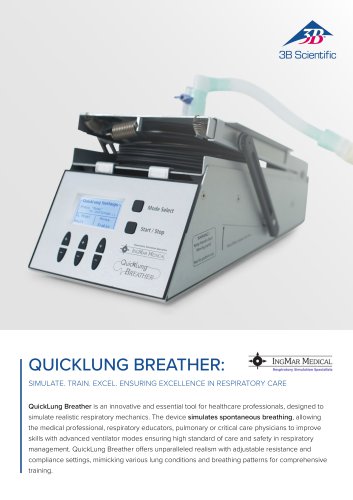
 QuickLung Breather
12 Pages
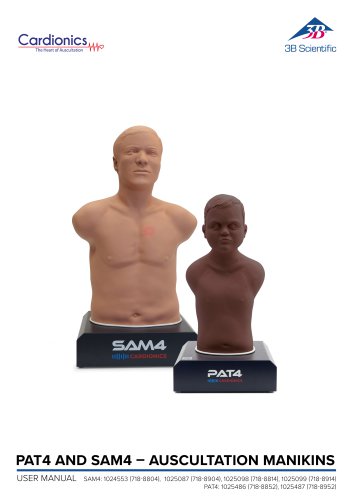
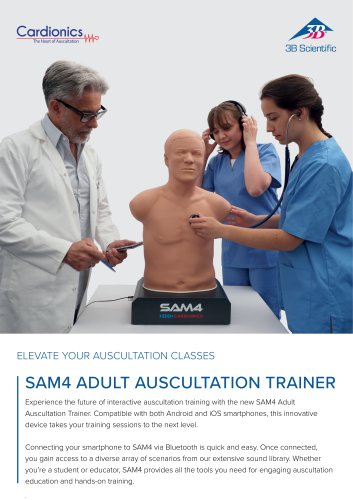
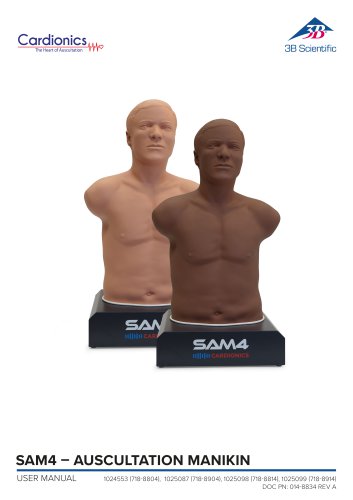 SAM4 - Auscultation Manikin
9 Pages
 Quick Start Guide Atlas Baby
4 Pages
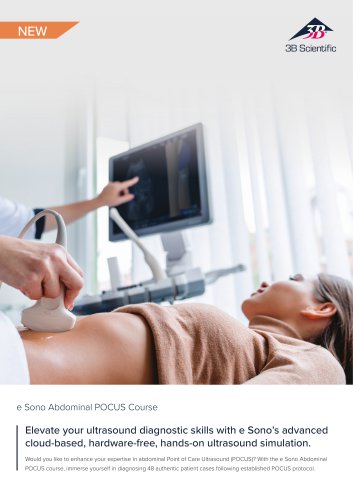 Sellsheet eSono Abdominal
3 Pages
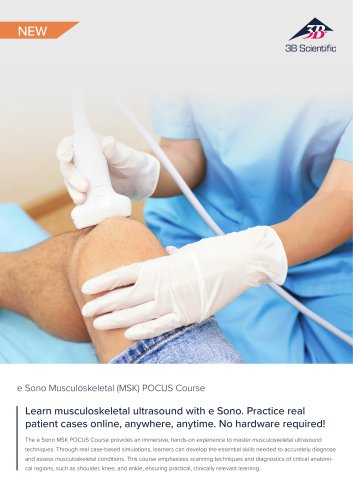 Sellsheet eSono MSK
3 Pages
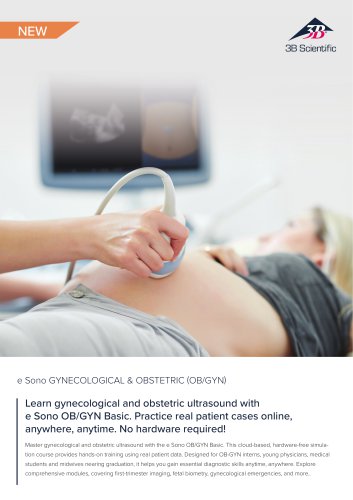 Sellsheet eSono OBGYN
3 Pages
 Sellsheet IngMar RespiSim
2 Pages
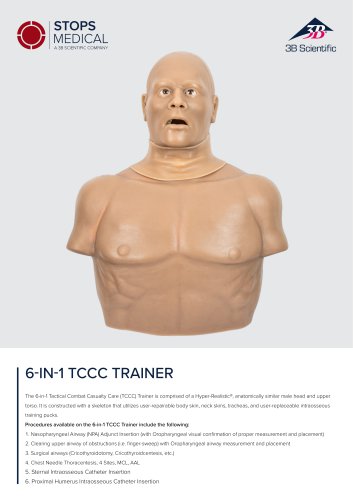 Sellsheet Stops 6N1 Trainer
2 Pages
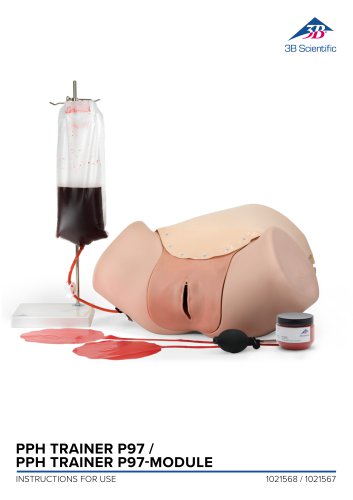 PPH Trainer P97
14 Pages
 Sellsheet Lifecast Neonatal
3 Pages
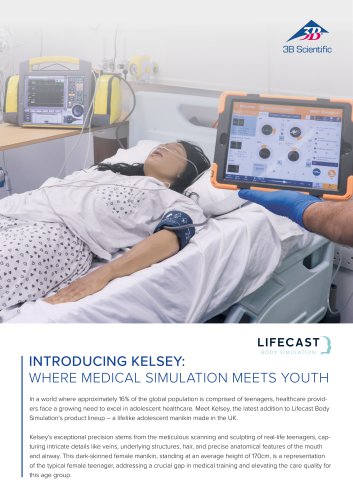 Sellsheet Lifecast Teenager
2 Pages
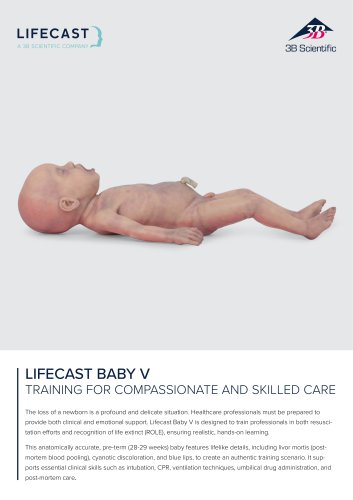 Sellsheet Lifecast Baby V
2 Pages
 Product Manual Atlas Baby
16 Pages
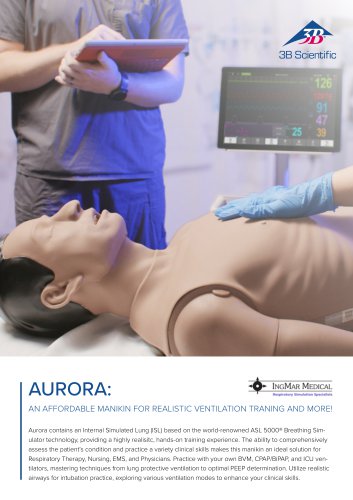 IngMar Sellsheet Aurora
2 Pages
 IngMar Sellsheet QuickLung
2 Pages
 Sellsheet VSI 1025586
2 Pages
 Sellsheet VSI 1025528
2 Pages
 Sellsheet VSI 1025662
2 Pages
 Sellsheet VSI 1025616
2 Pages
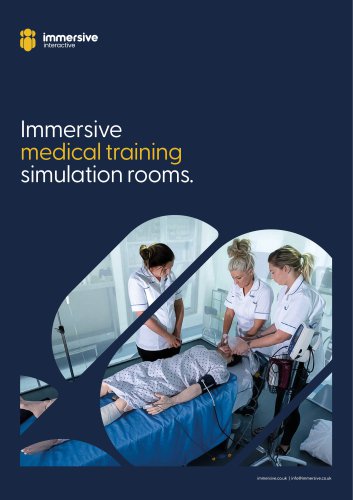 Immersive Brochure
13 Pages
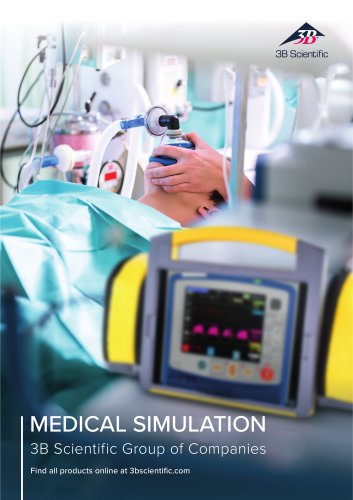 Medical Simulation
51 Pages
 Lifecast Brochure
16 Pages
 Atlas Product Manual
18 Pages
 Cardionics Brochure Simulation
23 Pages
 Acupuncture
35 Pages
 Best of Therapy
12 Pages
 Manual P120/P121/P122/P124/P125
60 Pages
 P10/1,P11/1 product manual
11 Pages
 P16 Product brochure
2 Pages
 Medical Simulation EMS TCCC
9 Pages
 Catalog Natural Sciences
196 Pages
 K17
K1716 Pages
 D25 Half Lower Jaw
13 Pages
 D20 Dentition Development
12 Pages
 D10
D1012 Pages
 L56
L5630 Pages
 L50, L51, L55
36 Pages
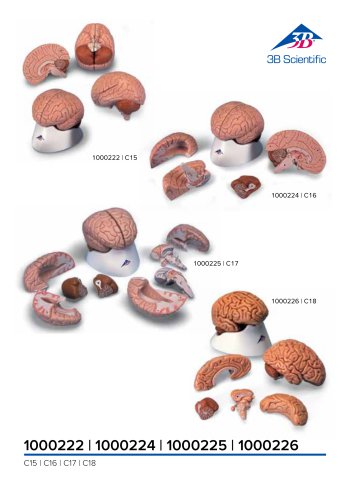
 C15, C16, C17, C18, C20
12 Pages
 P80 SIMone Product Manual
52 Pages
 P57 Quick instructions
16 Pages
 N30 / N31 Product Manual
12 Pages
 N15 Acupuncture Ears
2 Pages
 P16 Product manual
8 Pages
 P10CCD product brochure
2 Pages
 P10CCD product manual
16 Pages
 P72+light Product manual
28 Pages
 P72+light Product brochure
2 Pages
 Female Breast
30 Pages
 C41
C4116 Pages
 C18
C189 Pages
 G01
G0124 Pages
 3B Smart Anatomy
3 Pages
 M10
M1016 Pages
 A291
A29120 Pages
 F11
F1113 Pages
 P72
P7248 Pages
 B60
B6016 Pages
 A05/2 ,A11, A13
18 Pages
 A290 A291
20 Pages
 G21, G22
9 Pages
 K25
K2512 Pages
 K20, K21
12 Pages


![Product Manual - I.v. Injection Arm P50/1 - P50/1 [1021418]](https://img.medicalexpo.com/pdf/repository_me/67454/product-manual-iv-injection-arm-p50-1-p50-1-1021418-249392_1mg.jpg)

![Product Manual - Hemorrhage Control Arm Trainer P102 - P102 [1022652]](https://img.medicalexpo.com/pdf/repository_me/67454/product-manual-hemorrhage-control-arm-trainer-p102-p102-1022652-249356_1mg.jpg)
![Product Manual - Trainer for wound care and bandaging techniques - P100 [1020592]](https://img.medicalexpo.com/pdf/repository_me/67454/product-manual-trainer-wound-care-bandaging-techniques-p100-1020592-249350_1mg.jpg)
![Product Manual - Postpartum Hemorrhage Trainer - PPH Trainer P97 - P97 [1021568]](https://img.medicalexpo.com/pdf/repository_me/67454/product-manual-postpartum-hemorrhage-trainer-pph-trainer-p97-p97-1021568-249337_1mg.jpg)


- Hosley anatomical model
- Hosley training anatomical model
- Hosley teaching anatomical model
- Hosley training simulator
- Hosley general care simulator
- Hosley tooth model
- Hosley upper body simulator
- Hosley flexible anatomical model
- Hosley bone model
- Dental care model
- Hosley skull model
- Hosley training manikin
- Hosley surgery simulator
- Stethoscope
- Hosley plastic anatomical model
- Hosley mouth anatomical model
- White anatomical model
- Patient simulation unit
- Vascular model
- Training vascular model