Catalog excerpts

ACL Reconstruction Inside-Out Surgical Technique
Open the catalog to page 1
Instrumentation Description
Open the catalog to page 2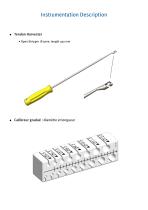
• Calibreur gradue : diametre et longueur
Open the catalog to page 3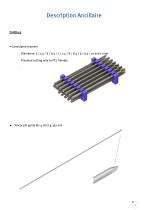
Cannulated reamers Description Ancillaire
Open the catalog to page 5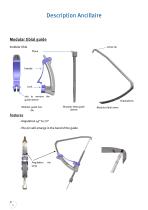
modular tibia slot to remove the guide sleeve Modular guide handle Modular tibial guide sleeve The pin will emerge in the bend of the guide
Open the catalog to page 6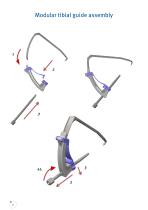
Modular tibial guide assembly
Open the catalog to page 8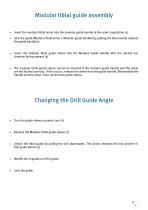
• Insert the modular tibial aimer into the modular guide handle to the select angulation (1) • lock the guide (Modular tibial aimer + Modular guide handle) by pulling the blue handle towards the guide handled) Insert the modular tibial guide sleeve into the Modular Guide Handle with the ratchet me chanism facing upward (3) • The modular tibial guide sleeve cannot be inserted if the modular guide handle and the aimer are not locked correctly. If this occurs, remove the aimer from the guide handle. Reassemble the handle and the aimer, then reinsert the guide sleeve. Turn the guide sleeve a...
Open the catalog to page 9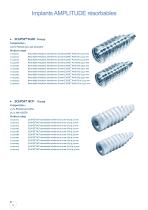
Resorbable Polylactic Interference Screw ECLIPSE® Profil 0 7 Lg 20 mm Resorbable Polylactic Interference Screw ECLIPSE® Profil 0 7 Lg 25 mm Resorbable Polylactic Interference Screw ECLIPSE® Profil 0 7 Lg 30 mm Resorbable Polylactic Interference Screw ECLIPSE® Pro fil 0 8 Lg 20 mm Resorbable Polylactic Interference Screw ECLIPSE® Profil 0 8 Lg 25 mm Resorbable Polylactic Interference Screw ECLIPSE® Profil 0 8 Lg 30 mm Resorbable Polylactic Interference Screw ECLIPSE® Profil 0 9 Lg 20 mm Resorbable Polylactic Interference Screw...
Open the catalog to page 10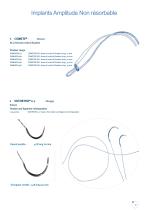
cortical fixation cortical fixation cortical fixation cortical fixation cortical fixation COMETE® ACL femoral COMETE® ACL femoral COMETE® ACL femoral COMETE® ACL femoral COMETE® ACL femoral Suture Tendon and ligament reintegration 1-0402600 SUTORTHO 0.7 Suture for tendon and ligament reintegration Triangular needle : 4/8 long 40 mm
Open the catalog to page 11
• Use the open tendon stripper to harvest the semitendinosis and gracilis tendons • Calibrate (diameter and length) the graft with the graft sizer,
Open the catalog to page 15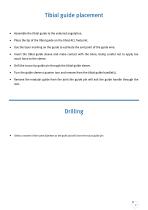
• Assemble the tibial guide to the selected angulation. • Place the tip of the tibial guide on the tibial ACL footprint. Use the laser marking on the guide to estimate the exit point of the guide wire. • Insert the tibial guide sleeve and make contact with the bone, being careful not to apply too much force to the sleeve. • Drill the trocar tip guide pin through the tibial guide sleeve. • Turn the guide sleeve a quarter turn and remove from the tibial guide handle(i). • Remove the modular guide from the joint the guide pin will exit the guide handle through the slot. Select a reamer of the...
Open the catalog to page 17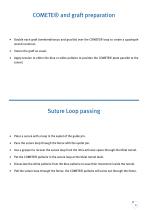
• Double each graft (semitendinosus and gracilis) over the COMETE® loop to create a quadruple strand construct. • Suture the graft as usual. • Apply tension to either the blue or white pullwire to position the COMETE® plate parallel to the tunnel. Place a suture with a loop in the eyelet of the guide pin. Pass the suture loop through the femur with the eyelet pin. Use a grasper to recover the suture loop from the intra-articular space through the tibial tunnel. Put the COMETE® pullwire in the suture loop at the tibial tunnel level. Dissociate the white pullwire from the blue pullwire to...
Open the catalog to page 19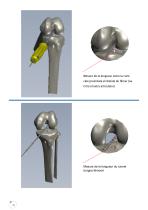
Mesure de la longueur entre la corticate proximale et distale du femur (ou intra et extra articulaire) Mesure de la longueur du tunnel borgne femoral
Open the catalog to page 20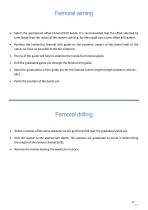
• Select the appropriate offset Femoral Drill Guide. It is recommended that the offset selected be imm larger than the radius of the reamer size (e.g. for 8mm graft use a 5mm offset drill guide). • Position the Inside-Out femoral drill guide on the posterior aspect of the lateral wall of the notch, as close as possible to the ACL footprint. • The tip of the guide will help to stabilize the Inside-Out femoral guide. • Drill the graduated guide pin through the femoral drill guide. • Read the graduations of the guide pin for the femoral tunnel length (length between cortices LBC). • Verify the...
Open the catalog to page 21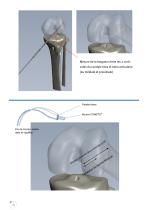
Palette titane Boucle COMETE® Fils de traction solidarisés et rigidifiés
Open the catalog to page 22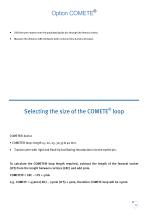
• Drill the 5mm reamer over the graduated guide pin through the femoral cortex. • Measure the distance (LBC) between both cortices (intra & extra articular). COMETE® device • COMETE® loop: length 15, 20, 25, 30,35 & 40 mm. • Traction wire with rigid and fixed tip facilitating introduction into the eyelet pin To calculate the COMETE® loop length required, subtract the length of the femoral socket (LFS) from the length between cortices (LBC) and add 5mm. COMETE® = LBC - LFS + 5mm e.g. COMETE = 45mm (LBC) - 25mm (LFS) + 5mm, therefore COMETE loop will be 25mm.
Open the catalog to page 23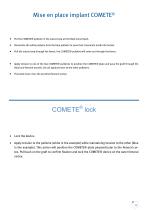
Mise en place implant COMETE® • Put the COMETE® pullwire in the suture loop at the tibial tunnel level. • Dissociate the white pullwire from the blue pullwire to ease their movement inside the tunnel. • Pull the suture loop through the femur, the COMETE® pullwire will come out through the femur. • Apply tension to one of the two COMETE® pullwires to position the COMETE® plate and pass the graft through the tibial and femoral tunnels. Do not apply tension to the other pullwires. • The plate must cross the proximal femoral cortex. • Lock the device. • Apply tension to the pullwire (white in...
Open the catalog to page 25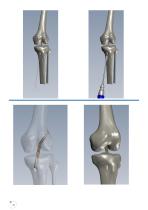
Mise sous tension de la greffe
Open the catalog to page 26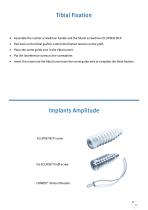
• Assemble the ratchet screwdriver handle and the Shank screwdriver ECLIPSE® BCP. • Pull back on the tibial graft to control the fixation tension on the graft. • Place the screw guide wire in the tibial tunnel. • Put the interference screw on the screwdriver. • Insert the screw into the tibial tunnel over the screw guide wire to complete the tibial fixation Vis ECLIPSE® Profil screw COMETE® femoral fixation
Open the catalog to page 27
E-mail: amplitude@amplitude-ortho.com Customer Service-Export: 11, cours Jacques Offenbach. Zone Mozart 2, 26000 Valence, France
Open the catalog to page 32All Amplitude Surgical catalogs and technical brochures
-
SCORE® II
4 Pages
-
SATURNE® II
28 Pages
-
ECLIPSE® BCP
4 Pages


