- Catalogs
- Andor Technology PLC
- iXon Ultra
iXon Ultra
1 /121Pages

iXon Ultra
1 /121Pages
Catalog excerpts

Software Guide Solis Andor’s camera control and analysis software platform iXon Ultra andor.com
Open the catalog to page 1
iXon Ultra Table of Contents TABLE OF CONTENTS SECTION 1: USING THE iXon Ultra MAIN WINDOW Main Window Status Bar SETTING TEMPERATURE SETUP ACQUISITION OptAcquire preset modes OptAcquire create user-defined modes SECTION 3: ACQUIRING DATA INITIAL ACQUISITION DATA TYPE SELECTION Definitions of data types ACQUISITION TYPES Autoscale Acquisition Take Background Take Reference Acquisition errors
Open the catalog to page 2
iXon Ultra Table of Contents ACQUISITION MODES & TIMINGS Single scan Kinetic Series COUNT CONVERT Count Convert dialogs SPURIOUS NOISE FILTER CROPPED SENSOR MODE TRIGGERING MODES READOUT MODES Image mode Video mode Image orientation Vertical Pixel Shift 3.9.4.2 Vertical Clock Amplitude Voltage Horizontal Pixel Shift 3.9.5.3 Output Amplifier Selection
Open the catalog to page 3
iXon Ultra Table of Contents 3.9.5.4 - EM Gain Amplifier Multi-track mode Full Vertical Binning Photon Counting in real time Photon Counting by post-processing Shutter Transfer Time Accumulate Cycle Time & No. of Accumulations Kinetic Series & Kinetic Cycle Lengths Fast Kinetics 3.12.4.1 Readout Mode & Fast Kinetics Virtual Memory SECTION 4: DISPLAYING DATA DISPLAY MODES DISPLAY PREFERENCES AXIS DEFINITIONS AXIS SETUP
Open the catalog to page 4
iXon Ultra Table of Contents 62 2D display mode preferences 4.7.1.1.1 Peak Search Sensitivity 4.7.1.2.1 Labels on Peaks or Troughs 4.7.1.2.2 Maximum Number of Labelled Peaks 4.7.1.3.1 Label Peaks in all Overlaid Spectra 2D with Peak Labelling 2D with Chemical Labels Baseline Correction
Open the catalog to page 5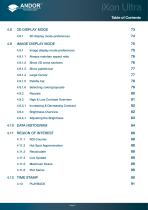
iXon Ultra Table of Contents 3D DISPLAY MODE 3D display mode preferences IMAGE DISPLAY MODE Image display mode preferences 4.9.1.1 Always maintain aspect ratio 4.9.1.2 Show 2D cross sections High & Low Contrast Overview 4.9.3.1 Increasing & Decreasing Contrast Brightness Overview Live Update Maximum Scans Plot Series
Open the catalog to page 6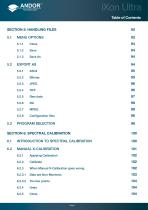
iXon Ultra Table of Contents SECTION 5: HANDLING FILES MENU OPTIONS Configuration files PROGRAM SELECTION SECTION 6: SPECTRAL CALIBRATION INTRODUCTION TO SPECTRAL CALIBRATION MANUAL X-CALIBRATION Applying Calibration When Manual X-Calibration goes wrong
Open the catalog to page 7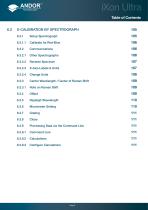
iXon Ultra Table of Contents 6.3 Setup Spectrograph 6.3.2.3 X-Axis Labels & Units Center Wavelength / Center of Raman Shift 6.3.3.1 Note on Raman Shift Rayleigh Wavelength Micrometer Setting Processing Data via the Command Line
Open the catalog to page 8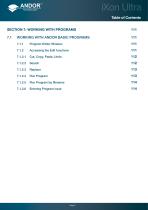
iXon Ultra Table of Contents SECTION 7: WORKING WITH PROGRAMS Working with Andor Basic programs Program Editor Window Accessing the Edit functions 7.1.2.1 Cut, Copy, Paste, Undo 7.1.2.6 Entering Program input
Open the catalog to page 9
iXon Ultra Table of Contents GLOSSARY EMCCD READOUT SEQUENCE Dark Signal Detection Limit Exposure Time Frame Transfer Pixel Noise Readout Noise Fixed Pattern Noise Quantum Efficiency/Spectral Response Scans (Keep Clean & Acquired) Shift Register Shot Noise Signal To Noise Ratio
Open the catalog to page 10
iXon Ultra Using the iXon Ultra SECTION 1: USING THE iXon Ultra 1.1 - STARTING THE APPLICATION On the desktop, click on the appears briefly: icon which was installed during the installation process and the Solis Splash Screen The Main Window then appears, e.g.:
Open the catalog to page 11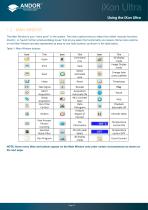
iXon Ultra Using the iXon Ultra 1.2 - MAIN WINDOW The Main Window is your “entry point” to the system. The menu options that you select from either ‘execute functions directly’, or ‘launch further windows/dialog boxes’ that let you select the functionality you require. Some menu options on the Main Window are also represented as easy-to-use radio buttons, as shown in the table below. Table 1: Main Window buttons NOTE: Some menu titles and buttons appear on the Main Window only under certain circumstances as shown on the next page.
Open the catalog to page 12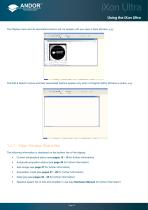
iXon Ultra Using the iXon Ultra The Display menu and its associated buttons will not appear until you open a Data Window, e.g.: The Edit & Search menus and their associated buttons appear only when a Program Editor Window is active, e.g.: 1.2.1 - Main Window Status Bar The following information is displayed on the bottom line of the display: • Current temperature status (see pages 15 - 16 for further information) Autoscale acquisition status (see page 26 for further information) Sub-Image (see page 37 for further information) Acquisition mode (see pages 27 - 29 for further information) Data type...
Open the catalog to page 13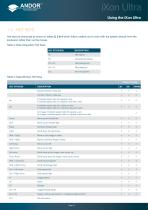
iXon Ultra Using the iXon Ultra 1.3 - HOT KEYS Hot keys (or shortcuts) as shown in tables 2, 3 & 4 which follow, enable you to work with the system directly from the keyboard, rather than via the mouse. Table 2: Data Acquisition Hot Keys Key stroke(s) Take signal Autoscale Acquisition Take background Take reference Abort Acquisition Table 3: Data Window Hot Keys DISPLAY MODE KEY STROKES Expand (‘Stretch’) data-axis Contract (‘Shrink’) data-axis If maintain aspect ratio off, expand x-axis. If maintain aspect ratio on, expand x-axis and y-axis If maintain aspect ratio off, contract x-axis. If maintain...
Open the catalog to page 14
iXon Ultra Using the iXon Ultra Table 4: Andor Basic Programming Language Hot Keys Key stroke(s) Abort acquisition / program Command line Context sensitive help on reserved words in the Andor Basic programming language is available if you are using the Program Editor Window.
Open the catalog to page 15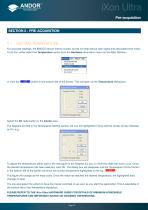
iXon Ultra Pre-acquisition SECTION 2 - PRE-ACQUISITION 2.1 - SETTING TEMPERATURE For accurate readings, the EMCCD should first be cooled, as this will help reduce dark signal and associated shot noise. To do this, either select the Temperature option from the Hardware drop-down menu on the Main Window: button in the bottom-left of the screen. This will open up the Temperature dialog box : Select the On radio button in the Cooler area. The Degrees (C) field in the Temperature Setting section will now be highlighted in blue and the Cooler will be indicated as On, e.g.: To adjust the temperature,...
Open the catalog to page 16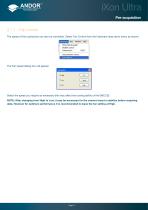
iXon Ultra Pre-acquisition 2.1.1 - Fan control The speed of the cooling fan can also be controlled. Select Fan Control from the Hardware drop-down menu as shown: The Fan speed dialog box will appear: Select the speed you require as necessary (this may affect the cooling ability of the EMCCD). NOTE: After changing from High to Low, it may be necessary for the camera temp to stabilize before acquiring data. However for optimum performance it is recommended to leave the fan setting at High.
Open the catalog to page 17All Andor Technology PLC catalogs and technical brochures
 Zyla sCMOS
78 Pages
 Andor_Newton
44 Pages
 Kymera_328i
63 Pages
 Solis 64
6 Pages
 ikon xl 231
8 Pages
 zyla 5.5 scmos
12 Pages
 ixon ultra 888
12 Pages
 ikon xl 230
8 Pages
 2020 Neo 5.5 sCMOS
6 Pages
 Multi-Wavelength Imaging
11 Pages
 2017 iXon EMCCD
13 Pages
 iKon-L HF
7 Pages
 Shamrock 500 Spectrograph
13 Pages
 Shamrock 750 Spectrograph
14 Pages
 iXon Ultra 888 EMCCD
2 Pages
 iXon Ultra 897 EMCCD
2 Pages
 Zyla 5.5 HF
8 Pages
 Neo 5.5 sCMOS
6 Pages
 Microspectroscopy Gatefold
8 Pages
 Kymera 193 Spectrograph
14 Pages
 Spectroscopy
25 Pages
 High Energy Detection
28 Pages
 Spectroscopy Solutions
23 Pages
 Neo and Zyla sCMOS Cameras
17 Pages
 iXon EMCCD
13 Pages


Archived catalogs
 Clara CCD
2 Pages
 Andor iXon Life EMCCD
9 Pages
 Imaris Gatefold
8 Pages
 iKon-XL 231
8 Pages
 iKon-XL 230
8 Pages
 iKon-M CCD for Photovoltaics
6 Pages
- Microscopy
- Compound microscope
- Laboratory microscope
- Desktop microscope
- Control software
- Laboratory software
- Windows software
- CMOS camera
- Camera with USB port
- Spectroscope
- Hospital software
- LED light source
- Acquisition software
- Capture software
- Medical camera
- Biology microscope
- Benchtop spectrometer
- Microscope camera
- Fluorescence microscope