Stabilization of Acute Acromioclavicular Joint Dislocations using Dog Bone Button Technology

Stabilization of Acute Acromioclavicular Joint Dislocations using Dog Bone Button Technology
This document outlines the surgical technique for stabilizing acute acromioclavicular (AC) joint dislocations using Dog Bone Button technology. This method is designed to provide a stronger construct for AC joint repair compared to existing devices.
Specifications
The Dog Bone Button is a precontoured titanium button that allows the use of multiple FiberTapes for AC joint reduction. It is suitable for acute Grade IV-VI AC separations and certain Grade III separations requiring operative treatment.
Surgical Technique
- Position the patient in lateral decubitus or Beach Chair position under general anesthesia.
- Use a 30° arthroscope for visualization and create necessary portals for access.
- Expose the coracoid and drill tunnels using the AC Guide and cannulated Drill.
- Pass FiberTape and TigerTape through the tunnels and secure with Dog Bone Buttons.
- Reduce the AC joint and secure with alternating half-hitches.
Post-operative Protocol
Patients should wear a sling for six weeks, with gradual progression to passive and active range of motion exercises. Return to contact sports is advised after six months.
Required Instruments and Implants
- Dog Bone Button (AR-2270)
- FiberTape Loop (AR-7275)
- TigerTape Loop (AR-7275T)
- AC Joint Reconstruction Master Set (AR-2255MS)
Warnings and Recommendations
This technique is not recommended as the sole method for chronic AC separations, which should include a biological component. Medical professionals should use their judgment and experience in applying this technique.
Conclusion
This document serves as an educational tool for licensed medical professionals, emphasizing the importance of professional judgment and thorough review of medical literature.
Catalog excerpts

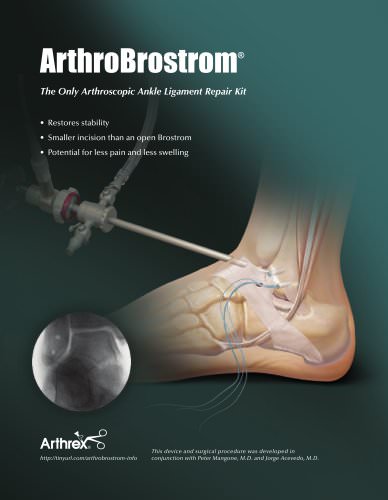
Surgical Technique AC Repair - Dog Bone Button Stabilization of Acute Acromioclavicular Joint Dislocations using Dog Bone Button Technology
Open the catalog to page 1
Stabilization of Acute Acromioclavicular Joint Dislocations using Dog Bone Button Technology The Dog Bone Button is a precontoured, titanium button that allows the use of multiple FiberTapes® for AC joint reduction, providing a construct that is twice as strong as existing AC joint repair devices. Since the buttons are attached to the FiberTapes independently, only suture material is passed through the clavicle and coracoid tunnels, allowing the repair to be completed through smaller tunnels. Tunnel drilling is made easier with new AC Guide arms and a new 2.4 or 3 mm cannulated Drill. The guide...
Open the catalog to page 2
1 Through the low anterior portal, place the appropriate AC Guide* under the coracoid base and drill the clavicle and coracoid tunnels using the 2.4 or 3 mm cannulated Drill. *Use the left guide (AR-2254L) for a left shoulder and use the right guide (AR-2254R) for a right shoulder. 3 Clip the limbs of a FiberTape Loop and a TigerTape® Loop into the slots of a Dog Bone Button so that the tapes form a U-shape. Slide the button to the base of the tapes. The tapes should wrap around the laser line, ensuring that the concavity of the button will sit against the base of the coracoid. 2 Remove the trocar...
Open the catalog to page 3
Surgical Technique 5 Seat the Dog Bone Button at the base of the coracoid. The concavity should seat against the coracoid and the orientation line should be in line with the arch of the coracoid. 6 Cut the splice from each loop and clip a second Dog Bone Button onto the suture limbs exiting the clavicle. The concavity should face the clavicle and the orientation line should be in line with the axis of the clavicle. Post-op Protocol Place the patient in a sling for six weeks, allowing elbow motion and gentle passive external rotation with the elbow by the side. At six weeks, discontinue sling...
Open the catalog to page 4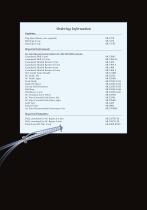
Ordering Information Implants: Dog Bone Button (two required) FiberTape Loop TigerTape Loop Required Instruments: AC Joint Reconstruction Master Set (AR-2255MS) includes: Cannulated Drill, 4 mm Cannulated Drill, 4.5 mm Cannulated Headed Reamer 5 mm Cannulated Headed Reamer 5.5 mm Cannulated Headed Reamer 6 mm Cannulated Headed Reamer 6.5 mm ACL Guide Frame Handle AC Guide, left AC Guide, right Fixed Guide Guide Pin Sleeve Clavicle Drill Positioner Drill Stop Drill Sleeve, 3 mm AC Tenodesis Screw Driver AC Joint Coracoid Graft Passer, left AC Joint Coracoid Graft Passer, right Graft Sizer Forked...
Open the catalog to page 5
This surgical technique has been developed in cooperation with Paul Brady, M.D., Knoxville, TN. www.arthrex.com ...up-to-date technology just a click away This description of technique is provided as an educational tool and clinical aid to assist properly licensed medical professionals in the usage of specific Arthrex products. As part of this professional usage, the medical professional must use their professional judgment in making any final determinations in product usage and technique. In doing so, the medical professional should rely on their own training and experience and should conduct...
Open the catalog to page 6All Arthrex catalogs and technical brochures
 Imaging and Resection Catalog
108 Pages
Archived catalogs
 ACL TightRope® RT - LS0178
2 Pages
 HTO Medial PEEK Implant
6 Pages
 A rthrex Graft Tubes
4 Pages
 Clavicle Plate and Screw System
12 Pages
 For Fracture Treatmen
8 Pages
 Hip Labral Scorpion
1 Page
 Imaging & Resection
80 Pages
 Hand & Wrist
64 Pages
 Foot and Ankle
12 Pages
 Shoulder Repair Technology
114 Pages
 Ankle Arthroscopy
11 Pages
 Arthroscopic Hand Instruments
28 Pages
 Foot & Ankle
138 Pages


- Bone plate
- Compression plate
- Planning software
- Suture thread
- Surgery software
- Ortho suture anchor
- Non-absorbable suture thread
- Ortho non-absorbable suture anchor
- Foot compression plate
- Orthopedic surgery suture thread
- Rotator cuff suture anchor
- Suture button
- Small joint suture anchor
- ACL reconstruction suture button
- Knotless suture anchor
- Calcaneus compression plate
- Shoulder prosthesis
- Preoperative planning software
- Suture needle
- Biceps tendon suture anchor