 Website:
Cubic Sensor and Instrument Co.,Ltd.
Group: Cubic Sensor and Instrument Co.,Ltd.
Catalog excerpts
SPECIFICATION Product Name: Handheld Ultrasonic Pulmonary Function Spirometer
Open the catalog to page 1
Content First Edition
Open the catalog to page 2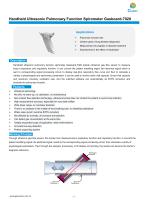
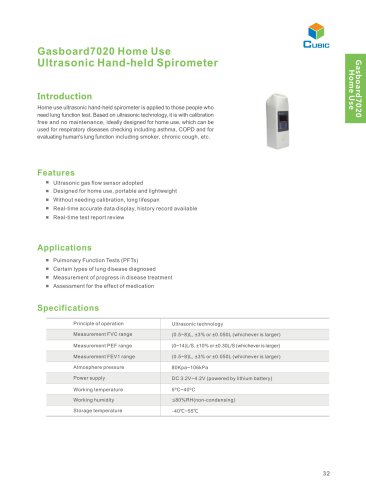
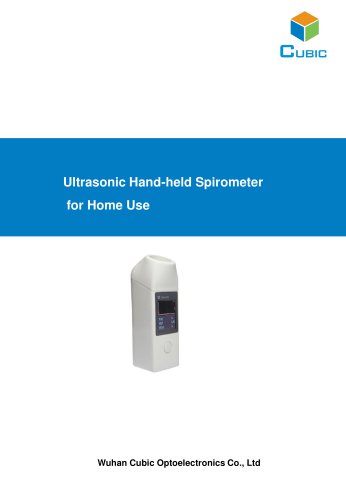
Handheld Ultrasonic Pulmonary Function Spirometer Gasboard-7020 Pulmonary function test Certain types of lung disease diagnosed Measurement of progress in disease treatment Assessment for the effect of medication Description Handheld ultrasonic pulmonary function spirometer Gasboard-7020 adopts ultrasonic gas flow sensor to measure body’s respiratory and inspiratory function. It can convert the patient breathing signal into electrical signal which is sent to corresponding signal processing circuit, to display real-time respiratory flow curve and then to calculate a variety of physiological...
Open the catalog to page 3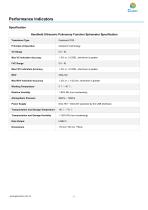
Performance Indicators Specification Handheld Ultrasonic Pulmonary Function Spirometer Specification Transducer Type Ultrasonic Technology Working Temperature Relative Humidity Atmospheric Pressure Power Supply Transportation and Storage Temperature Transportation and Storage Humidity Data Output
Open the catalog to page 4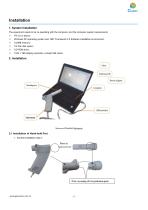
Installation 1. System Installation The equipment needs to be co-operating with the computer, and the computer system requirements: Windows XP operating system and. NET Framework 3.5 Software installation environment; 1G free disk space; CD-ROM drive; 1024 × 768 display resolution, at least 256 colors. 2.1 Installation of Hand-held Part 1.Snorkel installation step 1:
Open the catalog to page 5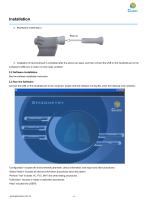
Installation 2.Mouthpiece install step 2 3.Installation of hand-held part is completed after the above two steps, and then connect the USB on the handheld part to the computer's USB port, to make it in test ready condition. 2.2 Software Installation See the software installation instruction 2.3 Run the Software Connect the USB on the handheld part to the computer, double click the software running file, enter the following main interface. "Configuration" includes the environmental parameter, device information, test report and other procedures. "Select Patient" includes all relevant...
Open the catalog to page 6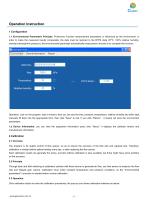
Operation Instruction 1 Configuration 1.1 Environmental Parameters Principle: Pulmonary Function measurement parameters is influenced by the environment, in order to make the measured results comparable, the data must be restored to the BTPS state (37℃, 100% relative humidity, standard atmospheric pressure), the environmental parameter automatically measurement module is to complete this function. Operation: Just run the program, wait a moment, then you can see the time, pressure, temperature, relative humidity and other data, manually fill them into the appropriate form, then click "Save"...
Open the catalog to page 7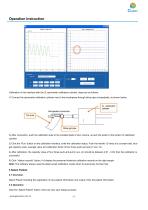
Operation Instruction Calibration in this interface with the 3L spirometer calibration cylinder, steps are as follows: 1) Connect the spirometer calibration cylinder vent to the mouthpiece through silica pipe unimpededly, as shown below: 2) After connection, push the calibration tube to the smallest state of zero volume, ie push the piston to the bottom of calibration cylinder. 3) Click the “Run” button on the calibration interface, enter the calibration status. Push the handle 12 times at a constant rate, thus get capacity value, average value and calibration factor of four times...
Open the catalog to page 8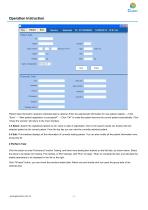
Operation Instruction Patient data information required; extended data is optional. Enter the appropriate information for new patient register → Click “Save” → "New patient registration is successful!" → Click “OK” to make the patient become the current patient automatically. Click “Close the window” will return to the main interface. 3.3 Select: Search the registered patients by ID, name or date of registration, then in the search results list, double-click the selected patient as the current patient. From the top tips you can view the currently selected patient. 3.4 Edit: This interface...
Open the catalog to page 9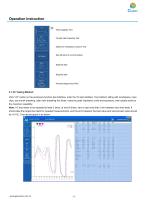
Operation Instruction 4.1.VC Testing Method: Click “VC” button on the pulmonary function test interface, enter the VC test interface. Test method: sitting with mouthpiece, nose clips, and mouth breathing, after calm breathing five times, make the peak inspiration at the end-expiratory, then exhale slowly to the maximum capability. Note: VC test needs to be repeated at least 3 times, at most 8 times, have a rest more than 1min between each time tests. It should take the largest two tests for repeated measurements, and the error between the best value and second-best value should be <0.15L....
Open the catalog to page 10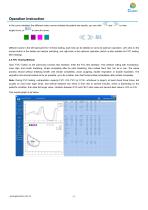
Operation Instruction In the curve interface, the different colors curves indicate the patient test results, you can click single curve, or Different colors in the left represent the 1-8 times testing, each test can be deleted or set to be optimum operation. Left -click on the mouse button is the delete and restore switching, and right-click is the optimum operation (which is also suitable for FVC testing, MVV testing). 4.2 FVC Testing Method: Click “FVC” button on the pulmonary function test interface, enter the FVC test interface. Test method: sitting with mouthpiece, nose clips, and...
Open the catalog to page 11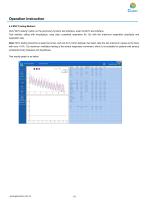
Operation Instruction 4.3 MVV Testing Method: Click “MVV testing” button on the pulmonary function test interface, enter the MVV test interface. Test method: sitting with mouthpiece, nose clips, sustained respiration for 12s with the maximum respiration amplitude and respiration rate. Note: MVV testing should be at least two times, and rest for 5-10min between two tests, take the two maximum values as the best, with error <10%. 12s maximum ventilation testing is the severe respiratory movement, which is not suitable for patients with serious cardiopulmonary diseases and hypothesis. Test...
Open the catalog to page 12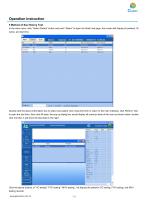
Operation Instruction 5 Method of See History Test In the main menu, click “Select Patient” button and push “Select” to open the Select tab page ,the screen will display all patients’ ID, name, and test time. Double-click the above information box to select one patient, then close this form to return to the main interface, click Perform Test to open the test form, then click All tests, the pop-up dialog box would display all previous tests of the user as shown below, doubleclick one test ,it will show the test data on the right . Click the above buttons of “VC testing” “FVC testing” “MVV...
Open the catalog to page 13All Cubic Sensor and Instrument Co. catalogs and technical brochures
-
About Cubic
1 Pages
-
Mainstream NDIR ETCO2 Sensor
3 Pages
Archived catalogs
-
Fast Response CO2 Sensor
1 Pages


