
- Catalogs
- Depuy Synthes
- Cementing Total Knee Replacements


Cementing Total Knee Replacements

Cementing Total Knee Replacements
The effectiveness of Total Knee Replacement (TKR) is heavily dependent on the cementing technique used. Cement creates a mechanical bond with the bone by penetrating its pores, forming a micro-interlock. Failures often occur at the cement-bone or cement-implant interfaces due to inadequate penetration or weak interfacial strength.
Definitions
- Dough time: The period when cement viscosity increases, becoming less runny and tacky.
- Working time: The optimal period for implanting cement, influenced by ambient temperature.
- Final pressurization: Securing the implant within the bone cement by extending the knee until the cement cures.
General Cementation Principles
Cement Viscosity
Bone cements reach a dough state after mixing. Medium Viscosity (MV) cements take longer to reach this state compared to High Viscosity (HV) cements. HV cements should be used immediately after mixing to optimize working time. Cement should be applied to the implant surface early in the dough state to enhance fixation strength.
Preparing Cement
All powder and liquid components must be thoroughly mixed. Cement should be applied while tacky to aid adherence. Mixing under vacuum reduces air voids and exposure to fumes but can affect setting time.
Working with Cement
Cement is incompatible with water; blood and other aqueous liquids can reduce bonding strength. Clean gloves and dry implant surfaces are recommended. Haemostatic agents may reduce blood laminations.
Cementation in TKR Surgery
The cement mantle in TKR is subject to various forces. Ideal cement penetration depth is 3-4 mm. Tibial preparation and cementation technique are crucial for optimal fixation. Temperature affects cement behavior; higher temperatures reduce working time.
Bone Surface Preparation
Washing bone surfaces removes debris and exposes porous bone, aiding cement penetration. Drying methods include absorbent pads, suction, or carbon dioxide jets. Drilling keyholes in dense bone can enhance cement interdigitation.
Cement Application Techniques
Cement can be syringed under pressure to improve penetration and seal. Applying cement to both bone and implant surfaces early in the dough state ensures good adhesion.
Implantation
Cement should flow around the implant periphery to seal against debris ingress. Excess cement must be removed to prevent implant scratching and wear debris.
Tibial, Femoral, and Patella Cementation
Tibial components are typically cemented first. MV cement can be applied before reaching the dough state, while HV cement is applied after. Femoral cementation involves applying a thick cement layer to the implant or bone. Patella cementation requires pressing cement into bone surfaces and peg holes.
Final Pressurization and Cleaning
Extending the leg pressurizes the cement. Unequal force distribution can lead to radiolucent lines and early failure. Excess cement should be carefully removed.
Summary and Conclusion
Best practices include drilling keyholes in dense bone, thoroughly washing bone surfaces, and keeping all surfaces clean and dry.
1. Mix cement under vacuum and use within its working time. Avoid preheating powder or liquid, especially with HV type cements.
2. For simultaneous cementation during TKA, designs with 'No Clearance' tibial preparation are recommended. Avoid stress and movement during cement curing to prevent lipid infiltration and degradation of fixation strength.
3. Pressurize cement by compression, using a thick layer and impaction. Ensure cement is well pressurized into the bone around the implant periphery.
4. Remove extruded cement around the implant and ensure it is sealed by cement around its edges.
5. Hold cemented components under compression until fully set, ensuring tibio-femoral compressive forces are perpendicular to the tibial axis to avoid tilting.
Product Information:
Various DePuy CMW and SMARTSET bone cements are listed with their respective catalog numbers and descriptions, including options with Gentamicin.
References:
The document cites numerous studies and articles related to cementing techniques and their effects on knee replacement outcomes.
Warranty and Legal Disclaimer:
DePuy Synthes products come with a limited warranty against defects. Federal law restricts these devices to sale by or on the order of a physician. Not all products may be available in all markets.
Catalog excerpts

Guidance for Cementing Total Knee Replacements
Open the catalog to page 1
Cementing Total Knee Replacements 1.0 Introduction The survivorship of Total Knee Replacement (TKR) is dependent on, among other factors, the cementing technique used.1 Early attempts to use acrylic cement in orthopaedic surgery may have failed due to a misunderstanding around how the cement functions.2 Cement achieves a mechanical bond to the bone by penetrating into the pores of the cancellous bone where it hardens, forming a micro-interlock; modern cementing techniques aim to improve this micro-interlock. There are different cement considerations for TKR and Total Hip Replacement (THR). However,...
Open the catalog to page 2
The behavior of cement is strongly temperature sensitive; increasing the cement's temperature will speed up the curing of the cement, however it will result in an earlier dough-time and significantly reduced available working time. NOTE: The user should refer to the specific instructions for use (package insert) for the timing and usage chart before preparing the cement. NOTE: Pre-warming powder or liquid beyond the temperature range stated in the instructions for use (package insert) is not recommended as it increases the risk of the cement being used too late in its working time phase. NOTE:...
Open the catalog to page 3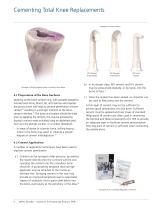
Cementing Total Knee Replacements Examples of knee nozzles 65˚ Flanged Knee Nozzle Example of drilling keying holes in sclerotic tibial bone 4.1 Preparation of the Bone Surfaces Washing all the bone surfaces (e.g. with pulsatile lavage) to remove loose bone, blood, fat, and marrow also exposes the porous bone and helps to achieve penetration of bone cement13 resulting in a stronger interlock at the bonecement interface.14 The bone and implant should be dried prior to applying the cement; this may be achieved by drying in various ways including using an absorbent pad, such as a dry sponge, suction,...
Open the catalog to page 4
Cementing Total Knee Replacements 4.3 Implantation NOTE: The surgeon should follow the implant system’s surgical technique guidelines for applying cement to the knee components. During implantation, cement must flow from around the periphery of the implant to generate an adequate seal between the implant and bone; this is important in preventing later ingress of osteolytic particles and debris. However, it is extremely important to remove excess cement from around the implant. By using the cement according to the instructions for use (working time for a given ambient temperature) and by watching...
Open the catalog to page 5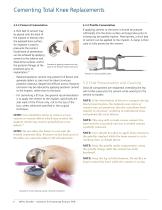
Cementing Total Knee Replacements 4.3.2 Femoral Cementation A thick bed of cement may be placed onto the back of the implant or directly onto the exposed bone surface. An impactor is used to pressurize the cement. Good levels of penetration can be achieved by applying cement to the anterior and distal bone surfaces, and to the posterior flanges of the prosthesis prior to implantation.21 If applying cement to the bone it should be pressed sufficiently into the bone surface and peg holes prior to introducing the patella implant. Alternatively, a thick bed of cement can be applied to the implant....
Open the catalog to page 6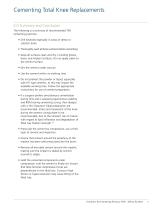
6.0 Summary and Conclusion The following is a summary of recommended TKR cementing practices: • Drill keyholes especially in areas of dense or sclerotic bone. • Thoroughly wash all bone surfaces before cementing. • Keep all surfaces clean and dry, including gloves, bone, and implant surfaces. Do not apply saline to the cement surface. • Mix the cement under vacuum. • Use the cement within its working time. • Do not preheat the powder or liquid, especially with HV type cements, as this may impact the available working time. Follow the appropriate instructions for use on cement preparation. • If...
Open the catalog to page 7
Cementing Total Knee Replacements 7.0 Ordering Information SMARTSET® MV Bone Cement SMARTSET® HV Bone Cement DePuy CMW 1 Gentamicin Bone Cement SMARTSET® MV Endurance Bone Cement SMARTSET® GMV Bone Cement Cat. No. DePuy CMW 2 Gentamicin Bone Cement Cat. No. SMARTSET® GHV Bone Cement Cat. No. 8 DePuy Synthes Guidance for Cementing Primary TKR
Open the catalog to page 8
Cementing Total Knee Replacements 8.0 References 1. Philips, A. M., Tomlinson, E., Goddard, N. J. (1996). Current technologies in total knee replacement: Results of a national survey. Annals of The Royal College of Surgeons of England, 78, 515-520. 13. Majokowski, R. S., Miles, A. W., Bannister, O. C., Perkins, J., Taylor, G. J. S. (1993). Bone surface preparation in cemented joint replacement. The Journal of Bone and Joint Surgery, 75 (3): 459-463. Charnley, J. (1972). Acrylic cement in orthopaedics surgery. Churchill Livingstone, 95. Guha, A. R., Debnath, U. K, Graham, N. M. (2008). Radiolucent...
Open the catalog to page 9
Cementing Primary Total Knee Replacements 11 DePuy Synthes Guidance for Cementing Primar
Open the catalog to page 10
Cementing Primary Total Knee Replacements Guidance for Cementing Primary TKR DePuy Synthes
Open the catalog to page 11
Limited Warranty and Disclaimer: DePuy Synthes products are sold with a limited warranty to the original purchaser against defects in workmanship and materials. Any other express or implied warranties, including warranties of merchantability or fitness, are hereby disclaimed. Please also refer to the package insert(s) or other labeling associated with the devices identified in this surgical technique for additional information. CAUTION: Federal Law restricts these devices to sale by or on the order of a physician. Some devices listed in this surgical technique may not have been licensed in accordance...
Open the catalog to page 12All Depuy Synthes catalogs and technical brochures
 Titanium Sternal Fixation System
34 Pages
 Small Battery Drive II
4 Pages
 Introducing The Variable Angle
12 Pages


Archived catalogs
 MatrixRIB®FixationSystem
86 Pages
 HEALIX ADVANCE
4 Pages
 HEALIX Anchor™ 3.4 mm
2 Pages
 3.5 mm LCP™ Medial
15 Pages
 RADIUS OF CURVATURE
3 Pages
 Building on Success
16 Pages
 2.0 mm LCP® Distal Ulna Plate
20 Pages
 2.4 mm VA LCP™
4 Pages
 Mandible Trauma Solutions
2 Pages
 Power line II
4 Pages
 Concorde
28 Pages
 LCP Intercarpal
31 Pages
 LCS® COMPLETE™
2 Pages
 Synthes TPLO.
8 Pages
 SynFix-LR System
56 Pages
 ATB Anterior Tension Band Plate
32 Pages
 CONDUIT™
15 Pages
 Brochure_FINAL
2 Pages
 DePuy Synthes
81 Pages
 Anspach
3 Pages
 Orthopedic Foot Instruments
32 Pages
 PINNACLE® Hip Solutions
12 Pages
 Corail
24 Pages
 S-ROM® NOILES™
68 Pages
 TRI-LOCK® Product Rationale
12 Pages
 Reclaim Surgical Technique
44 Pages
 Speed
Speed2 Pages
 attune
80 Pages
 HAMMERLOCK® 2
2 Pages
 DePuy Glenoid Solutions
2 Pages
 Trauma Solutions. Elbow
4 Pages
 Polar
Polar4 Pages
 Alveolar Distractor.
4 Pages
 Piezoelectric System
4 Pages
 Air Power Line II
6 Pages
 LCP Clavicle Hook Plate
4 Pages
 TruMatch Pin Guides
16 Pages
 P F N A
8 Pages
 SKILL, DEDICATION,
16 Pages
 Orthopaedics. Overview
20 Pages
 DURALOC
16 Pages
 Marathon Cemented Cup
20 Pages
 REEF Surgical Technique
16 Pages
 MatrixNEURO
8 Pages
 Anspach XMax
4 Pages
 Anspach eMax 2 Plus
4 Pages
 Small Electric Drive
4 Pages
 Air Pen Drive
4 Pages
 Colibri II
4 Pages
 Spine
Spine25 Pages
 Expert Hindfoot Arthrodesis Nail
48 Pages
 LCP Distal Fibula Plates
32 Pages
 TomoFix
60 Pages
 Expert Tibial Nail PROtect
16 Pages
 Expert Tibia Nail
84 Pages
 Sacral Bars
16 Pages
 Pelvic C-Clamp
20 Pages
 Low Profile Pelvic System
16 Pages
 Proximal Femoral (Hook) Plate
24 Pages
 LCP
LCP24 Pages
 PFNA
PFNA112 Pages
 HCS 1.5, 2.4, 3.0
36 Pages
 LCP Wrist Fusion
32 Pages
 LCP Compact Hand
28 Pages
 VA-LCP Elbow
48 Pages
 Distal Radius
44 Pages
 Olecranon
30 Pages
 LCP Hook Plate
28 Pages
 DHP & Olecranon
4 Pages
 LCP S-A
4 Pages
 Epoca
Epoca4 Pages
 Philos
32 Pages
 MultiLoc
68 Pages


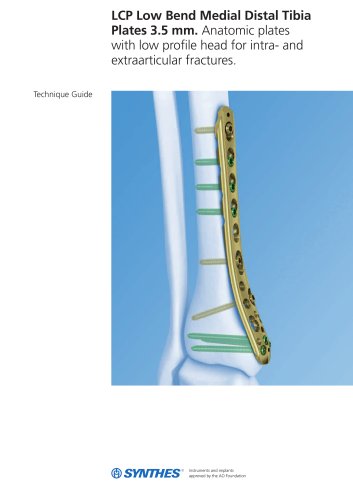


- DePuy Synthes bone plate
- Compression plate
- Metallic compression plate
- Locking compression plate
- Titanium compression plate
- Orthopedic surgery instrument kit
- Distal compression plate
- Interbody fusion cage
- Sterilization container
- Instrument sterilization container
- Arthrodesis nail
- Bone substitute
- Metallic intramedullary nail
- Femoral stem
- Anterior interbody fusion cage
- Arthrodesis plate
- Orthopedic surgery bone substitute
- Femoral intramedullary nail
- Knee prosthesis
- Metallic arthrodesis plate