- Catalogs
- Depuy Synthes
- Expert Hindfoot Arthrodesis Nail
Expert Hindfoot Arthrodesis Nail

Expert Hindfoot Arthrodesis Nail
The Expert Hindfoot Arthrodesis Nail (HAN) system is designed for the fixation and fusion of the ankle and subtalar joints. It includes components such as cannulated nails, spiral blades, end caps, and locking screws, all made from titanium alloy. The system is intended for use by experienced surgeons.
- Preoperative Planning: Use templates to estimate nail diameter and length based on x-rays and position the patient appropriately.
- Opening the Hindfoot: Perform a fibula osteotomy, prepare articular surfaces, determine the entry point with a guide wire, and open the canal with a drill.
- Reaming: Insert a reaming rod and ream the canal to a diameter 1 mm larger than the nail.
- Inserting the Nail: Assemble insertion instruments and insert the nail, ensuring proper alignment and reduction.
- Implants: Includes spiral blades and locking screws for stability and ease of insertion.
- Instruments: A range of instruments is provided, including drill bits and reaming rods.
- Vario Case and Power Tools: Available to facilitate the surgical process.
The system adheres to AO principles, focusing on anatomic reduction, stable fixation, preservation of blood supply, and early mobilization.
The Expert HAN is indicated for severe foot/ankle deformity, arthritis, instability, avascular necrosis, failed joint replacements, and more.
Offers distal and talar locking options with screw orientation for improved stability. End caps and spiral blades optimize load distribution and facilitate nail extraction.
The Expert Hindfoot Arthrodesis Nail system provides a comprehensive solution for hindfoot fusion, emphasizing stability, ease of use, and adherence to surgical principles.
- Available in right and left designs, made from Titanium-6% aluminum-7% niobium alloy.
- Features a 12° lateral bend and is cannulated for use over Synthes 2.5 mm/3.0 mm ball-tipped reaming rods.
- Diameters: 10 mm, 12 mm, and 13 mm; distal diameters: 12.5 mm and 13 mm.
- Lengths: 150 mm, 180 mm, and 240 mm, with specific cross-sectional designs.
- Locking options include proximal and distal locking with various screw sizes and configurations.
- Extraction of the spiral blade involves threading an extraction screw into the hub, followed by the hammer guide, and using controlled blows to remove the blade.
- Removal of the nail requires detaching locking screws and using a combined hammer for extraction.
- Key instruments include the Combined Hammer, Pin Wrench, Hammer Guide, Extraction Screw, and various drill bits and sleeves.
- Specific tools are provided for targeting, insertion, and securing the nail and screws.
- Includes Hindfoot Arthrodesis Nails, available in sterile and non-sterile options, with specific article numbers for each size and configuration.
- Locking screws are available in 5.0 mm and 6.0 mm diameters, with various lengths and sterile options.
- Spiral blades and end caps are detailed for secure locking and protection against tissue ingrowth.
- Includes the Power Drive system with batteries and attachments for various surgical applications.
Catalog excerpts

Expert HAN. Expert Hindfoot Arthrodesis Nail. Technique Guide Expert Nailing System
Open the catalog to page 1
Image intensifier control Warning This description alone does not provide sufficient background for direct use of the instrument set. Instruction by a surgeon experienced in handling these instruments is highly recommended.
Open the catalog to page 2
ntroduction Expert Hindfoot Arthrodesis Nail 2 Surgical Technique Preoperative Planning 6 Standard Distal Locking 1 5 Spiral Blade Insertion 19 Implant Removal (optional) 28 Product Information Implant Specifications 30 Expert HAN Technique Guide Synthes 1
Open the catalog to page 3
Expert HAN. Expert Hindfoot Arthrodesis Nail. Advanced solutions Distal and Talar Locking Options Screw orientation options: – Calcaneus into the cuboid – Talus into the navicular Spiral Blade – Increased surface area optimizes load distribution in the calcaneus – Lengths: 45 mm – 100 mm (5 mm increments) – Cannulated for insertion over a 3.2 mm guide wire – 12.5 mm blade diameter – Front cutting end – Implants common with the Expert Retrograde/Antegrade Femoral Nail System – Titanium alloy * Improved stability End Caps – Securely lock spiral blade or the most distal locking screw – Prevent ingrowth...
Open the catalog to page 4
Nail Design – The lateral bend allows an entry site in the center of the lateral column of the calcaneus – Permits proper hindfoot alignment and restores 3°–5° valgus positioning for a better gait – Cannulated for use over all Synthes 2.5 mm or 3.0 mm ball-tipped reaming rods. Reaming rods may be removed through the nail and the insertion handle assembly (no exchange tube required) – Titanium alloy* The nail design and aiming arm enable targeted medial-to-lateral or lateral-to-medial proximal locking. Standard Locking Screws – Double-lead threads for ease of insertion – Thread closer to screw...
Open the catalog to page 5
AO Principles In 1958, the AO formulated four basic principles, which have become the guidelines for internal fixation in general 1, and intramedullary nailing in particular. The Expert Hindfoot Arthrodesis Nail enables an intramedullary approach for the fixation and the fusion of the ankle and of the subtalar joints. The system consists of a series of cannulated nails, cannulated spiral blades, cannulated end caps and locking screws. All the implants are made of titanium alloy. Anatomic reduction Fracture reduction and fixation to restore anatomical relationships. The Expert Hindfoot Arthrodesis...
Open the catalog to page 6
Indications The Expert Hindfoot Arthodesis Nail is indicated to facilitate tibiotalocalcaneal arthrodesis to treat – Severe foot/ankle deformity – Arthritis – Instability and skeletal defects after tumor resection; these include, but are not limited to neuro-osteoarthropathy (Charcot’s foot) – Avascular necrosis of the talus – Failed joint replacement or failed ankle fusion – Distal tibial fracture nonunions – Osteoarthritis – Rheumatoid arthritis and pseudoarthrosis Expert HAN Technique Guide Synthes 5
Open the catalog to page 7
Preoperative Planning *Spiral Blades for Expert Retrograde Femoral Nails 04.013.041 – 04.013.052 To estimate nail length, place the template on the AP x-ray of the hindfoot and select the appropriate nail length based on patient anatomy. When selecting nail size, consider canal diameter, indication, patient anatomy and postoperative protocol. 45 60 80 10 20 30 40 30 60 80 100 mm 100 mm *For Distal PA Locking: *6.0 mm Locking Screws (Stardrive T25) 04.005.640 – 04.005.685 *6.0 mm Locking Screws (Stardrive T25) 04.005.690S – 04.005.695S 1.00 Magnification 0 For Expert Hindfoot Arthrodesis Nails,...
Open the catalog to page 8
3 Determine nail length and diameter Instrument 03.008.001 Radiographic Ruler Measure length Position the C-arm for a lateral view of the distal tibia and subtalar joint. With long forceps, hold the radiographic ruler parallel to the tibia. Adjust the ruler until the distal end is at the desired nail insertion depth. Mark the skin at that site on the lateral side. Move the image intensifier proximally with the ruler positioned on the distal skin mark. An image of the ruler can be used to choose the optimum nail length. Measure diameter Position the C-arm for a lateral view of the tibia with the...
Open the catalog to page 9
Opening the Hindfoot 1 Perform fibula osteotomy Create an incision laterally over the fibula. Dissection to the bone is directed anteriorly. Using a sagittal saw, create an osteotomy 10 cm from the distal tip of fibula. Resect approximately 1 cm of bone proximal to the first cut, creating a gap. This bone segment can be utilized as bone graft. Incise the anterior soft tissue including anterior tibiofibular, calcaneofibular and talofibular ligaments. Take care to preserve the posterior soft tissue. By maintaining a blood supply to this bone, it can be used later as a live biological plate on the...
Open the catalog to page 10
Determine entry point 03.010.115 Guide Wire 0 3.2 mm, length 290 mm The entry site is in line with the tibial canal and the lateral O Using a C-arm, identify the center of the tibial canal by placing a 3.2 mm guide wire along the canal. Draw a line. Palpate the center of the lateral column of the calcaneus. The entry point is located at the intersection of these two ines; the incision should be in line with the longitudinal axis Insert guide wire through calcaneus and talus 357.128 Drill Sleeve 13.0/3.2, with trocar tip Thread the drill sleeve into the protection sleeve. Insert this assembly...
Open the catalog to page 11
03.008.008 Drill Bit 0 5.0 mm, calibrated, length Remove the drill sleeve from the protection sleeve. Place the 13.0 mm cannulated drill bit over the guide wire and through the protection sleeve to the bone. Drill through Remove the 3.2 mm guide wire. 10 Synthes Expert HAN Technique Guide
Open the catalog to page 12
Invert the hindfoot and insert the 5.0 mm drill bit through the canal created in the calcaneus and talus. Under image intensifier control, center the drill point under the tibial canal in both the AP and lateral planes. Use the drill to create a defect in the subchondral bone to allow passage of the reaming rod. Expert HAN Technique Guide Synthes 11
Open the catalog to page 13All Depuy Synthes catalogs and technical brochures
 Titanium Sternal Fixation System
34 Pages
 Small Battery Drive II
4 Pages
 Introducing The Variable Angle
12 Pages

Archived catalogs
 MatrixRIB®FixationSystem
86 Pages
 HEALIX ADVANCE
4 Pages
 HEALIX Anchor™ 3.4 mm
2 Pages
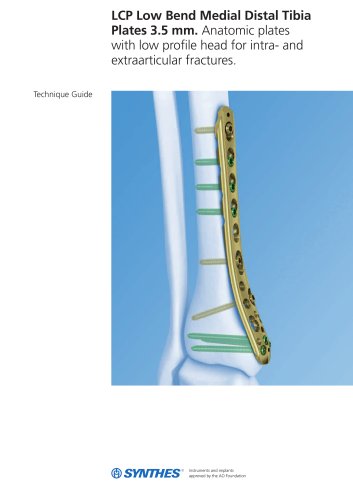
 3.5 mm LCP™ Medial
15 Pages
 RADIUS OF CURVATURE
3 Pages
 Building on Success
16 Pages
 2.0 mm LCP® Distal Ulna Plate
20 Pages
 2.4 mm VA LCP™
4 Pages
 Mandible Trauma Solutions
2 Pages
 Power line II
4 Pages
 Concorde
28 Pages
 LCP Intercarpal
31 Pages
 LCS® COMPLETE™
2 Pages
 Synthes TPLO.
8 Pages
 SynFix-LR System
56 Pages
 ATB Anterior Tension Band Plate
32 Pages
 CONDUIT™
15 Pages
 Brochure_FINAL
2 Pages
 DePuy Synthes
81 Pages
 Anspach
3 Pages
 Orthopedic Foot Instruments
32 Pages
 PINNACLE® Hip Solutions
12 Pages
 Corail
24 Pages
 S-ROM® NOILES™
68 Pages
 TRI-LOCK® Product Rationale
12 Pages
 Reclaim Surgical Technique
44 Pages
 Speed
Speed2 Pages
 attune
80 Pages
 HAMMERLOCK® 2
2 Pages
 DePuy Glenoid Solutions
2 Pages
 Trauma Solutions. Elbow
4 Pages
 Polar
Polar4 Pages
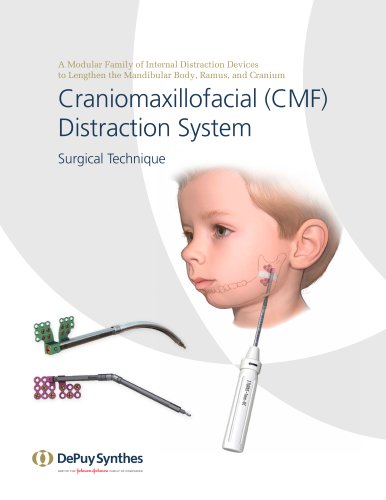
 Alveolar Distractor.
4 Pages
 Piezoelectric System
4 Pages
 Air Power Line II
6 Pages
 LCP Clavicle Hook Plate
4 Pages
 TruMatch Pin Guides
16 Pages
 P F N A
8 Pages
 SKILL, DEDICATION,
16 Pages
 Orthopaedics. Overview
20 Pages
 DURALOC
16 Pages
 Marathon Cemented Cup
20 Pages
 REEF Surgical Technique
16 Pages
 MatrixNEURO
8 Pages
 Anspach XMax
4 Pages
 Anspach eMax 2 Plus
4 Pages
 Small Electric Drive
4 Pages
 Air Pen Drive
4 Pages
 Colibri II
4 Pages
 Spine
Spine25 Pages
 LCP Distal Fibula Plates
32 Pages
 TomoFix
60 Pages
 Expert Tibial Nail PROtect
16 Pages
 Expert Tibia Nail
84 Pages
 Sacral Bars
16 Pages
 Pelvic C-Clamp
20 Pages
 Low Profile Pelvic System
16 Pages
 Proximal Femoral (Hook) Plate
24 Pages
 LCP
LCP24 Pages
 PFNA
PFNA112 Pages
 HCS 1.5, 2.4, 3.0
36 Pages
 LCP Wrist Fusion
32 Pages
 LCP Compact Hand
28 Pages
 VA-LCP Elbow
48 Pages
 Distal Radius
44 Pages
 Olecranon
30 Pages
 LCP Hook Plate
28 Pages
 DHP & Olecranon
4 Pages
 LCP S-A
4 Pages
 Epoca
Epoca4 Pages
 Philos
32 Pages
 MultiLoc
68 Pages


- DePuy Synthes bone plate
- Compression plate
- Metallic compression plate
- Locking compression plate
- Titanium compression plate
- Distal compression plate
- Orthopedic surgery instrument kit
- Interbody fusion cage
- Sterilization container
- Instrument sterilization container
- Arthrodesis nail
- Bone substitute
- Metallic intramedullary nail
- Femoral stem
- Anterior interbody fusion cage
- Arthrodesis plate
- Orthopedic surgery bone substitute
- Femoral intramedullary nail
- Metallic arthrodesis plate
- Knee prosthesis