Custom Direct Printed Bands: Bonding & Debonding
1 /1Page

Custom Direct Printed Bands: Bonding & Debonding
1 /1Page
Catalog excerpts
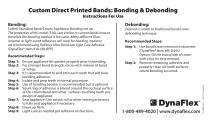
Custom Direct Printed Bands: Bonding & Debonding Instructions For Use Follow Standard Band/Crown Appliance Bonding set up. The properties of this metal (316L) are similar to current bands/crowns therefore the bonding method is the same. Many different Glass ionomer or light-cured adhesives will work for bonding, however, we recommend using Reliance Ultra Band-Lok Light Cure Adhesive (DynaFlex® Item #18-UBLBPP). Recommended Steps: Step 1: nsure appliance fits patient properly prior to bonding. E Step 2: or stronger bond strength; micro-etch interior of band F or wings. Step 3: t is recommended to acid etch each tooth that will have I bonding adhesive. Step 4: Isolate and prep teeth in normal procedure. Step 5: se of bonding booster is recommended but is optional. U Step 6: Small ring of adhesive is placed around the occlusal surface of the crown/band and other surfaces touching teeth per design of appliance. Step 7: Seat appliance. Use cotton roll or other seating accessory to fully seat appliance if necessary. Step 8: Clean up flash. Step 9: Light cure as needed per adhesive instructions. Debond is similar to traditional band/crown debonding technique. Recommended Steps: Step 1: Use band/crown removal instrument (DynaFlex® Item #M-D444). Option: Slit the buccal side of crown with a bur for easy removal. Step 2: Remove remaining adhesive and properly clean all tooth surfaces where bonding occurred.
Open the catalog to page 1All DynaFlex catalogs and technical brochures
 Glacier®
9 Pages
 Atlas_Mini
1 Page
 2018-DynaFlexProductsCatalog
204 Pages
 LABORATORY CATALOG
44 Pages
 SLEEP APNEA DEVICES CATALOG
6 Pages

- Dental material
- Dental surgery instrument kit
- Dental burr
- Retractor
- Biocompatible dental material
- Dental scaler
- Wax dental material
- Metal burr
- Orthodontic material
- Orthodontic bracket
- Face-cover shield
- Dental spatula
- Stainless steel retractor
- Dental mirror
- Carbide burr
- Orthodontic wire
- Dental impression tray
- Dental retractor
- Oral retractor
- Partial denture dental impression tray