- Catalogs
- Episurf Medical
- EPISEALER® KNEE

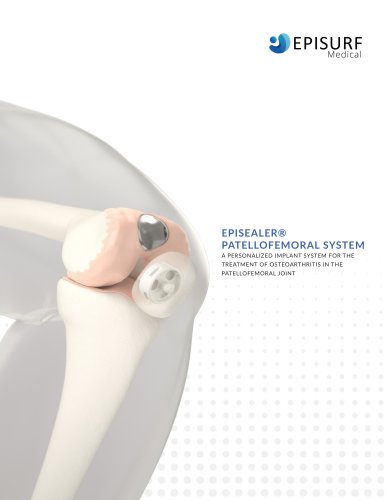
EPISEALER® KNEE
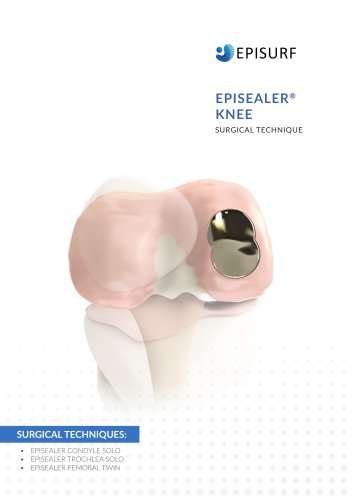
EPISEALER® KNEE
The report uses MR images to create a 3D model of the knee, visualizing cartilage and bone damage, previous surgeries, and osteoarthritic signs. This aids in assessing the suitability for an Episealer Knee implant and optimizing its position and size.
The Episealer Knee is a custom implant designed to fit a patient's knee damage. It includes a hat for the subchondral bone and a peg for stability, available in three models: Condyle Solo, Trochlea Solo, and Femoral Twin. Made from cobalt-chrome alloy with a titanium and hydroxyapatite coating, it ensures biological fixation.
- Placing the Epiguide Knee: Expose the operative field and secure the Epiguide Knee with pins.
- Assembling the Drilling Socket Knee: Position correctly for the first drill step.
- Drilling Procedure: Conduct in three steps, ensuring proper alignment and depth.
- Evaluating and Adjusting Drill Depth: Use the Epidummy Knee for depth assessment and adjustment.
- Placing the Episealer Knee: Align and place the implant into the drilled hole.
- Placing the Epiguide Knee: Expose the field, position using markings, and secure with pins.
- Drilling Procedure: Assemble and position the Drilling Socket Knee, drill with moderate speed, and use lavage.
- Adjusting Drill Depth: Fine-tune depth with the Adjustment Socket Knee.
- Final Placement: Align and tap the Episealer Knee into place.
- Placing and Securing the Epiguide Knee: Secure with pins.
- Drilling Procedure: Drill both holes to the same depth, rotate insert for the second hole.
- Adjusting Drill Depth: Ensure correct alignment and seating.
- Secure all components to avoid improper positioning.
- Incorrect drilling can affect implant performance and damage tissues.
- Make incremental adjustments to avoid excessive drilling.
Focuses on correct placement, debris removal, and drill depth adjustment. Key steps include cleaning the Epidrill Knee and marking the Episealer Knee direction.
Pause to clean the Epidrill Knee if residue is detected, ensuring it reaches the hole's bottom.
Perform adjustment drilling for the second hole, ensuring correct positioning to avoid errors.
Use the Epidummy Knee to assess depth, adjusting in 0.2 mm increments.
Mark the direction with a sterile pen, place, and tap the Episealer Knee into position.
Emphasizes correct handling to prevent damage affecting joint surfaces.
Catalog excerpts
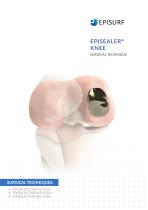
EPISEALER®KNEE SURGICAL TECHNIQUE SURGICAL TECHNIQUES: • EPISEALER CONDYLE SOLO • EPISEALER TROCHLEA SOLO • EPISEALER FEMORAL TWIN
Open the catalog to page 1
TABLE OF CONTENTS DAMAGE MARKING REPORT. . . . . . . . . . . . . . . . . . . . . . . . . . . . . . . . 3 PRODUCT OVERVIEW . . . . . . . . . . . . . . . . . . . . . . . . . . . . . . . . . . . 4-6 CONDYLE SOLO - SURGICAL PROCEDURE . . . . . . . . . . . . . . . . . 7-14 TROCHLEA SOLO - SURGICAL PROCEDURE. . . . . . . . . . . . . . . . 15-22 FEMORAL TWIN - SURGICAL PROCEDURE. . . . . . . . . . . . . . . . . 23-31 For training and marketing purposes only. EPISURF | SURGICAL TECHNIQUE
Open the catalog to page 2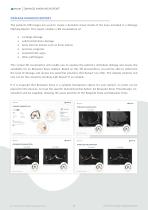
DAMAGE MARKING REPORT DAMAGE MARKING REPORT The patient’s MR images are used to create a detailed virtual model of the knee included in a Damage Marking Report. This report enables a 3D visualisation of: • cartilage damage subchondral bone damage bone marrow lesions such as bone edema previous surgeries osteoarthritic signs other pathologies This virtual 3D visualisation will enable you to explore the patient’s individual damage and assess the suitability for an Episealer Knee implant. Based on this 3D presentation, you will be able to determine the level of damage and review any potential solutions...
Open the catalog to page 3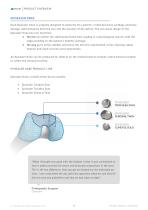
episurf PRODUCT OVERVIEW Each Episealer Knee is uniquely designed to perfectly fit a patient's individual knee cartilage and bone damage, determined by both the size and the location of the defect. The one-piece design of the Episealer Knee has two functions: • the hat sits within the subchondral bone bed, loading in a physiological manner with the edges bonding to the patient’s healthy cartilage. • the peg gives initial stability and press-fits into the subchondral cortex allowing stable fixation and rapid recovery post-operatively. An Episealer Knee can be produced for defects on the medial...
Open the catalog to page 4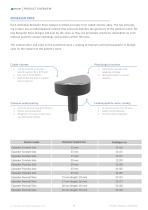
episurf PRODUCT OVERVIEW Each individual Episealer Knee implant is milled precisely from cobalt-chrome alloy. The top articulating surface has an individualised contour that precisely matches the geometry of the patient's knee. No two Episealer Knee designs will ever be the same as they are personally produced, dependent on each indivual patient's unique pathology and position within the knee. The undersurface and sides of the prosthesis have a coating of titanium and hydroxyapatite to biologically fix the implant to the patient's bone. • Can be polished to an ultrasmooth surface (Ra < 0.05 pm)...
Open the catalog to page 5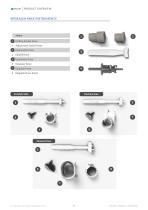
PRODUCT OVERVIEW EPISEALER KNEE INSTRUMENTS Drilling Socket Knee Adjustment Socket Knee Epimandrel Knee Epidrill Knee Epidummy Knee Episealer Knee Epiguide Knee Epiguide Knee Insert Condyle Solo Trochlea Solo For training and marketing purposes only. EPISURF | PRODUCT OVERVIEW
Open the catalog to page 6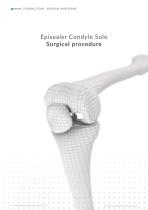
CONDYLE SOLO - SURGICAL PROCEDURE Episealer Condyle Solo Surgical procedure For For training training and and marketing marketing purposes purposes only. only. EPISURF | EPISEALER CONDYLE SOLO
Open the catalog to page 7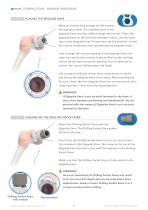
CONDYLE SOLO - SURGICAL PROCEDURE PLACING THE EPIGUIDE KNEE Make an incision long enough to fully expose the operative field. The complete base of the Epiguide Knee must be visible through the incision. Place the Epiguide Knee on the articular cartilage surface. Use the markings on the Epiguide Knee, A (anterior) and P (posterior), to find the correct orientation when positioning the Epiguide Knee. Look through the circular opening of the Epiguide Knee and make sure the bottom surface is placed flush to the cartilage surface all the way around the opening. This is important to achieve the correct...
Open the catalog to page 8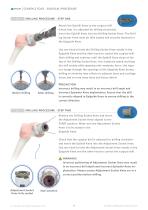
CONDYLE SOLO - SURGICAL PROCEDURE DRILLING PROCEDURE - STEP ONE Attach the Epidrill Knee to the surgical drill (check that it is adjusted for drilling clockwise). Insert the Epidrill Knee into the Drilling Socket Knee. The Drilling Socket Knee must be fully seated and securely fastened in the Epiguide Knee. Use one hand to hold the Drilling Socket Knee steady in the Epiguide Knee and the other hand to control the surgical drill. Start drilling and continue until the Epidrill Knee stops at the top of the Drilling Socket Knee. Use moderate speed and keep the drill steady while applying only moderate...
Open the catalog to page 9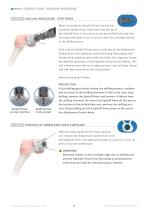
CONDYLE SOLO - SURGICAL PROCEDURE DRILLING PROCEDURE - STEP THREE When inserting the Epidrill Knee into the Adjustment Socket Knee, make sure that the tip of the Epidrill Knee is inserted into the pre-drilled hole and that the large drill body is not in contact with the cartilage surface as the drilling starts. Drill until the Epidrill Knee stops at the top of the Adjustment Socket Knee. Use moderate speed and keep the surgical drill steady while applying only moderate force. Use vigorous lavage through the openings on the Epiguide Knee during drilling. This will minimise heat effects to adjacent...
Open the catalog to page 10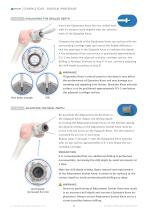
CONDYLE SOLO - SURGICAL PROCEDURE EVALUATING THE DRILLED DEPTH Insert the Epidummy Knee into the drilled hole with its rotation mark aligned with the rotation mark of the Epiguide Knee. Compare the depth of the Epidummy Knee top surface with the surrounding cartilage edge and assess the height difference. Use the openings in the Epiguide Knee to evaluate the depth. If the Epidummy Knee top surface is positioned approximately 0.5-1 mm below the adjacent articular cartilage surface, the drilling is finished. Proceed to step 9. If not, continue adjusting the drill depth according to step 8. WARNING!...
Open the catalog to page 11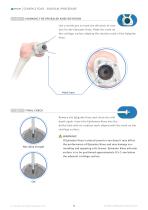
CONDYLE SOLO - SURGICAL PROCEDURE MARKING THE EPISEALER KNEE ROTATION Use a sterile pen to mark the direction of rotation for the Episealer Knee. Make the mark on the cartilage surface aligning the rotation mark of the Epiguide Knee. Mark here FINAL CHECK Remove the Epiguide Knee and check the drill depth again. Insert the Epidummy Knee into the drilled hole with its rotation mark aligned with the mark on the cartilage surface. WARNING! If Episealer Knee is placed proud or too deep it may affect Not deep enough the performance of Episealer Knee and may damage surrounding and opposing soft tissues....
Open the catalog to page 12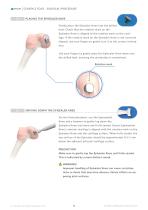
CONDYLE SOLO - SURGICAL PROCEDURE PLACING THE EPISEALER KNEE Gently place the Episealer Knee into the drilled hole. Check that the rotation mark on the Episealer Knee is aligned to the rotation mark on the cartilage. if the rotation mark on the Episealer Knee is not correctly aligned, use your fingers to gently turn it to the correct orientation. Use your fingers to gently press the Episealer Knee down into the drilled hole, ensuring the orientation is maintained. Rotation mark DRIVING DOWN THE EPISEALER KNEE For the final placement, use the Epimandrel Knee and a hammer to gently tap down the...
Open the catalog to page 13All Episurf Medical catalogs and technical brochures
 EPISEALER ® KNEE
4 Pages
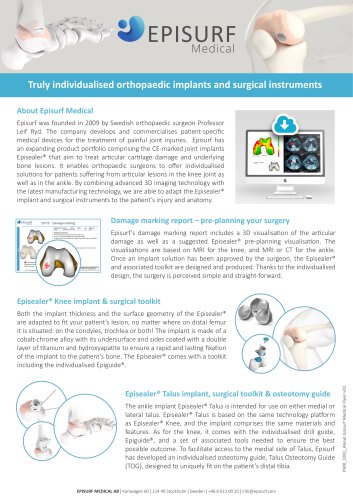 Episurf Medical
1 Page
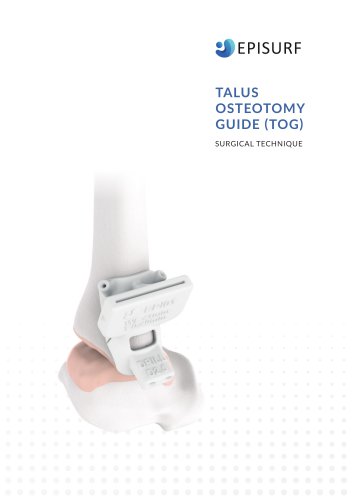 TALUS OSTEOTOMY
12 Pages
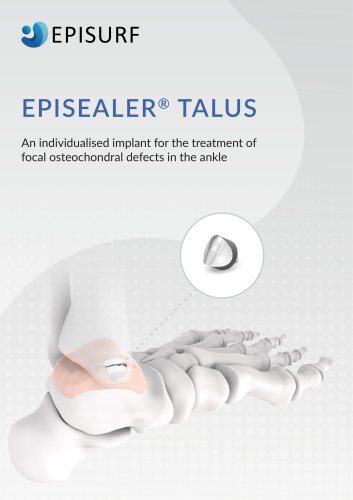 EPISEALER ® TALUS
4 Pages