- Catalogs
- Episurf Medical
- TALUS OSTEOTOMY

TALUS OSTEOTOMY
TALUS OSTEOTOMY
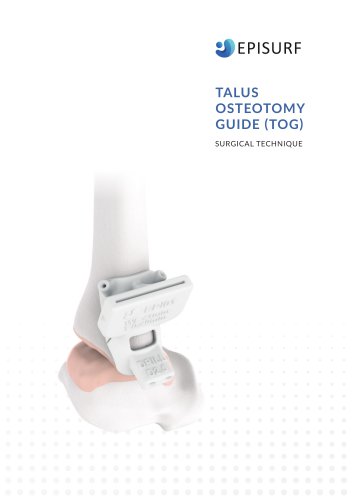
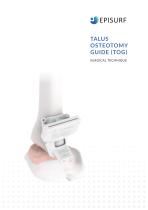
Episurf’s Talus Osteotomy Guide (TOG) is designed to fit the patient's distal tibia, facilitating the osteotomy of the medial malleolus for the implantation of the Episealer Talus or other surgeries requiring access to the talus bone. Key features include a saw guide for detachment and drill holes for fixation. The TOG is customized based on the patient's anatomy and requires specific sawblade and drill dimensions.
CT and MRI Protocols
The TOG is designed using MRI or CT data, with specific protocols developed by Episurf. These protocols must be installed on the radiology department's scanner, requiring a magnetic field strength of at least 1.5 T for MRI. The setup involves specifying the scanner, installing the protocol, running a test scan, and completing the setup. The TOG design uses MRI data for accurate anatomical reconstruction.
Final Design
CT and/or MR images are used to create a virtual model of the talus and distal tibia. A report with the TOG design and position is provided, which can be adjusted if necessary. The sawing process leaves varying material thickness, and adjustments can be made with an osteotome.
Surgical Procedure
- Checking the Sawblade Length: Verify the sawblade length using the Osteotomy Depth Meter (ODM).
- Placing the TOG: Make an incision to expose the operative field, liberate the tibia, and place the TOG without gaps.
- Securing the TOG: Secure the TOG with surgical pins to prevent movement.
- Creating Fixation Holes: Use the specified drill diameter to create fixation holes.
- Sawing: Insert the sawblade into the TOG and saw until the saw bottoms on the TOG.
- Removing the TOG: Remove the surgical pins and TOG.
- Breaking Off the Bone Fragment: Use an osteotome for the final break-off.
- Final Result: Use fixation holes for re-fixation of the medial malleolus to the tibia.
Catalog excerpts
SURGI^i technique
Open the catalog to page 1
TABLE OF CONTENTS TALUS OSTEOTOMY GUIDE OVERVIEW. . . . . . . . . . . . . . . 3 CT AND MRI PROTOCOLS . . . . . . . . . . . . . . . . . . . . . . . . . . 4 FINAL DESIGN . . . . . . . . . . . . . . . . . . . . . . . . . . . . . . . . . . . 5 TALUS OSTEOTOMY GUIDE SURGICAL PROCEDURE. . . . . . . . . . . . . . . . . . . . . . . . . . . 6-9 For training and marketing purposes only. EPISURF MEDICAL | TALUS OSTEOTOMY GUIDE
Open the catalog to page 2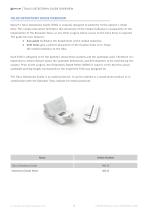
EPISURF TALUS OSTEOTOMY GUIDE OVERVIEW Episurf’s Talus Osteotomy Guide (TOG) is uniquely designed to perfectly fit the patient's distal tibia. This unique placement facilitates the osteotomy of the medial malleolus in preparation of the implantation of the Episealer Talus, or any other surgery where access to the talus bone is required. The guide has two features: • Saw guide facilitates the detachment of the medial malleolus. • Drill hol es give a perfect placement of the fixation holes to re-fixate the medial malleolus to the tibia. Each TOG is designed to fit the patient’s distal tibial anatomy...
Open the catalog to page 3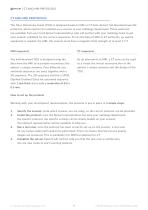
CT AND MRI PROTOCOLS The Talus Osteotomy Guide (TOG) is designed based on MRI or CT data. Episurf has developed specific protocols, which need to be installed on a scanner in your radiology department. These protocols are available from your local Episurf representative who will partner with your radiology team to get your scanner validated for the correct sequences. To run the Episurf MRI or CT protocols, no special equipment is needed. For MRI, the scanner must have a magnetic field strength of at least 1.5 T. The individualised TOG is designed using the As an alternative to MRI, a CT scan...
Open the catalog to page 4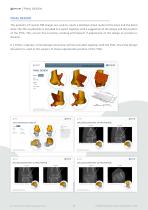
FINAL DESIGN FINAL DESIGN The patient’s CT and/or MR images are used to create a detailed virtual model of the talus and the distal tibia. The 3D visualisation is included in a report together with a suggestion of the design and the position of the TOG. This can be fine-tuned by working with Episurf if adjustment of the design or position is desired. If a TOG is ordered, a Final Design document with be provided togehter with the TOG. The Final Design document is used at the surgery to shows appropriate position of the TOG. The sawing leaves 2 mm of material at the thinnest part, but up to 6,5...
Open the catalog to page 5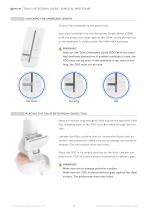
TALUS OSTEOTOMY GUIDE - SURGICAL PROCEDURE CHECKING THE SAWBLADE LENGTH Connect the sawblade to the power tool. Insert the sawblade into the Osteotomy Depth Meter (ODM) until the power tool stops against the ODM. Verify that the tip of the sawblade is visible within the MIN/MAX markings. WARNING! Only use the Talus Osteotomy Guide (TOG) with the specified sawblade dimensions. If another sawblade is used, the TOG must not be used. If the sawblade is too short or too long, the TOG must not be used. PLACING THE TALUS OSTEOTOMY GUIDE (TOG) Make an incision long enough to fully expose the operative...
Open the catalog to page 6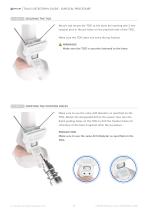
TALUS OSTEOTOMY GUIDE - SURGICAL PROCEDURE SECURING THE TOG Attach and secure the TOG to the bone by inserting two 2 mm surgical pins in the pin holes on the proximal side of the TOG. Make sure the TOG does not move during fixation. WARNING! Make sure the TOG is securely fastened to the bone. CREATING THE FIXATION HOLES Make sure to use the same drill diameter as specified on the TOG. Attach the designated drill to the power tool. Use the distal guiding holes on the TOG to drill the fixation holes for refixation of the bone fragment after the procedure. PRECAUTION Make sure to use the same drill...
Open the catalog to page 7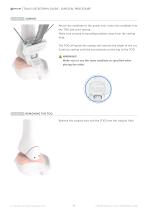
TALUS OSTEOTOMY GUIDE - SURGICAL PROCEDURE SAWING Attach the sawblade to the power tool. Insert the sawblade into the TOG and start sawing. Make sure to keep surrounding tendons away from the sawing field. The TOG will guide the sawing and controls the depth of the cut. Continue sawing until the saw bottoms on the top of the TOG. WARNING! Make sure to use the same sawblade as specified when placing the order. REMOVING THE TOG Remove the surgical pins and the TOG from the surgical field. For training and marketing purposes only. EPISURF MEDICAL | TALUS OSTEOTOMY GUIDE
Open the catalog to page 8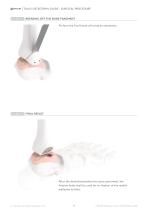
TALUS OSTEOTOMY GUIDE - SURGICAL PROCEDURE BREAKING OFF THE BONE FRAGMENT Perform the final break-off using an osteotome. FINAL RESULT After the desired procedure has been performed, the fixation holes shall be used for re-fixation of the medial malleolus to tibia. For training and marketing purposes only. EPISURF MEDICAL | TALUS OSTEOTOMY GUIDE
Open the catalog to page 9
For training and marketing purposes only. EPISURF MEDICAL | TALUS OSTEOTOMY GUIDE
Open the catalog to page 10
For training and marketing purposes only. EPISURF MEDICAL | TALUS OSTEOTOMY GUIDE
Open the catalog to page 11
CONTACT INFORMATION Copyright © 2024 Episurf Medical AB. All rights reserved. KARLAVÄGEN 60 | 114 49 STOCKHOLM | SWEDEN +46 8 612 00 20 | [email protected] WWW.EPISURF.COM
Open the catalog to page 12All Episurf Medical catalogs and technical brochures
 EPISEALER ® KNEE
4 Pages
 Episurf Medical
1 Page
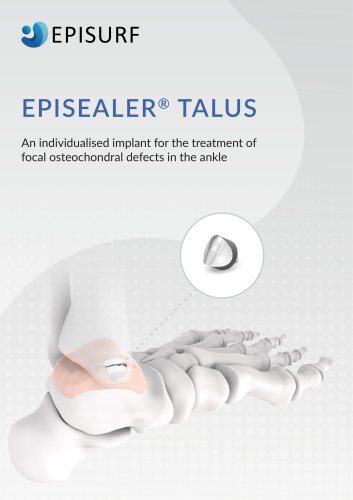 EPISEALER ® TALUS
4 Pages
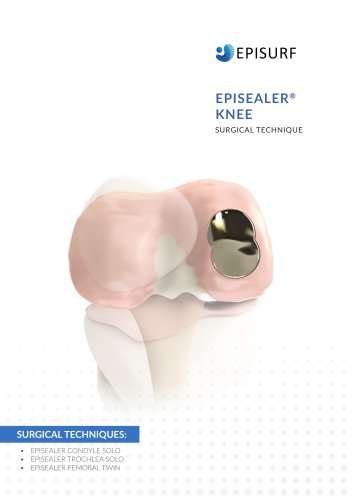 EPISEALER® KNEE
32 Pages