
- Catalogs
- Guilin Veirun Medical Technology
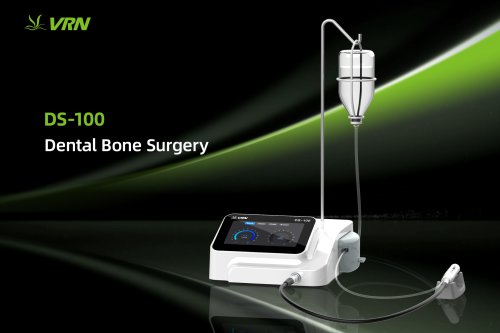
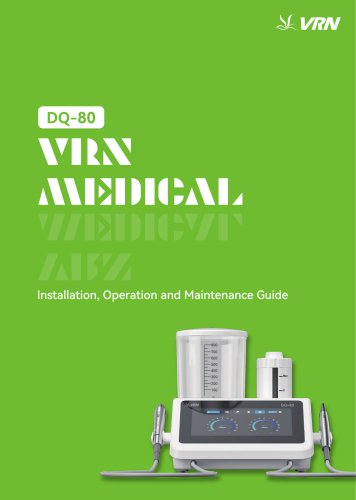
- VRN DENTAL SURGERY MICROMOTOR CONTROL UNIT DS-100

- Company
- Products
- Catalogs
- News & Trends
- Exhibitions
VRN DENTAL SURGERY MICROMOTOR CONTROL UNIT DS-100
VRN DENTAL SURGERY MICROMOTOR CONTROL UNIT DS-100
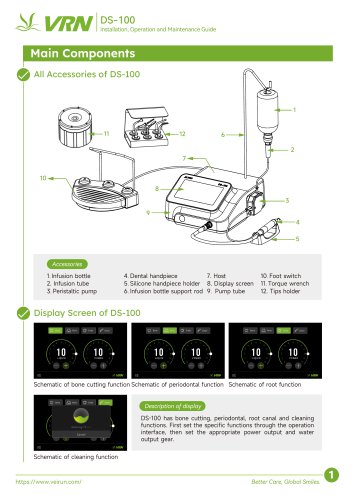
The DS-100 device includes several components such as an infusion bottle, infusion tube, peristaltic pump, foot switch, torque wrench, and tips holder. The device is equipped with a display screen and various accessories like a dental handpiece, silicone handpiece holder, and infusion bottle support rod.
Functions and Display
The DS-100 offers bone cutting, periodontal, root canal, and cleaning functions. Users can set specific functions through the operation interface and adjust power and water output accordingly. The display provides schematics for each function.
Installation Procedures
Installation involves connecting the power cord, foot switch, and handpiece. The peristaltic pump tube must be installed correctly, ensuring the pump is fully closed before activation. The infusion bottle and tube assembly require careful setup to ensure proper operation.
Operation and Mode Switching
The device features a foot pedal control for starting and stopping operations, adjusting power levels, and switching modes. The user interface allows for mode switching between Bone, Perio, Endo, and Clean functions, with 12 power settings available.
Maintenance and Cleaning
Regular cleaning and disinfection are crucial. The device includes an auto-cleaning mode and requires the use of pure or distilled water. Components like the handpiece and tips must be sterilized using high-temperature steam sterilization.
Troubleshooting
Common issues include improper tip mounting, power cord issues, and blown fuses. Solutions involve checking connections, replacing components, and ensuring proper installation.
Sterilization Procedures
Autoclave sterilization is recommended for various components, including the handpiece, tips, pump tube, and torque wrench. Proper cleaning and drying are essential before sealing components in disposable packages.
Warranty and After-sales Service
The main unit has a 2-year warranty, while other components have a 1-year warranty. Consumables are not covered. Lifelong maintenance is offered, but unauthorized repairs void the warranty.
Catalog excerpts
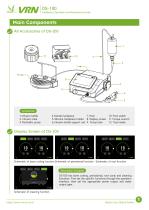
Installation, Operation and Maintenance Guide Main Components All Accessories of DS-100 Accessories 4. Dental handpiece 7. Host 5. Silicone handpiece holder 8. Display screen 6. Infusion bottle support rod 9. Pump tube 1. Infusion bottle 2. Infusion tube 3. Peristaltic pump 10. Foot switch 11. Torque wrench 12. Tips holder Display Screen of DS-100 Bone Schematic of bone cutting function Schematic of periodontal function Schematic of root function Bone Description of display DS-100 has bone cutting, periodontal, root canal and cleaning functions. First set the specific functions through the operation interface, then set the appropriate power output and water output gear. Schematic of cleaning function Better Care, Global Smiles.
Open the catalog to page 1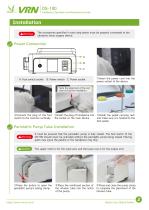
Installation, Operation and Maintenance Guide Installation Warning The accessories specified in each step below must be properly connected to the ultrasonic bone surgery device. Power Connection A: Foot switch socket B: Power switch C: Power socket ①Insert the power cord into the power socket of the device. Note the alignment of the red dots during the installation. ②Connect the plug of the foot switch to the machine vertically. ③Insert the plug of handpiece into the socket on the main device. ④Install the pedal carrying rack and make sure it is hooked to the foot pedal. Peristaltic Pump Tube...
Open the catalog to page 2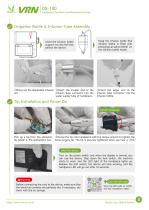
Installation, Operation and Maintenance Guide Irrigation Bottle & Infusion Tube Assembly Insert the infusion bottle support rod into the hole behind the device. ①Bring out the disposable infusion ②Insert the smaller end of the set. infusion tube connector into the water supply tube of handpiece. Hang the infusion bottle (the infusion bottle is filled with physiological saline bottle) on the infusion bottle holder. ③Insert the larger end of the infusion tube connector into the infusion bottle. Tip Installation and Power On Tighten clockwise Pick up a tip from the ultrasonic tip holder in the sterilization...
Open the catalog to page 3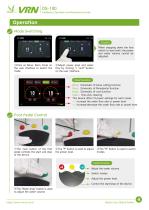
Installation, Operation and Maintenance Guide Operation Mode Switching Caution When stepping down the foot switch to start work, the power and water volume cannot be adjusted. ①Click on Bone, Perio, Endo on the user interface to switch the mode. ②Adjust power level and water flow by clicking "+ "and"-"button on the user interface. Panel Function Bone:Schematic of bone cutting function Perio:Schematic of Periodontal function Endo:Schematic of root function Clean:One-click cleaning This device offers 12 power settings for each mode. +:Increase the water flow rate or power level ➖:Increase/decrease...
Open the catalog to page 4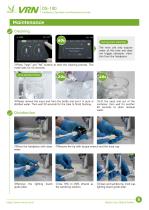
Installation, Operation and Maintenance Guide During auto-cleaning: The main unit only outputs water at this time and does not trigger ultrasonic vibration from the handpiece. ①Press "clean" and "Yes" buttons to start the cleaning process. This mode lasts for 60 seconds. Pure/Distilled Water ②Please remove the input end from the bottle and put it in pure or distilled water. Then wait 20 seconds for the tube to finish flushing. ③Lift the input end out of the container, then wait for another 40 seconds to drain residual water. ①Rinse the handpiece with clean water. ②Remove the tip with torque wrench...
Open the catalog to page 5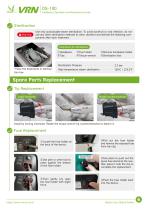
Installation, Operation and Maintenance Guide Sterilization Warning Use only autoclavable steam sterilization. To avoid bacterial or viral infection, do not use any other sterilization methods to clean, disinfect and sterilize the following components after each treatment. Treatments for Sterilization ①Handpiece ②Tips *Place the treatments in sterilization box. ③Tips holder ④Torque wrench ⑤Silicone handpiece holder ⑥Sterilization box Sterilization Pressure High temperature steam sterilization Spare Parts Replacement Tip Replacement Install clockwise Rotate counterclockwise Install by turning...
Open the catalog to page 6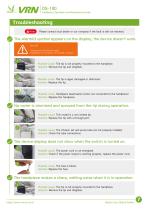
Installation, Operation and Maintenance Guide Troubleshooting Note Please contact local dealer or our company if the fault is still not resolved. The Alarm01 symbol appears on the display, the device doesn’t work. Alarm01 Ultrasound module damaged, handpiece not properly connected or failed Possible cause: The tip is not properly mounted to the handpiece. Solution: Remove the tip and retighten. Possible cause: The tip is aged, damaged or deformed. Solution: Replace the tip. Possible cause: Handpiece deactivation (when not connected to the handpiece) Solution: Replace the handpiece. No water is...
Open the catalog to page 7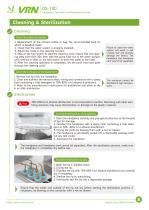
DS-100 installation, Operation and Maintenance Guide Clean the waterway system Failure to clean the water system will result in salt crystals that will severely damage the device. The handpiece and handpiece cord cannot be separated. 1. Replacement of the infusion bottle or bag, the recommended fluid for which is desalted water; 2. Check that the water system is properly installed; 3. Adjust the mode to the cleaning function. 4. Step on the foot switch to start the cleaning cycle, ensure that the cleaning lasts more than 20s, then take the pump tube out of the water surface, and continue to step...
Open the catalog to page 8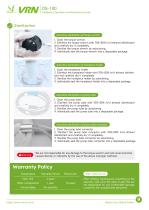
DS-100 installation, Operation and Maintenance Guide 1. Clean the torque wrench. 2. Disinfect the torque wrench with 70%~80% (v/v) ethanol disinfectant and carefully dry it completely. 3. Sterilize the torque wrench by autoclaving. 4. Individually seal the torque wrench into a disposable package. Autoclave sterilization of handpiece holder 1. Clean the handpiece holder 2. Disinfect the handpiece holder with 70%~80% (v/v) ethanol disinfectant and carefully dry it completely 3. Sterilize the handpiece holder by autoclaving. 4. Individually seal the handpiece holder into a disposable package. Autoclave...
Open the catalog to page 9All Guilin Veirun Medical Technology catalogs and technical brochures
 VRN製品カタログ_2026.08_日本語版
2 Pages
 VRN PVMTC Oral PreventionProgram
23 Pages
 VRN Prophylaxis Powder
4 Pages
 VRN ENDODONTIC MATERIALS
5 Pages
 VRN catalog
32 Pages
 VRN Medical PRODUCTOVERVIEW
2 Pages
 VRN DS-100 Dental Bone Surgery
16 Pages
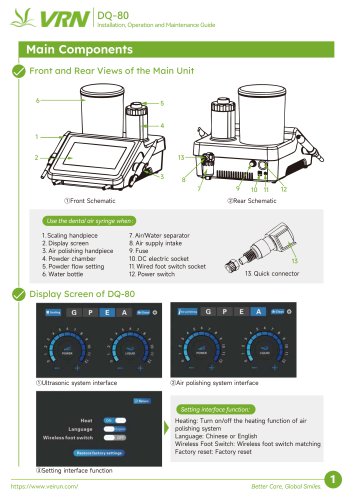 VRN DQ-80 Main Components
9 Pages
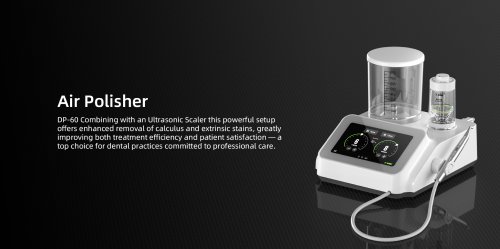 VRN DP-60 Air Polisher
12 Pages
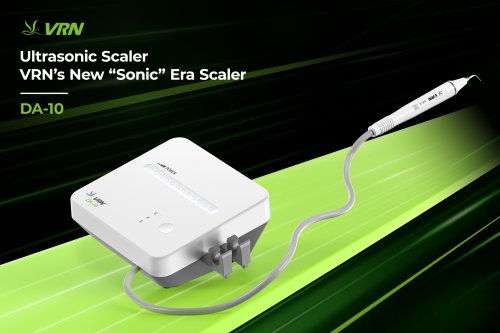 VRN Ultrasonic Scaler
4 Pages
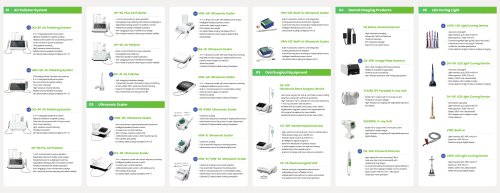 VRN Medical PRODUCTO VERVIEW
2 Pages





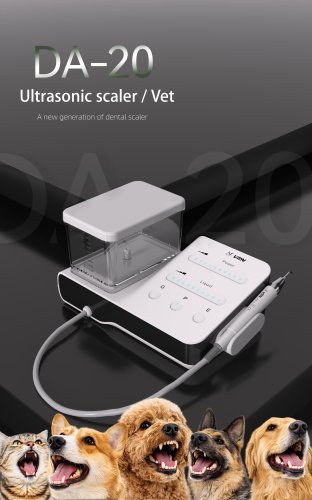
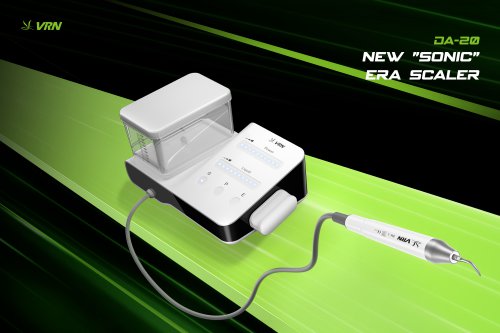

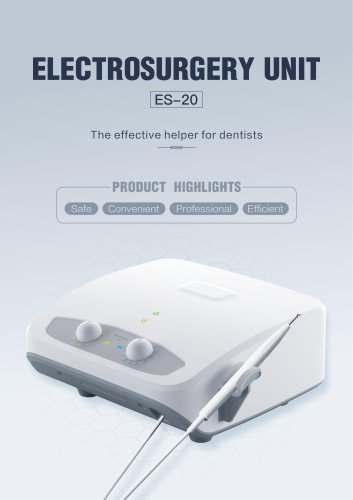
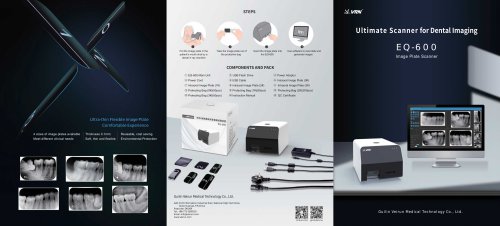
- Medical dolly
- Dental material
- Instrument trolley
- Surgical system
- Cutting electrosurgical system
- Flat panel detector
- Surgical suction pump
- Dental scaler
- Portable flat panel detector
- Electric surgical suction pump
- Dental radiography system
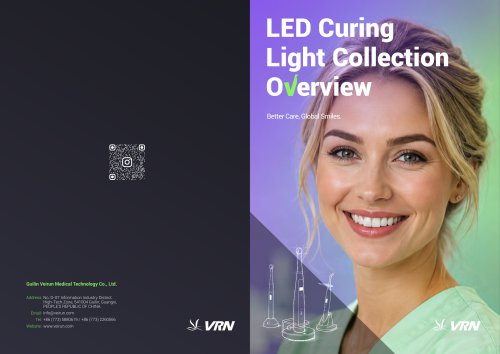
- Curing light
- High-frequency surgical system
- Digital dental radiography system
- Dental office curing light
- 3D scanner
- Ultrasonic dental scaler
- Powder dental material