
- Catalogs
- Guilin Veirun Medical Technology
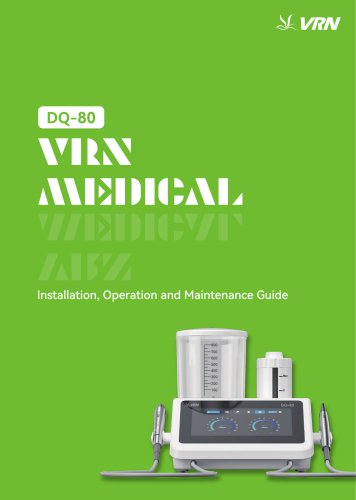
- VRN DQ-80 Main Components 8.5

- Company
- Products
- Catalogs
- News & Trends
- Exhibitions
VRN DQ-80 Main Components 8.5
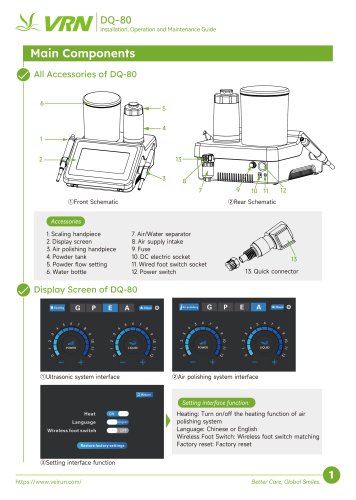
VRN DQ-80 Main Components 8.5
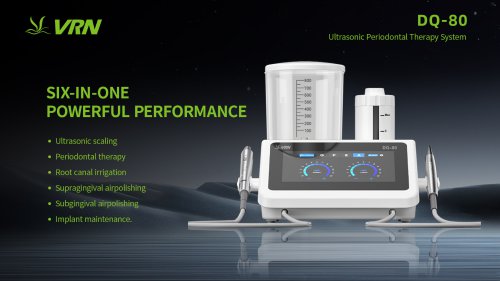
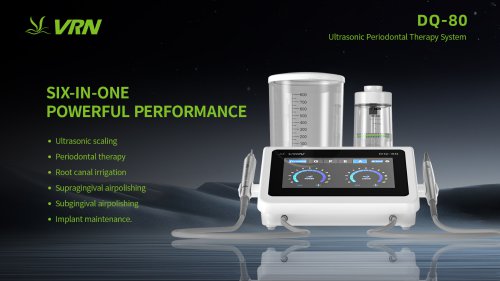
The DQ-80 device includes several key components: a scaling handpiece, display screen, air polishing handpiece, powder tank, water bottle, air/water separator, air supply intake, fuse, DC electric socket, wired foot switch socket, power switch, and a quick connector.
Installation involves connecting the water bottle, powder tank, air supply hose, power adapter, and handpieces. Ensure secure connections and follow the sequence for proper setup.
The device automatically switches modes based on the handpiece used. It offers 12 power settings for each mode, including scaling, periodontal treatment, endodontic irrigation, and air polishing. The foot pedal starts the device, and users can adjust power levels and water volume.
Maintenance includes cleaning the handpieces and powder tank, using the auto-cleaning function, and drying components with a dental air syringe. Sterilization should follow specific procedures using steam sterilization at specified temperatures.
Common issues include pump running dry, air polishing handpiece blockage, and foot switch failures. Solutions involve checking connections, using needles to clear blockages, and re-pairing the wireless foot switch.
Instructions are provided for replacing handpieces, tips, files, and nozzles. Proper alignment and use of tools like torque wrenches are emphasized.
Manual cleaning involves disassembling components, using ethanol, and rinsing with deionized water. Only specific sterilization methods are allowed, and unauthorized modifications to cleaning methods are discouraged.
The product comes with a warranty, and unauthorized disassembly voids it. Repairs are limited to specific components and must be performed by authorized personnel.
Catalog excerpts
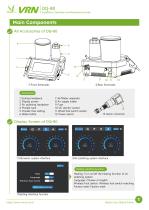
DQ-80 installation, Operation and Maintenance Guide 5. Powder flow setting 11. Wired foot switch socket Display Screen of DQ-80 POWER ©Ultrasonic system interface Setting interface function: Heat on Language ^HEngiish Wireless foot switch off Restore factory settings Heating: Turn on/off the heating function of air polishing system Language: Chinese or English Wireless Foot Switch: Wireless foot switch matching Factory reset: Factory reset ©Setting interface function https://www.veirun.com/ Better Care, Global Smiles.
Open the catalog to page 1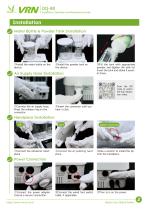
Installation, Operation and Maintenance Guide Installation Water Bottle & Powder Tank Installation ①Install the water bottle on the device. ②Install the powder tank on the device. Air Supply Hose Installation ③Fill the tank with appropriate powder and tighten the tank lid. Invert the tank and shake it several times. Scan the QR code to watch the full installation video. ①Connect the air supply hose. Press the release ring on the connector. ②Insert the connector until you hear a click. Handpiece Installation left ①Connect the ultrasonic handpiece. tighten clockwise ②Connect the air polishing handpiece....
Open the catalog to page 2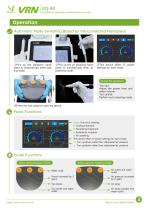
Installation, Operation and Maintenance Guide Operation Automatic Mode Switching Based on the Connected Handpiece ①Pick up the ultrasonic handpiece to automatically enter scaling mode. ②Pick up the air polishing handpiece to automatically enter air polishing mode. ③This device offers 12 power settings for each mode. During the operation You can: Adjust the power level and water volume You cannot: Perform auto-cleaning mode. ④Press the foot pedal to start the device. Penal Functions Clean: One-click cleaning G: Scaling treatment P: Periodontal treatment E: Endodontic irrigation A: Air polishing...
Open the catalog to page 3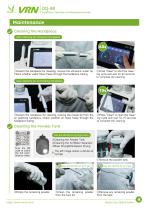
Installation, Operation and Maintenance Guide Maintenance Cleaning the Handpiece Auto-Cleaning for Ultrasonic Handpiece ①Detach the handpiece for cleaning, remove the ultrasonic scaler tip. Check whether water flows freely through the handpiece tubing. ②Press "Clean" to start the cleaning cycle and wait for 60 seconds to complete the cleaning. Auto-Cleaning for Air Polishing Handpiece ①Detach the handpiece for cleaning, remove the nozzle tip from the air polishing handpiece. Check whether air flows freely through the handpiece tubing. ②Press "Clean" to start the cleaning cycle and wait for 15...
Open the catalog to page 4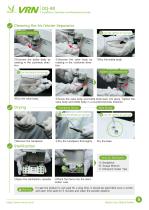
Installation, Operation and Maintenance Guide Cleaning the Air/Water Separator unscrew clockwise ①Unscrew the bottle body by rotating in the clockwise direction. ②Unscrew the valve body by rotating in the clockwise direction. tighten counterclockwise ④Dry the valve body. ⑤Screw the valve body and bottle body back into place. Tighten the valve body and bottle body in a counterclockwise direction. Handpiece Drying Base Drying ③Dry the bottle body. ②Dry the handpiece thoroughly. Sterilization Items for Sterilization ①Open the sterilization cassette. A: Handpiece B: Torque Wrench C: Ultrasonic Scaler...
Open the catalog to page 5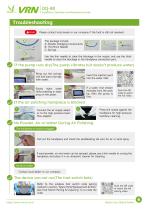
Installation, Operation and Maintenance Guide Troubleshooting Note Please contact local dealer or our company if the fault is still not resolved. The package include: A: Powder Dredging Components B: Thin/thick Needle C: Syringe Use the thin needle to clear the blockage in the nozzle, and use the thick needle to clear the blockage in the handpiece connection port. If the pump runs dry(The pump vibrates but doesn’t produce water) 1 Bring out the syringe unit and load a syringe with water. Slowly inject water while pressing or stepping on the pedal. 2 Insert the injection port into the water inlet....
Open the catalog to page 6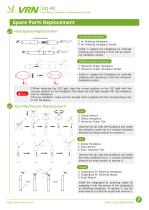
Installation, Operation and Maintenance Guide Spare Parts Replacement Handpiece Replacement Air polishing handpiece ① Air Polishing Handpiece ② Air Polishing Handpiece Socket Install or replace the handpiece by vertically inserting and removing it from the air polishing handpiece socket. Ultrasonic scaler handpiece ① Ultrasonic Scaler Handpiece ② Ultrasonic Scaler Handpiece Socket Install or replace the handpiece by vertically inserting and removing it from the ultrasonic handpiece socket. ② ①When replacing the LED light, align the convex position on the LED light with the concave position on...
Open the catalog to page 7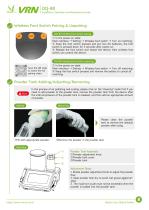
Installation, Operation and Maintenance Guide Wireless Foot Switch Pairing & Unpairing DQ-80 wireless foot switch paring ① In the power-on state: Main interface → Setting → Wireless foot switch → Turn on matching; ② Keep the foot switch pressed and put two AA batteries, the foot switch is pressed down for 3 seconds after power-on; ③ Release the foot switch and restart the device, then wireless foot switch can control the device. DQ-80 wireless foot switch unparing Scan the QR code to watch the full pairing video. ① In the power-on state: Main interface → Setting → Wireless foot switch → Turn...
Open the catalog to page 8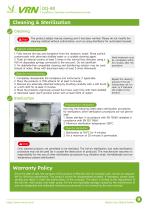
Installation, Operation and Maintenance Guide Cleaning & Sterilization Cleaning Note The product adopts manual cleaning and it has been verified. Please do not modify the cleaning method without authorization, such as using disinfector for automated cleaned. Steps for initial treatment 1. Fully remove the tips and handpiece from the ultrasonic scaler. Rinse surface contaminants with deionized distilled water or a suitable cleaning agent. 2. Flush all internal lumens at least 3 times in the normal flow direction using a ≥50 ml disposable syringe connected to the rear port. Do not backflush. 3....
Open the catalog to page 9All Guilin Veirun Medical Technology catalogs and technical brochures
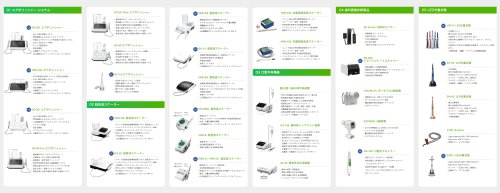 VRN製品カタログ_2026.08_日本語版
2 Pages
 VRN PVMTC Oral PreventionProgram
23 Pages
 VRN Prophylaxis Powder
4 Pages
 VRN ENDODONTIC MATERIALS
5 Pages
 VRN catalog
32 Pages
 VRN Medical PRODUCTOVERVIEW
2 Pages
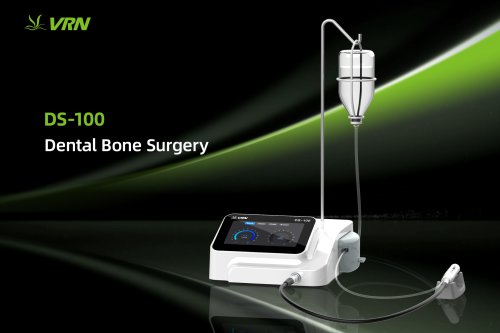 VRN DS-100 Dental Bone Surgery
16 Pages
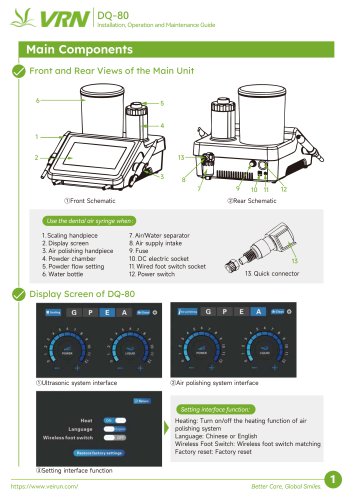 VRN DQ-80 Main Components
9 Pages
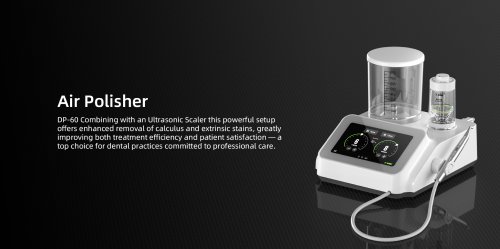 VRN DP-60 Air Polisher
12 Pages
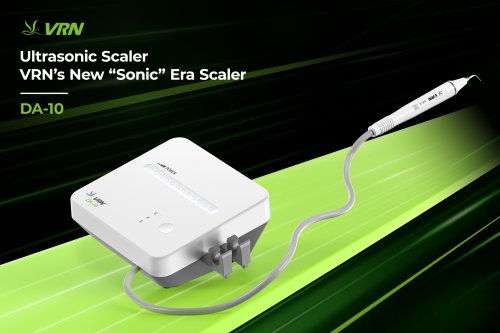 VRN Ultrasonic Scaler
4 Pages
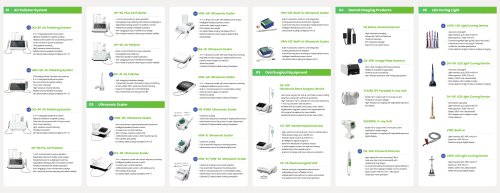 VRN Medical PRODUCTO VERVIEW
2 Pages





- Medical dolly
- Dental material
- Instrument trolley
- Surgical system
- Cutting electrosurgical system
- Flat panel detector
- Surgical suction pump
- Dental scaler
- Portable flat panel detector
- Electric surgical suction pump
- Dental radiography system
- Curing light
- High-frequency surgical system
- Digital dental radiography system
- Dental office curing light
- 3D scanner
- Dental handpiece
- Ultrasonic dental scaler
- Powder dental material