- Catalogs
- HORIBA Scientific
- LAQUAtwin-pH-11, LAQUAtwin-pH-22, LAQUAtwin-pH-33
LAQUAtwin-pH-11, LAQUAtwin-pH-22, LAQUAtwin-pH-33
1 /4Pages

LAQUAtwin-pH-11, LAQUAtwin-pH-22, LAQUAtwin-pH-33
1 /4Pages
Catalog excerpts
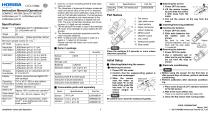
Instruction Manual (Operation) COMPACT WATER QUALITY METER LAQUAtwin-pH-11, LAQUAtwin-pH-22, LAQUAtwin-pH-33 Specifications Model Target pH Measurement principle Glass electrode method Minimum sample volume 0.1 mL*1 pH range 0 pH to 14 pH Resolution LAQUAtwin-pH-11: 0.1 pH (valid digits) LAQUAtwin-pH-22: 0.01 pH LAQUAtwin-pH-33: 0.01 pH Calibration LAQUAtwin-pH-11: Up to 2 points LAQUAtwin-pH-22: Up to 3 points LAQUAtwin-pH-33: Up to 5 points LAQUAtwin-pH-11: 0.1 pH LAQUAtwin-pH-22: 0.01 pH LAQUAtwin-pH-33: 0.01 pH TemperaAvailable only on LAQUAtwin-pH-33, ture display 0 C to 50.0C Display Custom (monochrome) digital LCD with backlight Operating 5C to 40C, 85% or less relative environment humidity (no condensation) Power CR2032 batteries (2) Battery life Approx. 400 h continuous operation*3 Outer dimen- 164 29 20 mm, Approx. 50 g*4 sions/mass Main funcTemperature compensation, watertion proof*5, auto stable/auto hold, automatic power OFF *1 0.05 mL or more if sampling sheet B (sold separately) is used. *2 The closeness of agreement between measured value and actual value of the pH 4.01 standard solution after two-point calibration using pH 4.01 and pH 7.00 standard solutions. The temperature during the calibration and measurement is the same. Two-point calibration is started from pH 7.00. The error of standard solutions and rounding error (1 digit) are not included. *3 The life period if the meter is used in the backlight off mode. If the backlight is used, battery life will shorten. *4 The dimensions excludes projections and the mass excludes batteries. *5 IP67: no failure when immersed in water at a depth or 1 meter for 30 minutes. Please note that the meter can not be used underwater Sensor Meter Storage case Batteries Standard solution Pipette Sampling sheet B (5 sheet-pack) Instruction manual (Operation) Instruction manual (Before use) Sampling Y046, 100 sheet-pack sheet B Flat sensor Light shield cover Liquid junction Glass membrane Lithium batteries MEAS switch ON/OFF switch CAL switch Waterproof gasket Strap eyelet Press the switches 0.5 seconds or more unless otherwise specified. Initial Setup Attaching/detaching the sensor Attaching the sensor 1. Power OFF the meter. 2. Confirm that the waterproofing gasket is clean and undamaged. 3. Slide the sensor Waterproof onto the meter so gasket that catch "A" on the back of the meter fits into hole "a" on the A sensor tongue as a shown. Consumable parts sold separately Items Items in package Items Standard solution Detaching the sensor 1. Power OFF the meter. 2. Lift the sensor tongue tip and slide the sensor a little away from the meter. 3. Pull out the sensor all the way from the meter. Inserting/removing batteries Inserting the batteries 1. Power OFF the meter. 2. Slide both batteries into the battery case as shown. Be sure to use two Battery CR2032 batteries, and put Battery clip them with the plus sides (+) upwards. Removing the batteries 1. Power OFF the meter. 2. Use a ball-point pen or other tool to pry the batteries out from the clips as shown. Electrode conditioning Before using the sensor for the first time or after several days of disuse, perform electrode conditioning. Perform calibration after electrode conditioning. 1. Place some drops of pH 7 standard solution to the flat sensor. 2. Wait a few hours before use. There is no need to switch the meter ON. 3. Clean the flat sensor with running water. Be careful not to twist the waterproof gasket. CODE: GZ0000472467 LAQUAtwin series (pH) Operation
Open the catalog to page 1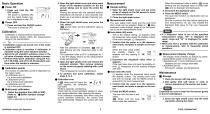
Basic Operation Power ON 1. Press and hold the ON/ OFF switch. The power is switched ON, and the meter model number is displayed on the LCD. Power OFF 1. Press and hold the ON/OFF switch. The power is switched OFF. 2. Open the light shield cover and place some drops of the standard solution on the flat sensor taking care to cover the entire flat sensor. Rinsing the sensor with the standard solution beforehand will provide a more accurate calibration as it will reduce sample crossover contamination. 3. Close the light shield cover and press the CAL switch. and blink, and the calibration value...
Open the catalog to page 2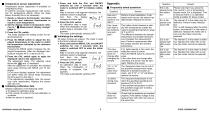
Temperature sensor adjustment Temperature sensor adjustment is available on LAQUAtwin-pH-33. To perform accurate measurement with correction for temperature effects, follow the steps below. Normally this is not necessary. 1. Ready a reference thermometer, and allow the meter and reference thermometer to reach to room temperature. 2. Set the display mode to temperature referring to " Measurement display change" (page 2). 3. Press the CAL switch. The meter displays the setting screen for target temperature. 4. Press the MEAS switch to adjust the displayed temperature on the meter to match the...
Open the catalog to page 3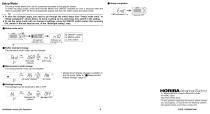
Setup Mode The setup mode allows the user to customize the meter to his specific needs. To enter the setup mode, press and hold the MEAS and ON/OFF switches for over 3 seconds when the meter is switched OFF. All the LCD segments appear and then the meter enters the setup mode. To have the changes apply, you need to go through the entire steps from “Setup mode entry” to “Setup completion” shown below. To leave a setting as it is, just press CAL switch in the setting. To exit the setup mode with no change of settings, press the ON/OFF switch earlier than pressing CAL switch in the last step but...
Open the catalog to page 4All HORIBA Scientific catalogs and technical brochures
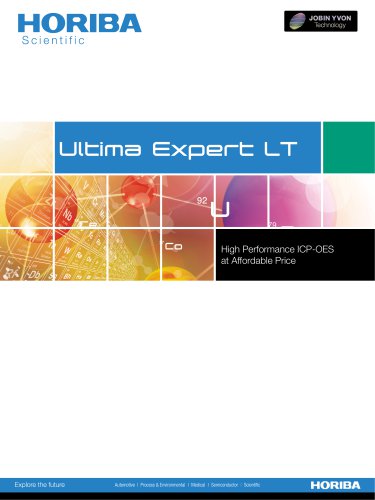 Ultima Expert LT
3 Pages
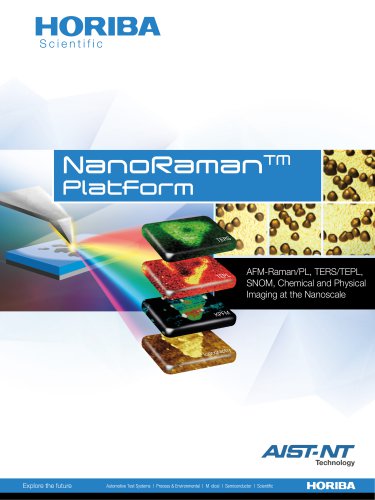 Tm PlstForm
7 Pages

Archived catalogs
 LSH
LSH2 Pages
 iHR
iHR6 Pages
 LabRAM Odyssey
2 Pages
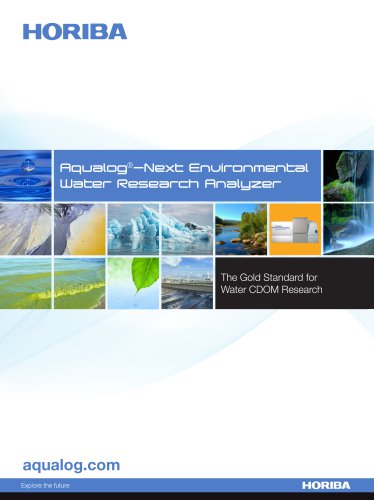
 Aqualog®
2 Pages
 MicOS
MicOS2 Pages
 BRO ICP NEO
3 Pages
 FluoroMax Plus
20 Pages
 QuantaMaster
28 Pages
 Ultima Expert LT
3 Pages
 SA-9600_Series_Brochure
2 Pages
 Ultima Expert
5 Pages
 XploRA Series
8 Pages
 LabRAM HR Evolution
5 Pages
 MacroRAM™
2 Pages
 Modular Raman Spectrometers
5 Pages
 NanoRaman brochure
7 Pages
 Tunable PowerArc
2 Pages
 Tunable KiloArc
2 Pages
 PowerArc™
2 Pages
 KiloArc
2 Pages
 EasyLife L
2 Pages
 EasyLife X
2 Pages
 MicroHead 3000
4 Pages
 MINI-CCT+
2 Pages
 THz-Raman®
4 Pages
 UVISEL Plus In-Situ
4 Pages
 Duetta™
8 Pages
 OpenPlex
2 Pages
 SZ-100
8 Pages
 LA-960V2
8 Pages
 LAQUAtwin
12 Pages
 EMGA-920
4 Pages
 LA-350
4 Pages
 LAQUAact-DO110 LAQUAact-DO120
87 Pages

- Isolcell microscope
- Compound microscope
- Isolcell laboratory microscope
- Isolcell benchtop microscope
- Laboratory testing system
- Isolcell spectrometer
- LED light source
- Control analyser
- Temperature testing system
- Isolcell benchtop spectrometer
- Fluorescence microscope
- Research microscope
- Digital microscope
- Compact light source
- Achromatic microscope
- High-resolution microscope
- Pressure testing system
- Microscope light source
- Compact microscope
- Compact spectrometer