
- Catalogs
- Infusion Tech
- PINATM LiQuick DNA Extraction Kit

PINATM LiQuick DNA Extraction Kit
PINATM LiQuick DNA Extraction Kit
Introduction: The PINA™ LiQuick DNA Extraction Kit is designed for efficient DNA extraction from various samples including food, blood products, saliva, and urine. It utilizes a special polymer (SP buffer) that lyses samples and extracts nucleic acids without the need for heating, allowing for rapid DNA extraction. The kit provides high yields and quality DNA suitable for nucleic acid amplification applications.
Quality: The kit's effectiveness is demonstrated through qPCR results from DNA extracted from scrub typhus DNA spiked in plasma.
Specifications: The kit (Model PNC201) includes components such as buffers and syringes, and is stored at room temperature with a shelf life of one year. It is intended for DNA extraction from various samples.
Experimental Procedures
Preparation: Use protective equipment to prevent contamination. Perform extractions on a clean bench sterilized with ethanol or sodium hypochlorite.
Blood Sample Considerations: Use EDTA tubes for plasma and buffy coat separation. Store samples appropriately to prevent degradation.
Protocol:
Step 1: Lysis Protocol - Mix sample with water and buffers, use a syringe and filter to process the sample.
Step 2: Washing Protocol - Use EL buffer to wash the sample through the filter.
Step 3: Elution Protocol - Elute DNA with elution buffer, incubate, and store appropriately.
Precautions for Use
1. For research use only.
2. Check expiration dates and component integrity before use.
3. Follow instructions and precautions strictly.
4. Store at room temperature and avoid contamination.
5. Use protective gear when handling biohazardous materials.
6. Avoid ingestion or skin contact with reagents.
7. Dispose of syringes as medical waste.
8. Do not mix components from different lots or alter procedures.
Catalog excerpts
PINA™ LiQuick DNA Extraction Kit Cat.No. INFUSION TECH, Inc. #1202, 38, Heungan-daero 427 beon-gil, Dongan-gu, Anyang-si, Gyeonggi-do, Korea TEL +82-31-687-3459 │ FAX +82-31-624-1518 │ [email protected] www.infusiontech.co
Open the catalog to page 1
1) Product Information Introduction The PINA™ LiQuick DNA Extraction Kit is optimized for extracting DNA from samples consisting of a variety of foods, as well as blood products (plasma, serum, blood) and liquids such as saliva and urine. As a special polymer(SP buffer) is used that simultaneously lyses the sample and extracts and concentrates nucleic acids, no incubation process such as heating is required, enabling DNA extraction in a short time. The PINA™ LiQuick DNA Extraction Kit is capable of extracting high yields of DNA and enables the acquisition of high-quality DNA and can be used for...
Open the catalog to page 2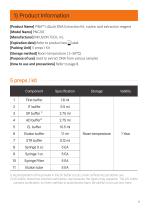
[Product Name] PINA™ LiQuick DNA Extraction Kit, nucleic acid extraction reagent [Model Name] PNC201 [Manufacturer] INFUSION TECH, Inc. [Expiration date] Refer to product box 2 label. [Packing Unit] 5 preps / Kit [Storage method] Room temperature ( 1~30°C) [Purpose of use] Used to extract DNA from various samples [How to use and precautions] Refer to page 8. 1) As precipitation of the powder in the SP buffer occurs, invert sufficiently just before use. 2) AD buffer should be inverted well before use because the layers may separate. The AD buffer contains surfactants, so invert carefully to avoid...
Open the catalog to page 3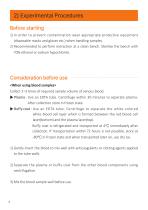
1) In order to prevent contamination wear appropriate protective equipment (disposable masks and gloves etc.) when handling samples. 2) Recommended to perform extraction at a clean bench. Sterilize the bench with 70% ethanol or sodium hypochlorite. <When using blood samples> Collect 2~3 times of required sample volume of venous blood. ► Plasma : Use an EDTA tube. Centrifuge within 30 minutes to separate plasma. After collection store in frozen state. ► Buffy coat : Use an EDTA tube. Centrifuge to separate the white-colored white blood cell layer which is formed between the red blood cell layer(bottom)...
Open the catalog to page 4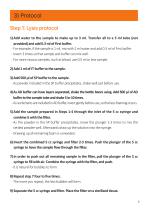
Step 1: Lysis protocol1) Add water to the sample to make up to 3 ml. Transfer all to a 5 ml tube (not provided) and add 0.3 ml of First buffer. - For example, if the sample is 1 ml, mix with 2 ml water and add 0.3 ml of First buffer. - Invert 3 times so that sample and buffer can mix well. - For more viscous samples, such as blood, use 0.5 ml or less sample. - As powder included in the SP buffer precipitates, shake well just before use. 4) As AD buffer can have layers separated, shake the bottle beore using. Add 500 pl of AD buffer to the sample tube and shake 5 to 10 times. - As surfactants...
Open the catalog to page 5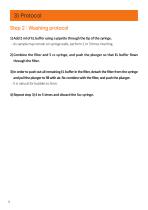
1) Add 2 ml of EL buffer using a pipette through the tip of the syringe. - As sample may remain on syringe walls, perform 2 or 3 times inverting. 2) Combine the filter and 5 cc syringe, and push the plunger so that EL buffer flows through the filter. 3) In order to push out all remaining EL buffer in the filter, detach the filter from the syringe and pull the plunger to fill with air. Re-combine with the filter, and push the plunger. - It is natural for bubbles to form. 4) Repeat step 3) 4 to 5 times and discard the 5cc syringe.
Open the catalog to page 6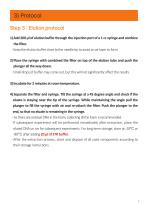
1) Add 200 pl of elution buffer through the injection port of a 1 cc syringe and combine the filter. - Keep the elution buffer close to the needle tip to avoid an air layer to form. 2) Place the syringe with combined the filter on top of the elution tube and push the plunger all the way down. - Small drops of buffer may come out, but this will not significantly affect the results. 3) Incubate for 2 minutes at room temperature. 4) Separate the filter and syringe. Tilt the syringe at a 45 degree angle and check if the eluate is staying near the tip of the syringe. While maintaining the angle pull...
Open the catalog to page 7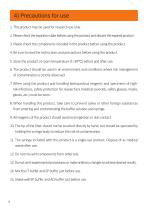
1. This product may be used for research use only. 2. Please check the expiration date before using the product and discard the expired product. 3. Please check the components included in the product before using the product. 4. Be sure to read the instructions and precautions before using the product. 5. Store the product at room temperature (1~30°C) before and after use. 6. The product should be used in an environment and conditions where risk management of contamination is strictly observed. 7. When using the product and handling biohazardous reagents and specimens of high-risk infections,...
Open the catalog to page 8