
- Catalogs
- JRI Orthopaedics
- Avanteon Surgical Technique


Avanteon Surgical Technique
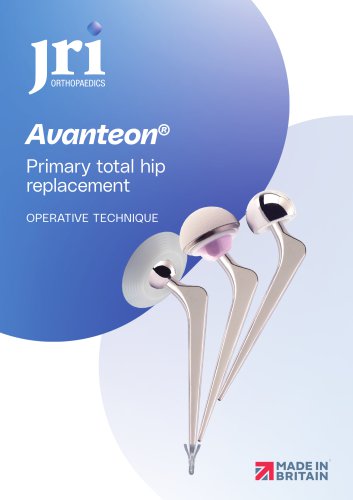
Avanteon Surgical Technique
The objective is to collect anatomical data to determine the optimal size and position of the femoral stem and acetabular component. X-rays are utilized with templates set at 115% magnification for evaluation.
The center of rotation is established to determine offset and neck length. An osteotomy guide aligns with the femoral axis for precise resection.
The acetabular rim is exposed, and osteophytes are removed. Reaming continues until subchondral bone is visible, ensuring a 3mm cement mantle. Holes are drilled for cement fixation.
UHMWPE cups are trimmed to fit the acetabulum. Cement is applied, and the cup is inserted at 45° abduction. Pressure is maintained until cement polymerizes.
The canal is opened with an osteotome and reamed to the required size. A cement plug is inserted to prevent cement ingress.
Broaches are used sequentially to prepare the femur, ensuring a uniform cement mantle. The correct offset is determined from pre-operative planning.
The trial neck and head are used to check joint stability and leg length. Adjustments are made as necessary.
Cement plugs are used to secure the canal. The size is determined by trials, ensuring a snug fit.
The stem is inserted to the pre-determined depth, maintaining alignment. A trial reduction is performed before placing the definitive femoral head.
Details of available stem sizes, cement plugs, and acetabular cups are provided. Warnings about compatibility are noted.
The document outlines various components and instruments related to the AVANTEON hip system, including head-neck lengths, head sizes, and specific offsets for different components.
The document lists the contents of Instrument Tray 1, both top and bottom layers, and Range Extension Tray 2. Key instruments include broaches, trial necks, cement plug inserter, femoral head impactor, osteotomy guides, and various reamers and inserters.
Includes broaches with different offsets, trial necks, cement plug inserter, femoral head impactor, trial heads with varying neck lengths, and osteotomy guides.
Contains acetabular step drill, cup inserter, cup pusher, anteversion handle, intramedullary reamers, and broach handle.
Features Avanteon trial neck adaptor and broaches with specific offsets.
Additional notes and references are provided, including contact information for JRI Orthopaedics Ltd.
The AVANTEON hip system is manufactured in Britain, with some components sourced from BIOLOX®delta ceramic components.
Catalog excerpts
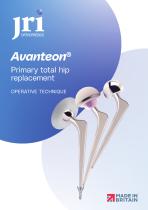
Avanteon®Primary total hip replacement OPERATIVE TECHNIQUE
Open the catalog to page 1
Femoral Head Resection 3 Femoral Canal Preparation 8 Cement Plug Insertion 11 Femoral Stem Implantation 12
Open the catalog to page 2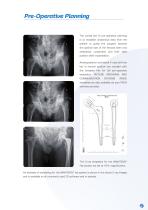
Pre-Operative Planning The overall aim of pre-operative planning is to establish anatomical data from the patient to guide the surgeon towards the optimal size of the femoral stem and acetabular component and their ideal position after implantation. Anteroposterior and lateral X-rays with the hip in neutral position are overlaid with the template film for full pre-operative evaluation. ARCHIVING SYSTEMS templates are also available via your PACS software provider. The X-ray templates for the AVANTEON® Hip system are set at 115% magnification. An example of templating for the AVANTEON® hip system...
Open the catalog to page 3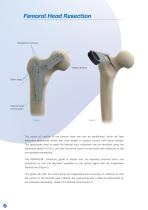
Femoral Head Resection Resection cutouts Head centres Stem sizes Central axis of the stem The centre of rotation of the femoral head can also be established, which will help determine appropriate offset and neck length to achieve correct soft tissue tension. The appropriate level to make the femoral neck osteotomy can be identified using the osteotomy guide (007027), and this should be used in conjunction with reference to the pre-operative templating. The AVANTEON® osteotomy guide is placed over the exposed proximal femur and positioned so that the alignment guideline on the device aligns with...
Open the catalog to page 4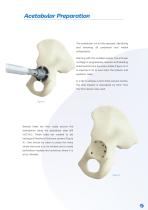
Acetabular Preparation The acetabular rim is fully exposed, identifying and osteophytes. Starting with the smallest reamer, the articular cartilage is progressively reamed until bleeding subchondral bone becomes visible (Figure 3). It is important not to over-ream the anterior and posterior walls. In order to achieve a 3mm thick cement mantle, the final implant is downsized by 6mm from the final reamer size used. Several holes are then made around the acetabulum using the acetabular step drill (007042). These holes are created to aid keying and fixation of the bone cement (Figure 4). Care should...
Open the catalog to page 5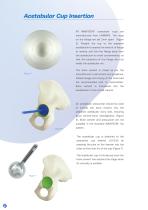
manufactured from UHMWPE. The rings on the flange are set 2mm apart (Figure 5). Present the cup to the prepared acetabulum to assess the amount of flange to remove, and trim the flange away from the acetabulum to avoid contamination, so that the periphery of the flange sits just inside the acetabular rim. The bone cement is mixed as per the Figure 5 manufacturer’s instructions and guidelines. Pulsed lavage and drying of the bone bed are recommended prior to cementation. Bone cement is introduced into the acetabulum in the normal manner. An acetabular pressuriser should be used to intrude the...
Open the catalog to page 6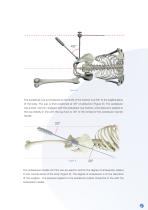
The acetabular cup is introduced so the shaft of the inserter is at 90° to the sagittal plane of the body. The cup is then positioned at 45° of abduction (Figure 8). The acetabular cup pusher (007047) engages with the acetabular cup inserter, and pressure is applied to the cup directly in line with the cup face or 45° to the vertical of the acetabular inserter handle. The anteversion handle (007052) can be used to confirm the degree of anteversion relative to the coronal plane of the body (Figure 9). The degree of anteversion is at the discretion of the surgeon. The pressure applied to the acetabular...
Open the catalog to page 7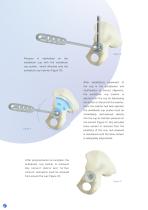
acetabular cup with the acetabular cup pusher, which attaches onto the acetabular cup inserter (Figure 10). the cup in the acetabulum and confirmation of correct alignment, the ejected from the cup by depressing the button on the end of the inserter. Once the inserter has been ejected, the acetabular cup pusher must be immediately into the cup to maintain pressure on the cement (Figure 11). Any extruded Figure 11 bone cement is removed from the periphery of the cup, and pressure is maintained until the bone cement is adequately polymerised. After polymerisation is complete, the acetabular cup...
Open the catalog to page 8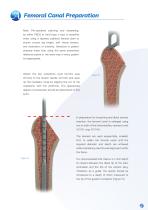
Femoral Canal Preparation Note: Pre-operative planning and templating, by either PACS or hard-copy x-rays is essential when using a tapered, polished femoral stem to ensure correct leg length, soft tissue tension, and restoration of anatomy. Variations in patient anatomy mean that using the same anatomical reference points in the same way in every patient is inappropriate. Attach the box osteotome (small 007033, large 007034) to the broach handle (007035) and open up the medullary canal by aligning the cut of the osteotome with the piriformis. The appropriate degree of anteversion should be determined...
Open the catalog to page 9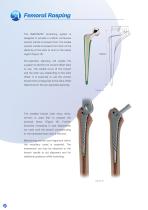
The AVANTEON® broaching system is designed to provide a uniform continuous cement mantle of at least 2mm. The medial cement mantle increases from 2mm at the distal tip of the stem to 4mm in the calcar region (Figure 15). Pre-operative planning will enable the surgeon to identify the correct offset stem to use. The medial curve of the broach and the stem vary depending on the stem offset. It is essential to use the correct broach that corresponds to the stem offset determined in the pre-operative planning. Figure 15 The smallest broach (CDH 36mm offset, 007100) is used first to prepare the broaches...
Open the catalog to page 10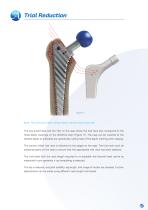
Trial Reduction Note: The CDH and 38mm offset stems use the same trial neck The two small holes and the ‘flat’ on the rasp where the trial neck sits correspond to the three depth markings on the definitive stem (Figure 17). The rasp can be inserted to the desired depth as indicated pre-operatively, taking note of the depth marking when rasping. The correct offset trial neck is attached to the spigot on the rasp. The trial neck must be seated properly on the rasp to ensure that the appropriate trial neck has been selected. The trial head with the neck length required to re-establish the femoral...
Open the catalog to page 11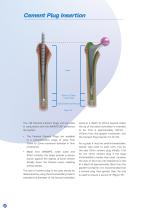
Cement Plug Insertion 10mm to 20mm cement gap Typical distal cement plug Figure 18 The JRI Femoral Cement Plugs can be used in conjunction with the AVANTEON® cemented hip system. • The Femoral Cement Plugs are available in a comprehensive range of sizes from 10mm to 20mm maximum diameter in 1mm increments. • Made from UHMWPE, when sized and fitted correctly the plugs provide a secure barrier against the ingress of bone cement distally down the femoral canal, enabling pressurisation. The size of cement plug to be used should be determined by using the intramedullary trials to estimate the diameter...
Open the catalog to page 12All JRI Orthopaedics catalogs and technical brochures
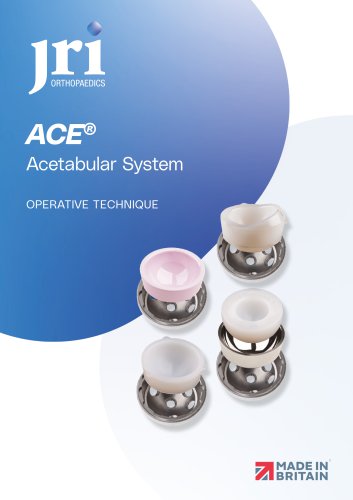 ACE Surgical Technique
24 Pages
 Product Catalogue
8 Pages
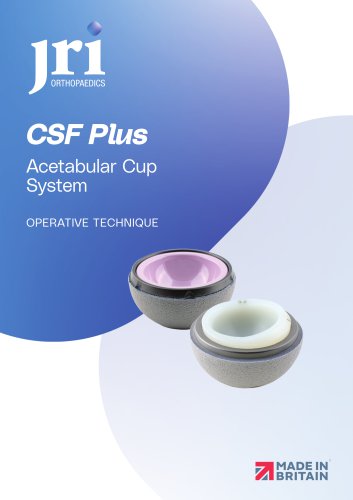 CSF Plus Surgical Technique
20 Pages
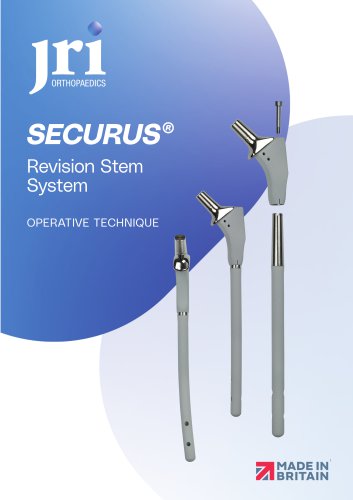 Securus Surgical Technique
40 Pages
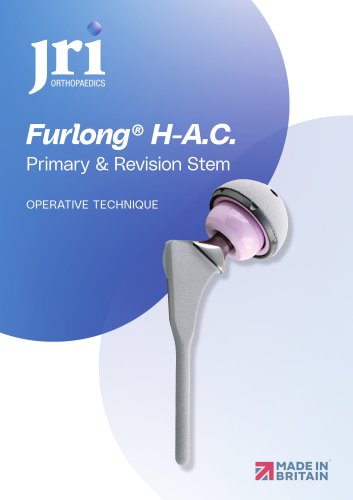 Furlong H-A.C Surgical technique
24 Pages
 Furlong
20 Pages

- Acetabular prosthesis
- Cementless femoral stem
- Cementless acetabular prosthesis
- Hip prosthesis
- Cemented femoral stem
- Femoral head prosthesis
- Primary hip prosthesis
- Revision femoral stem
- Cementless hip prosthesis
- Shoulder prosthesis
- Revision shoulder prosthesis
- Cemented hip prosthesis
- Minimally invasive femoral stem