
- Catalogs
- LifeLike BioTissue Inc.
- The VI Box

The VI Box

The VI Box
- The vi-box includes a blue box cover, main box body, large and small box lids, a power bank with charger wire, a plastic tray for accessories, a vessel inlay, skin-colored foam, black foam, arterial and venous pumps, silicone tubes, a grey bridge part, wire holders, connectors, a pump control unit, and rubber bands.
- Remove the blue cover and slide the lid aside to access the contents.
- Pour 100-200 ml of water into the cavity with the pumps and remove the plastic tray.
- Connect the appropriate connectors to the vessel inlay and fix it on the foam.
- Connect the pump to the control unit and power bank, then start the pump using the white button.
- Red components are for arterial (pulsatile) flow, while blue components are for venous (continuous) flow.
- Ensure all connections are secure and the power bank is charged.
- Remove the used vessel and use the silicone tube to drain remaining water.
- Keep all power components dry to prevent damage.
- Leave the box open to dry before storing.
- If the pump does not run, check the power bank charge and connections.
Catalog excerpts
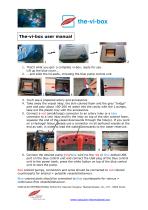
The-vi-box user manual 1. That’s what you get: a complete vi-box, ready for use. Lift up the blue cover…. 2. … and slide the lid aside, including the blue pump control unit 3. You’ll see a prepared artery and accessories 4. Take away the vessel inlay, the skin colored foam and the grey “bridge” part and pour about 100-200 ml water into the cavity with the 2 pumps, take out the plastic tray with the accessories 5. Connect a red (small/large) connector to an artery inlay or a blue connector to a vein inlay and fix the inlay on top of the skin colored foam, squeeze the end of the vessel downwards through the hole(s). If you work on a Hydrogel tissue, please use a connector on all perfused vessels at the end as well, in order to lead the water downwards to the water reservoir. 6 6. Connect the desired pump (red/blue wire) to the red or blue dotted USB port on the blue control unit and connect the USB plug of the blue control unit to the power bank, press the white button on top of the blue control unit to start the pump. Red colored pumps, connectors and wires should be connected to red colored counterparts for arterial = pulsatile vessels/behaviour. Blue colored parts should be connected to blue counterparts for venous = continuous flow vessels/behaviour. VASCULAR INTERNATIONAL School for Vascular Surgery, Stanserstrasse 111, CH – 6064 Kerns
Open the catalog to page 1
7. Move back the larger box lid to close the box (pay attention, that the outgoing wire lies properly in the notch), pull over the blue cover. Now you’re ready to start your procedure/exercise. 8. When you’re finish, take off the used vessel and put the longer silicone tube to a connector and start the pump again to drain the remaining water into an external container. Keep all power parts always dry ! Leave the box open for drying. When dry, put all material back to the box, close the lid and pull over the blue cover to store it until the next use/exercise The power bank, the control unit, as...
Open the catalog to page 2All LifeLike BioTissue Inc. catalogs and technical brochures


- Anatomy model
- Training anatomy model
- Training phantom
- Surgical anatomy model
- Surgical phantom
- Vascular model
- Healthcare training vascular model
- Pad simulator
- Portable simulation unit
- Artery vascular model
- Circulatory system vascular model
- Blood vessels vascular model
- Digestive system model
- Heart anatomy model
- Kit simulator
- Suture simulator
- Surgery vascular model
- General surgery surgical set
- Circulatory system model
- Artery model