- Catalogs
- Mindray North America
- Needle Guide Visualization with ZONARE Ultrasound
Needle Guide Visualization with ZONARE Ultrasound

Needle Guide Visualization with ZONARE Ultrasound
- The ultrasound beam is thin, often less than 1mm, which can hinder visualization at steep angles.
- Hand-eye coordination is crucial.
- System settings for needle visualization differ from those for tissue imaging.
- Proper transducer control is essential for maintaining needle alignment within the sound plane.
- In-plane approach offers full visualization of the needle tip and shaft, allowing for real-time monitoring, but is technically challenging and time-consuming.
- Out-of-plane approach is more conventional but makes it difficult to accurately visualize the needle tip.
- Use specific presets for different applications, such as thyroid or breast presets for neck applications, and abdomen presets for epidural applications.
- B-steer can improve visualization for deep targets at steeper angles.
- Adjust frequency settings to enhance needle visibility.
- If the needle tip location is uncertain, inject a small amount of saline to aid visualization.
- Be cautious of probe pressure as it can distort anatomy.
- Utilize features like "Bx Guide" and be aware of the anisotropic effect, which can affect target visibility.
Catalog excerpts

Needle visualization with ZONARE ultrasound systems
Open the catalog to page 1
This material provides a general overview of ultrasound guided needle imaging and techniques and is not intended to replace formal training or education courses or programs The material presented does not constitute professional medical advice or a complete course of training. No procedure should be performed solely upon the information provided This tutorial is intended as an introduction to needle techniques For more information see “Ultrasound Imaging for Regional Anesthesia: a practical guide”, by Vincent Chan MD. (http://www.usra.ca/ )
Open the catalog to page 2
CHALLENGES TO NEEDLE VISUALIZATION ✴ Ultrasound beam is thin – May be less than 1mm ✴ Poor visualization at steep angles ✴ Hand-eye coordination ✴ System settings for needle visualization may be different than for tissue imaging
Open the catalog to page 3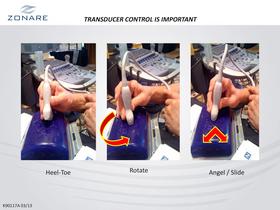
TRANSDUCER CONTROL IS IMPORTANT Heel-Toe Rotate Angel/Slide
Open the catalog to page 5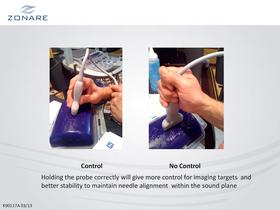
Holding the probe correctly will give more control for imaging targets and better stability to maintain needle alignment within the sound plane K90117A 03/13
Open the catalog to page 6
Good hand – eye co-ordination with a basic understanding of ultrasound physics and how ultrasound portrays anatomy is key The best way to see the needle is with an in plane approach using beam steer The most conventional method is out of plane but be aware that you will not see the advancement of the needle to the target or the extent past the target that the needle tip has gone. Two main points to remember - probe control and practice with patience K90117A 03/13
Open the catalog to page 7
BASIC TECHNIQUES Keep the probe still over the target and the needle in line Keep the needle tip in view at all times
Open the catalog to page 8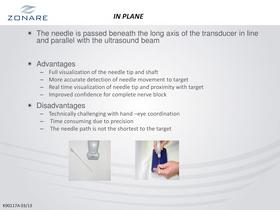
IN PLANE ✴ The needle is passed beneath the long axis of the transducer in line and parallel with the ultrasound beam ✴ Advantages – – – – Full visualization of the needle tip and shaft More accurate detection of needle movement to target Real time visualization of needle tip and proximity with target Improved confidence for complete nerve block ✴ Disadvantages – Technically challenging with hand –eye coordination – Time consuming due to precision – The needle path is not the shortest to the target
Open the catalog to page 9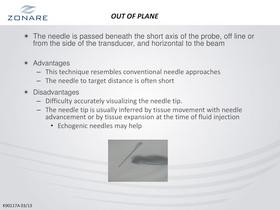
OUT OF PLANE ✴ The needle is passed beneath the short axis of the probe, off line or from the side of the transducer, and horizontal to the beam ✴ Advantages – This technique resembles conventional needle approaches – The needle to target distance is often short ✴ Disadvantages – Difficulty accurately visualizing the needle tip. – The needle tip is usually inferred by tissue movement with needle advancement or by tissue expansion at the time of fluid injection • Echogenic needles may help
Open the catalog to page 10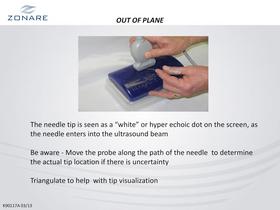
The needle tip is seen as a “white” or hyper echoic dot on the screen, as the needle enters into the ultrasound beam Be aware - Move the probe along the path of the needle to determine the actual tip location if there is uncertainty Triangulate to help with tip visualization K90117A 03/13
Open the catalog to page 11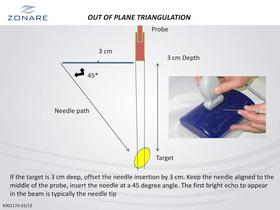
OUT OF PLANE TRIANGULATION Probe 3 cm Needle path Target If the target is 3 cm deep, offset the needle insertion by 3 cm. Keep the needle aligned to the middle of the probe, insert the needle at a 45 degree angle. The first bright echo to appear in the beam is typically the needle tip K90117A 03/13
Open the catalog to page 12
IMAGE OPTIMIZATION
Open the catalog to page 13
PRESET STARTING POINTS ✴ Thyroid, breast or a small parts preset for neck, femoral, or popliteal nerve applications – May also try a vascular venous upper preset for near field optimization ✴ Abdomen general or difficult presets for epidural and back applications ✴ Ensure the system has the latest imaging updates.
Open the catalog to page 14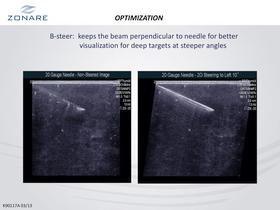
OPTIMIZATION B-steer: keeps the beam perpendicular to needle for better visualization for deep targets at steeper angles
Open the catalog to page 15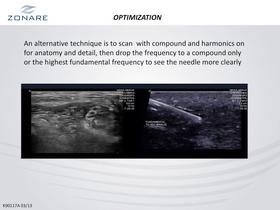
OPTIMIZATION An alternative technique is to scan with compound and harmonics on for anatomy and detail, then drop the frequency to a compound only or the highest fundamental frequency to see the needle more clearly
Open the catalog to page 16
TIPS If the location of the needle tip is not certain, inject a small amount of saline. The hydro-dissection from the saline will help show you the tip location Too much probe pressure will distort anatomy If the needle is lost, stop the advancement and relocate the needle before moving on ✴ Please contact your ZONARE Clinical Technology Consultant for more information
Open the catalog to page 17
Ultrasound - Guided or Assisted • Guided means the doctor watches the needle advance in real time. • Assisted means the target location is assessed via ultrasound prior to using a traditional non ultrasound method
Open the catalog to page 18
Tints – adding a color to the 2D image can in some cases improve the target detail “Bx Guide” key – overlays yellow dots that correspond to the center of the transducer and is helpful in lining up deeper targets using in an out of plane techniques Anisotropic effect – is an artifact to be aware of. Slight angulations of the probe can enhance a target or make it disappear Supraclavicular starting point- is a great way to begin looking for Interscalene nerves if they are not obvious at the scan start. This is a readily seen target and, from there, simply follow that nerve up into the Brachial Plexus...
Open the catalog to page 19All Mindray North America catalogs and technical brochures
 BC-5390
4 Pages
 A8/A9 Brochure
12 Pages
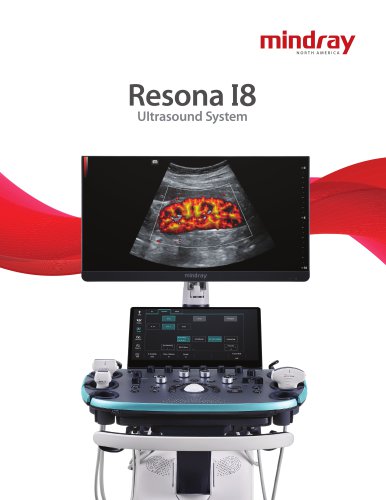 Resona I8 Brochure
4 Pages
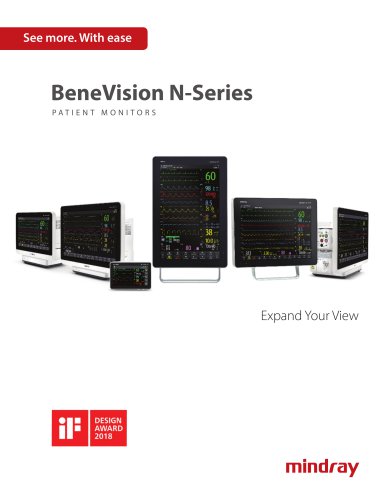 N-Series Family Brochure
12 Pages
Archived catalogs
 Z.One PRO Spec Sheet
29 Pages
 ZS3 Spec Sheet
27 Pages
 Family of Transducers
2 Pages
 Corporate Accounts Brochure
6 Pages
 Pediatric / NICU Brochure
6 Pages
 Vascular Brochure
6 Pages


- Analysis software
- B/W ultrasound system
- Surgical table
- Universal operating table
- Color doppler ultrasound system
- Patient monitor
- Portable ultrasound system
- Multipurpose ultrasound imaging system
- Adjustable height operating table
- Visualization software
- Electric operating table
- Clinical chemistry analyzer
- Surgical table with legrest
- Reporting software
- Convex-array ultrasound system
- Blood pressure patient monitor
- Linear-array ultrasound system
- Automated biochemistry analyzer
- Benchtop biochemistry analyzer