- Catalogs
- OPELAIII Cx
- OPELAIII Instructions Manual
- Company
- Products
- Catalogs
- News & Trends
- Exhibitions
OPELAIII Instructions Manual
1 /32Pages
OPELAIII Instructions Manual
1 /32Pages
Catalog excerpts
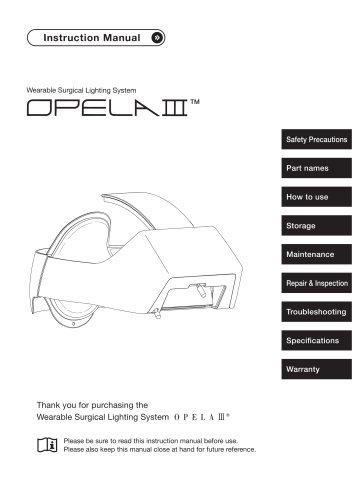
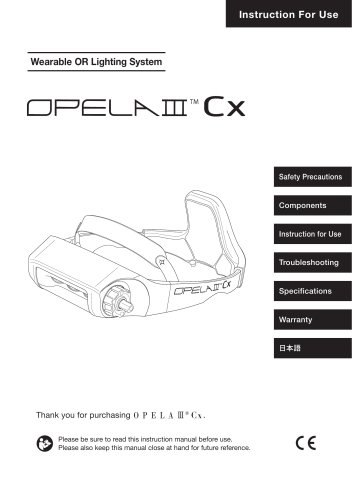
Instruction Manual Wearable Surgical Lighting System TM Safety Precautions Part names Repair & Inspection Thank you for purchasing the Wearable Surgical Lighting System Please be sure to read this instruction manual before use. Please also keep this manual close at hand for future refer
Open the catalog to page 1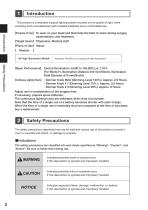
Introduction Safety Precautions -H (High Illumination Model) Introduction This product is a wearable surgical lighting system focused on the quality of light, while providing both moveableness (with installed batteries) and a comfortable feel. [Purpose of Use] To wear on your head and illuminate the field of vision during surgery, examinations, and treatment. [Target Users] Physicians, Medical staff Place of Use] Indoor Models ] Achieves 145,000 Lux in pursuit of high illumination. [Basic Performance] Central Illumination: 6,000 to 145,000 Lux ±10% (For Mode-H, Illumination Distance 400 mm(16inch),...
Open the catalog to page 2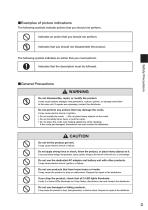
The following symbols indicate actions that you should not perform. The following symbol indicates an action that you must perform. Indicates that the description must be followed. ■General Precautions A WARNING Safety Precautions
Open the catalog to page 3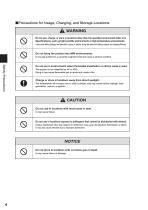
■ Precautions for Usage, Charging, and Storage Locations A WARNING
Open the catalog to page 4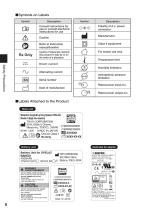
Safety Precautions ■ Labels Attached to the Product Wearable Surgical Lighting System OPELAH Model-H (High illumination) TAIYO CORPORATION MAI 30-9, Shiba 5 Chome, Minato-ku, TOKYO, JAPAN 9V= 7.2W MADE IN JAPAN ArTM /JV Device Class 1 □i]©RxOnly IsnI xxxxxx (^0 xxxx-xx-xx lottery unit ] RAwnrv>Unit f°r °PELAm mJ TAIYO CORPORATION 4500mAh 30-9, Shiba 5 Chome, SWITCHING POWER SUPPLY MODEL NO.:MPU32B-105 IN PUT: 100-240V 47-63Hz A Efficiency Level © Indoor use only RISK OF ELECTRIC SHOCK
Open the catalog to page 8
This product includes the following items. ■Standard Package / Protected Special Package This product uses "COOLMAX®" as interior fabric which allows sweat to evaporate for lasting comfort. • COOLMAX® exhibits superior moisture control by allowing perspiration to escape, while letting air enter, keeping the fabric cool and dry, effectively lowering surface temperature. • COOLMAX® is soft, lightweight with natural texture and excellent air permeability. ^ COOLMAX® is a registered trademark of INVISTA.
Open the catalog to page 9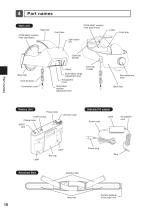
Part names Main unit Heat sink COOLMAX® comfort inner pad (Front) Front face COOLMAX® comfort inner pad (Back) Light source unit Cord clip (Small) Cord clip (Large) Illumination range adjustment lever Part names Transparent cover Cord tie band Connection cord Battery Unit Size adjustment knob Illumination position adjustment lever Back face Power lamp Dimmer knob OUTPUT jack Charge lamp Power cord INPUT jack Power plug Belt clip Label Attached Belt Assistive belt Main belt Surface fastener of the main unit
Open the catalog to page 10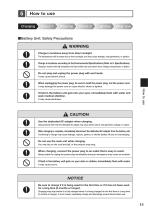
■Battery Unit: Safety Precautions A WARNING
Open the catalog to page 11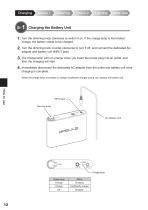
Charging the Battery Unit 1. Turn the dimming knob clockwise to switch it on. If the charge lamp is illuminated orange, the battery needs to be charged. 2. Turn the dimming knob counter-clockwise to turn it off, and connect the dedicated AC adapter and battery unit (INPUT jack). 3. The charge lamp will turn orange when you insert the power plug into an outlet, and then the charging will start. 4. Immediately disconnect the dedicated AC adapter from the outlet and battery unit once charging is complete. *When the charge lamp illuminates in orange (insufficient charge) during use, replace the battery...
Open the catalog to page 12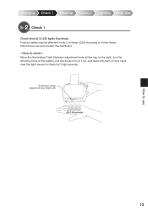
Check that all 3 LED lights illuminate. Product safety may be affected if only 2 or fewer LEDs illuminate or if they flicker. Discontinue use and contact the distributor. <How to check> Move the Illumination Field Diameter adjustment lever all the way to the right, turn the dimming knob of the battery unit clockwise to turn it on, and place the palm of your hand near the light source to check for 3 light sources. Illumination range adjustment lever (right end)
Open the catalog to page 13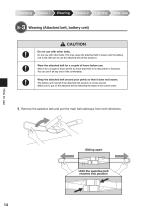
Wearing (Attached belt, battery unit) A CAUTION 1. Remove the assistive belt and pull the main belt sideways from both directions.
Open the catalog to page 14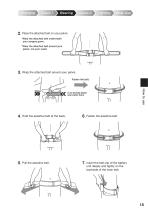
2. Place the attached belt on your pelvis. *Wear the attached belt underneath your surgery gown. *Wear the attached belt around your pelvis, not your waist. 3. Wrap the attached belt around your pelvis. Fasten the belt. 4. Hold the assistive belt at the back. 6. Fasten the assistive belt. 5. Pull the assistive belt. 7. Insert the belt clip of the battery 5 cm (2 inch) below your pelvic bone unit deeply and tightly on the backside of the main belt.
Open the catalog to page 15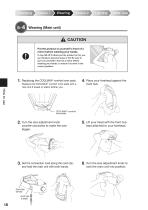
Wearing (Main unit) CAUTION Put the product on yourself in front of a mirror before washing your hands. It may fall off if others put the product on for you as it tends to become loose or tilt. Be sure to put it on yourself in front of a mirror before washing your hands, to ensure it is worn in the correct position. 1. Replacing the COOLMAX® comfort inner pads Replace the COOLMAX® comfort inner pads with a new one if sweat or stains bother you. 4. Place your forehead against the front hub. How to use COOLMAX® comfort inner pads 2. Turn the size adjustment knob 5. Lift your head with the front...
Open the catalog to page 16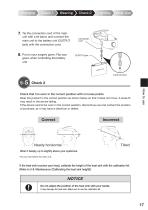
7. Tie the connection cord of the main unit with a tie band, and connect the main unit to the battery unit (OUTPUT jack) with the connection cord. 8. Put on your surgery gown. Flip your gown when controlling the battery unit. Check 2 Check that it is worn in the correct position with no loose points. Wear the product in the correct position as shown below so that it does not move. A loose fit may result in the device falling. If the device cannot be worn in the correct position, discontinue use and contact the location of purchase, as it may have a distortion or defect. Correct Incorrect Nearly...
Open the catalog to page 17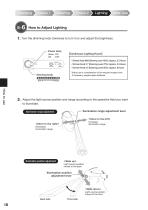
1. Turn the dimming knob clockwise to turn it on and adjust the brightness. Power lamp Green: ON Off : OFF 【Continuous Lighting Hours】 ・Dimmer Knob MAX (Dimming Level 100%): Approx. 2.5 Hours ・Dimmer Knob # 7 (Dimming Level 70%): Approx. 3.5 Hours ・Dimmer Knob # 5 (Dimming Level 50%): Approx. 6 Hours *Adjust use in consideration of the required surgery time. If necessary, prepare spare batteries. Adjust the light source position and range according to the operative field you want to illuminate. Illumination range adjustment lever Illumination range adjustment <Move to the left> Increases illumination...
Open the catalog to page 18All OPELAIII Cx catalogs and technical brochures
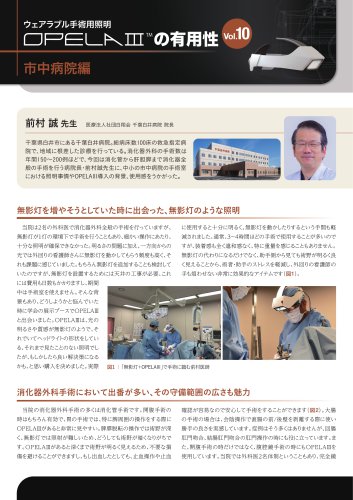 OPELAⅢの有用性vol10市中病院編
2 Pages
 OPELAⅢの有用性vol9美容外科領域
2 Pages
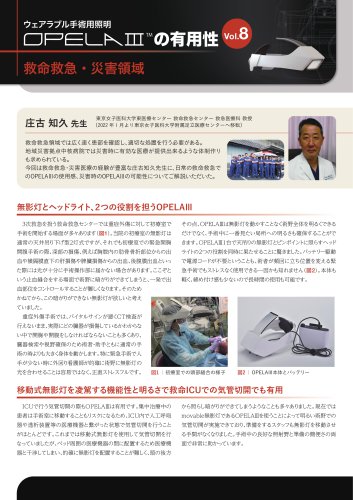 OPELAⅢの有用性vol8救命救急・災害領域
2 Pages
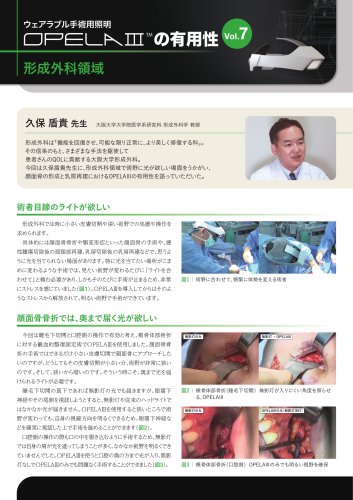 OPELAⅢの有用性vol7形成外科領域
2 Pages
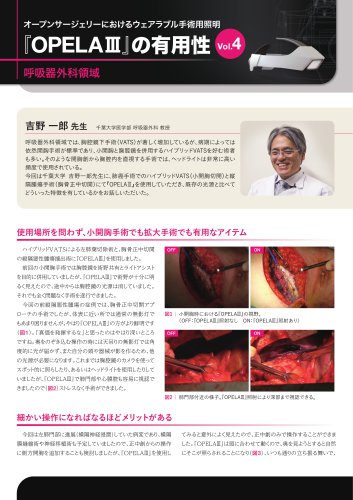 OPELAⅢの有用性vol4呼吸器外科領域
2 Pages
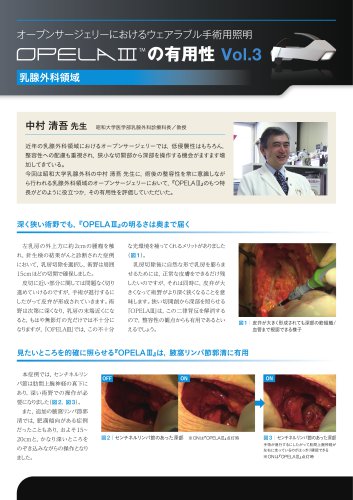 OPELAⅢの有用性vol3乳腺外科領域
2 Pages
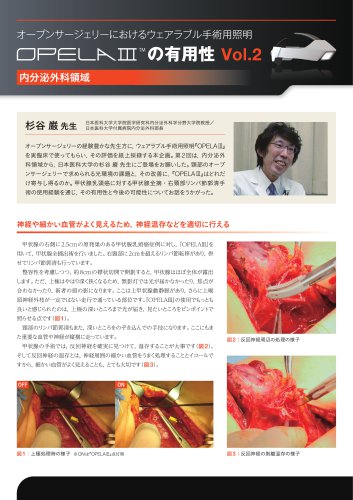 OPELAⅢの有用性vol2内分泌外科領域
2 Pages
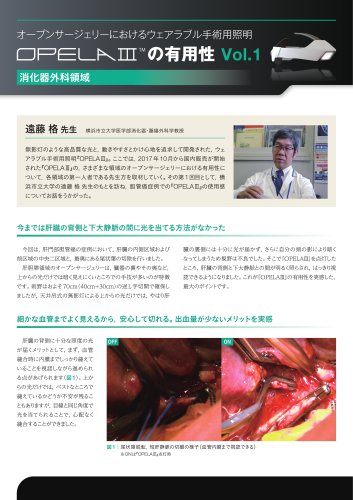 OPELAⅢの有用性vol1消化器外科領域
2 Pages
 OPELAⅢ_Catalog_EN
2 Pages
 OPELAIII Cx Instructions Manual
48 Pages