- Catalogs
- Otopet USA
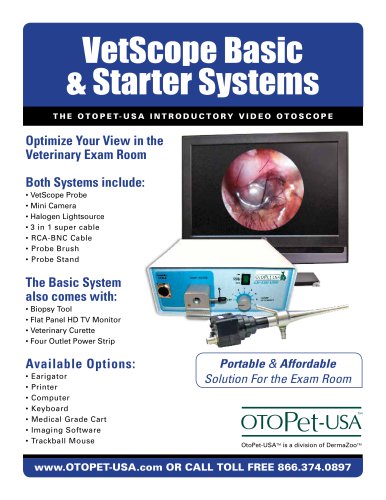
- VetScope
VetScope
VetScope
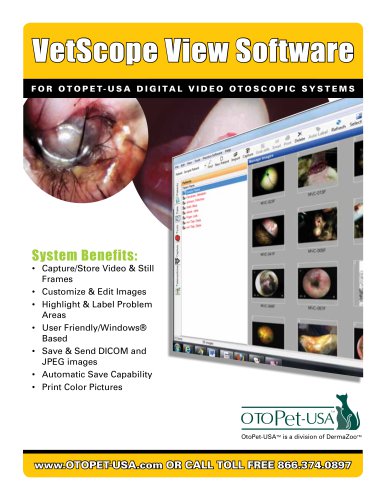
The OtoPet-USA VetScopeView Software is tailored for veterinary practices to manage patient data and images. It offers functionalities for data management, image capture, and organizing patient records.
The software features a Data Tab for managing current patient data and images. Users can back up data to CDs, create new patient records, and organize images into subfolders. It supports importing data from AVImark and provides options for emailing images.
Images and videos can be captured using the VetScope device, with support for still and video capture. The software allows for thumbnail expansion for better previews and simultaneous viewing of multiple images through the Multi View feature.
Users can set preferences for email configurations, external program paths, and image library management. Customization options include image paths and doctor information. Tools available include image labeling, brightness and contrast adjustment, and digital ink for annotations.
Images and patient lists can be printed with customizable printer and page settings. Navigation is facilitated by Previous/Next buttons, and a Refresh button updates the view after changes.
- Data backup and patient record management
- Image and video capture with VetScope
- Multi View for simultaneous image viewing
- Customizable preferences for email and external programs
- Tools for image annotation and adjustment
Users can adjust image brightness and contrast using slider bars, with changes saved upon clicking 'Apply'.
The software allows undoing or redoing image changes. The 'Reset' button clears changes, 'Save' retains the original image, and 'Save As' creates a separate version to maintain diagnostic integrity.
Integration requires configuring paths to AVImark and Photos folders. Images can be sent to AVImark by selecting patient images and using the Practice Software/AVImark option, appearing under 'Import' in AVImark.
To export images to DVM Manager, users must open the patient file in DVM Manager, select the correct file in VetScopeView, choose images, and use the 'Export' function.
OtoPet-USA, a division of DermaZoo, is located at 8909 Iverleigh Court, Potomac, MD 20854. Contact details include phone numbers and an email address.
Catalog excerpts
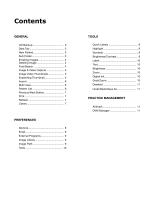
Contents General
Open the catalog to page 2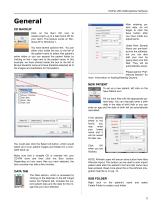
OtoPet-USA VetScopeView Software After entering patient data, do not forget to click the Save button after you have made any adjustments. CD Backup Click on the Burn CD icon to create a back-up or a take home CD for your client. This feature works on Windows XP or Windows 7. Under View: Several Views are pre-loaded into the software, but you can also add your own by typing them into this field. They will be automatically saved. You have several options here. You can either click inside the box to the left of the patient name to select that patient’s entire folder or you can expand the patient...
Open the catalog to page 3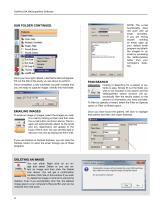
OtoPet-USA VetScopeView Software !ieate Folds Once you have right clicked, a Set Name field will appear. Fill out the title of the study you are about to perform. Once completed, a new subfolder has been created and you are ready to capture images directly into that folder. EMAILING IMAGES To email an image or images, select the images you wish to e-mail by clicking on them and then click the e-mail button as shown above. The im- ages will automatically attach to the email and any data/history will appear in the body of the e-mail. You can edit this data or add your own text by typing into the...
Open the catalog to page 4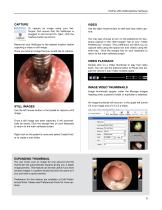
OtoPet-USA VetScopeView Software Capture To capture an image using your VetScope, first ensure that the VetScope is plugged in and turned On. Next, click the Capture button as shown. Maneuver your VetScope to the desired location before capturing a video or still image. Once you have an image that you would like to capture: VIDEO Use the right mouse button to start and stop video capture. You may also choose to turn on the preference for keyboard capture in the “Still Images” tab of your “Video Preferences” window. This preference will allow you to capture stills using the space bar and videos...
Open the catalog to page 5
OtoPet-USA VetScopeView Software You can import images from external sources, such as your digital camera or other imaging devices. Simply click on the File drop-down menu and then "Im- port Images" and then browse to the desired file you MULTI VIEW The software allows you to open and view multiple im- ages at one time. Select the images you wish to open, you can choose two, three or four images, and then click the Multi View button. Images are selected by left clicking and dragging over the images or by holding down on CTRL and then click- ing on each image you wish to select. The images you...
Open the catalog to page 6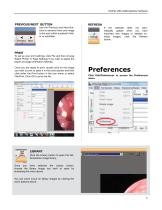
OtoPet-USA VetScopeView Software PREVIOUS/NEXT BUTTON tons to advance from one image to the next within a patient's fold- Previous Next To set up your print settings, click File and then choose Select Printer or Page Settings if you wish to adjust the paper and page orientation settings. Once you are ready to print, double click on the image you wish to print to open it in the tools section and then click either the Print button in the icon menu or select File/Print. Click OK to print the file. If the software does not auto- matically update when you have imported new images or deleted ex- isting...
Open the catalog to page 7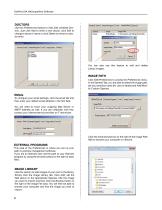
OtoPet-USA VetScopeView Software Use this Preferences feature to Add, Edit orDelete Doc- tors. Just click Add to enter a new doctor, click Edit to change a doctor's name or click Delete to remove a doc- Eewrij End ] Exlsmd Fiopami | Toot Im^Lhay j [iKtl]l | You can also use this feature to edit and delete Library images. IMAGE PATH Click Edit/Preferences to access the Preferences menu. In the General Tab, you are able to select the image path, set your practice name (for use on labels) and Add/Mod- To configure your email settings, click the email tab and then enter your default email address...
Open the catalog to page 8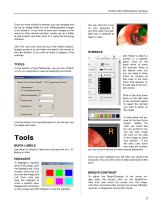
OtoPet-USA VetScopeView Software Once you have clicked to browse, you can navigate and set up an image folder for your VetScopeView images to be saved in. If you wish to save your images on the server or other network location, simply set up a folder at that location and then point to it using this browsing interface. You can click the C key on your keyboard at any time when the highlight tool is selected to select a color. Click OK once you have set your new folder location. Images saved to an old folder will need to be moved to the new location if you wish for them to appear in the software....
Open the catalog to page 9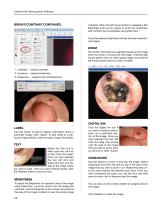
OtoPet-USA VetScopeView Software bright/contrast continued. if desired. When the left mouse button is released a Set Brightness pop-up box opens in which the brightness and contrast may be adjusted using slider bars. Once the desired brightness/contrast has been reached, click Apply. Zoom This button will produce a magnified square on the image when the cursor is moved over the image. Hold the right mouse button down to make square larger, and hold the left mouse button down to make it smaller. 1. Left/right — adjusts contrast 2. Up/down — adjusts brightness 3. Diagonally — adjusts both simultaneously...
Open the catalog to page 10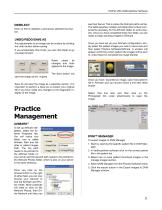
OtoPet-USA VetScopeView Software Click on this to deselect a previously selected tool but- Any adjustments to an image can be undone by clicking the Undo button before saving. If you accidentally click Undo, you can click Redo to go The Save button will save the image as the original. Save As will save the image as a separate version. It is important to perform a Save As to protect your original file if you have made any changes to the diagnostic in- other is called Images your server and the second path needs to be pointed to the AVImark Photos folder, which is also on your server Avimsik Path:...
Open the catalog to page 11
OtoPet-USA VetScopeView Software OtoPet-USA is a division of DermaZooTM 8909 Iverleigh Court, Potomac, MD 20854 Office: 301-365-0192 • Toll Free: 866-374-0897 Fax: 301-983-2369 • Email: [email protected]
Open the catalog to page 12All Otopet USA catalogs and technical brochures
 Basic & Starter Systems
1 Page
 Full System
1 Page
 HD Camera
1 Page
 VetScope View Software
1 Page
 VetScope System
1 Page
 The Earigator
1 Page

- Visualization software
- Radiology software
- Acquisition software
- Veterinary endoscope
- Sharing software
- Veterinary software
- Fluid management system
- Endoscopy fluid management system
- Archiving software
- Veterinary otoscope
- Veterinary endoscope with speculum
- Irrigation + suction fluid management system
- Veterinary otoscope with speculum
- Video veterinary otoscope