
- Catalogs
- Rifton Equipment LLC
- HTS Quick Reference Guide

HTS Quick Reference Guide
HTS Quick Reference Guide
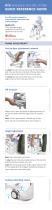
- Seat Attachment/Removal: Align white hooks at the back of the seat with the base frame slots. Use blue triggers to remove.
- Tilt-in-Space: Adjust by squeezing the blue trigger on the right back extension. Available on select frames.
- Height Adjustment: Raise by pulling up the seat; lower by squeezing blue triggers on support columns.
- Casters: Lock and unlock as needed.
- Backrest Angle: Adjust using blue triggers on both sides.
- Seat Depth: Adjust using blue triggers; slide seat forward or backward.
- Backrest Attachment/Removal: Align white markings and insert or remove.
- Seat Belt: Attach by sliding white ends into slots; adjust for safety.
- Armrests: Press down to attach; use blue button to remove.
- Headrest: Insert/remove using blue button; adjust with white knobs.
- Laterals: Slide into groove; adjust with white knob.
- Chest Strap: Thread onto laterals; use with seatbelt.
- Butterfly Harness: Clip into backrest buckles; replace seatbelt section.
- Anterior Support/Tray: Adjust using blue trigger; six position options.
- Hip Guides: Thread armrest through; adjust width with slots.
- Footboard: Adjust height and angle with blue buttons and triggers.
- Abductor/Deflectors: Attach/remove using indicated levers.
- Calf Rest: Thread around footboard support; adjust with webbing.
- Ankle Straps: Secure around ankle; adjust for snug fit.
- Tub Base Attachment: Align hooks with sockets; use blue triggers to remove.
- Portability Kit: Includes carry bag for frame; seat and backrest can be fitted for transfer.
Catalog excerpts
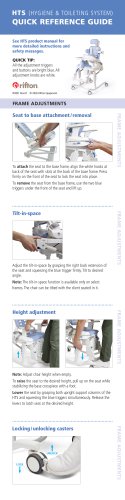
HTS (HYGIENE & TOILETING SYSTEM) QUICK REFERENCE GUIDE See HTS product manual for more detailed instructions and safety messages. QUICK TIP: All the adjustment triggers and buttons are bright blue. All adjustment knobs are white. FRAME ADJUSTMENTS To attach the seat to the base frame, align the white hooks at back of the seat with slots at the back of the base frame. Press firmly on the front of the seat to lock the seat into place. FRAME ADJUSTMENTS Seat to base attachment / removal To remove the seat from the base frame, use the two blue triggers under the front of the seat and lift up. Adjust the tilt-in-space by grasping the right back extension of the seat and squeezing the blue trigger firmly. Tilt to desired angle. FRAME ADJUSTMENTS Note: The tilt-in-space function is available only on select frames. The chair can be tilted with the client seated in it. FRAME ADJUSTMENTS Height adjustment Note: Adjust chair height when empty. To raise the seat to the desired height, pull up on the seat while stabilizing the base crosspiece with a foot. Lower the seat by grasping both upright support columns of the HTS and squeezing the blue triggers simultaneously. Release the levers to latch seat at the desired height. FRAME ADJUSTMENTS Locking / unlocking casters
Open the catalog to page 1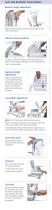
SEAT AND BACKREST ADJUSTMENTS Backrest angle adjustment Adjust the backrest angle using the two blue triggers on both sides of the backrest. Attach / remove backrest To attach or remove the backrest, tilt the backrest forward to align the white markings indicated on the round moldings. Then insert or remove backrest. Backrest height adjustment Adjust the backrest height to user shoulder height by removing four screws with the wrench provided, sliding backrest to the desired position and reinserting the four screws. Seat depth adjustment Note: The HTS has four seat depth adjustment options. Adjust...
Open the catalog to page 2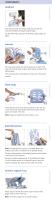
COMPONENTS COMPONENTS Press the blue button at the back of the chair to insert and remove the headrest and adjust headrest height. Use the white knobs at the back of headrest to adjust angle and depth. The swing-away laterals slide into the groove at the back of the chair. Use the white knob to adjust height, depth and angle of the lateral support. Press the blue button on the lateral to swing it out of the way for transfers. Chest strap Thread the loop of the chest strap onto laterals so the strap runs on the interior side of the laterals. Reinsert the laterals into the groove at the back of...
Open the catalog to page 3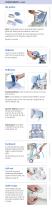
COMPONENTS, cont. Hip guides Note: The hip guides come in right and left sides. Longer hip guides with thicker pads are available on select sizes. Thread the armrest through the correct hip guide. Use the two available slots on the hip guide to adjust for width. Abductor Attach or remove the abductor under the front seat pad using the lever indicated. Deflectors Standard deflector: Insert the tab into the grooves in the seat pad, as shown. Note: Use the abductor to hold the standard deflector in place. The groove inside the front of the seat pad is designed for use with the deflector only. Dynamic...
Open the catalog to page 4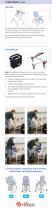
COMPONENTS, cont. COMPONENTS To attach the seat to tub base, align the white hooks at back of the seat with sockets at the back of the tub base frame. Press firmly on the front of the seat to lock the seat into place. To remove the seat from the base frame, use the two blue triggers under the front of the seat and lift up. Note: The portability kit comes with a carry bag for the frame. Seat and backrest are not included, but can be fitted into the bag as well for convenient transfer. 1. Connect the square tubing of the two sides of the base. Place the base over the toilet. 2. First attach the...
Open the catalog to page 5All Rifton Equipment LLC catalogs and technical brochures
 Adaptive Tricycle Brochure
8 Pages
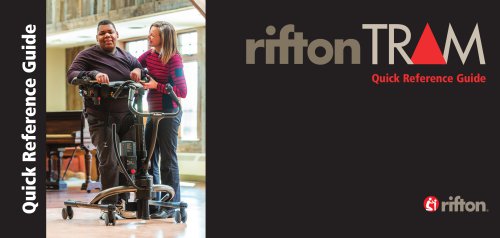 TRAM Quick Reference Guide
14 Pages
 Adaptive Desk Brochure
6 Pages
- Chair with armrests
- Shower chair
- Medical chair
- Patient chair
- Shower chair with backrest
- Reclining patient chair
- Grab bar
- Walking aid
- Manual medical chair
- Manual patient chair
- Commode chair
- Patient chair on casters
- Shower chair with footrest
- Height-adjustable mobility walker
- Rectangular desk
- Height-adjustable shower chair
- Patient chair with adjustable backrest
- Handisport
- Stander
- Commode chair with bucket