
- Catalogs
- Seiler Medical
- Alpha slim 3


Alpha slim 3

Alpha slim 3
The Alpha Slim 3 ENT Operating Microscope by Seiler Instrument & Mfg. Co., Inc. is designed for enhanced image magnification with comfort and maneuverability. With over 70 years of experience, the company ensures high-quality, reliable devices adhering to medical and ISO standards. The product offers a lifetime warranty on optics and mechanics in the U.S. and a 3-year international warranty.
This microscope provides surgeons with a magnified, illuminated view of small structures in the surgical area, intended for use by authorized and trained personnel only.
Key components include the pantographic arm, optic pod, binocular head, and LED illumination system, each contributing to the microscope's performance.
Carefully unpack and inspect components for damage. Follow instructions for installing the pantographic arm and optic pod, ensuring secure connections and adjusting arm tension as needed.
Operate by switching on the LED light source and adjusting illumination intensity. Turn off the microscope when idle to prevent wear.
Adjust interpupillary distance for a single field of view. Parfocalizing maintains clarity across magnification levels, and a color filter lever allows light filtering adjustments.
Regular cleaning is essential, especially for the objective lens. Use alcohol or ether with a cotton swab for cleaning, and protect the lens with an objective protector. Clean external surfaces with window cleaner and keep vents dust-free.
Address common issues like power failures and LED illumination problems by ensuring secure power connections and checking fuses.
Specifications include mechanical, electrical, and optical details. The working distance ranges from 175 mm to 400 mm, with a microfocus vertical adjustment range of 13 mm. The microscope weighs 73.48 kg and is packaged in three boxes. Power supply operates on 96-264 VAC, with auxiliary power at 12 VDC. Magnification levels range from 1.3x to 48.5x, with LED illumination providing 120,000-150,000 LUX and a lifespan of over 30,000 hours.
Detailed procedures for replacing fuses and mounting the microscope are provided. Fuse replacement involves disconnecting the device, measuring resistance, and replacing with 250VAC 1.5A rated fuses. Mounting instructions cover floor, wall, and ceiling installations.
The equipment complies with safety and regulatory standards, including IEC 60601-1:2005 and IEC 62471:2006. It is classified as Class I, Type B equipment and meets EMC standards CISPR 11, Group 1 Class B, and IEC 61000-4-3.
Ensure proper air circulation to prevent overheating and use appropriate anchors for mounting. Consult a professional contractor for mounting to ensure structural integrity.
Tables provide measurements for eyepiece and objective lens combinations, showing magnification fields and illuminated fields. The mounting location chart suggests optimal zones for microscope placement.
Instructions for mounting a microscope to the ceiling include measurements for the mounting structure and necessary entry holes for power and HDMI. Ensure a solid coupling between the mounting surface and the assembly.
Assemble the mounting plate, insert the mounting post, and secure it with set screws. Instructions for leveling and securing the mounting post, installing the ceiling flange assembly, and adjusting rotation tension are provided.
Dimensions of various components, including base length, caster size, base width, and vertical movement, are listed in inches and millimeters.
Symbols indicating caution, hot surfaces, shock hazards, and intense light are explained. Warnings about exposure to bright light, fire hazards, overheating, and electrical currents are included.
Only authorized personnel should service and repair defective equipment. Procedures for fuse replacement and warranty information are outlined.
Recycling is encouraged, and instructions for returning products at the end of their life are provided. The return policy includes obtaining a Return Material Authorization (RMA) number before shipping products back.
Space is provided for recording the model number, serial number, purchase date, and contact information for Seiler Instrument and Manufacturing Co., Inc.
Seiler Instrument Company offers a Limited Lifetime Warranty for its microscopes, covering defects in materials and workmanship under normal use. This warranty is non-transferable and applies only to the original purchaser.
The warranty includes mechanics, optics, and hardware components. Electronic and electrical components have a three-year warranty, and consumables like lamps and fiber-optic cables are excluded.
The warranty is void if the product is misused, mishandled, or repaired by unauthorized personnel. It does not cover damages from natural disasters.
To claim warranty service, the purchaser must ship the product to SIC's facility in St. Louis, MO, at their expense. SIC will cover the cost of repairs and return shipping via the most economical method.
SIC disclaims all other warranties, including merchantability and fitness for a particular purpose. SIC is not liable for any damages exceeding the purchase price of the product.
Warranty registration must be completed online to activate the warranty.
For warranty service, contact SIC at 1-800-489-2282 x347 or via email at [email protected].
Catalog excerpts

Alpha slim 3 ENT OPERATING MICROSCOPE USER’S MANUAL Including installation instructions for all mounting options This document is property of Seiler Instrument & Mfg. Co., Inc. No part of this manual should be reproduced or transmitted without the expressed written consent being obtained. All the figures and images appearing in this manual are for illustration purposes only and may vary according to the version of the device purchased. The information contained in this manual is subject to change without notice. Please contact Seiler whenever additional information is needed. This device is restricted to the sale and the use by authorized and trained personnel. MEDICAL DIVISION
Open the catalog to page 1
Introduction To Our Valued Professionals, On behalf of the Seiler Medical Division, I would like to thank you for your recent purchase. We stand by our products and are thrilled that when choosing one of the most important aspects of your practice, you chose us. We are proud to say that, as a company, we have over 70 years’ experience in the optical field. We have the expertise to provide you with modern, reliable devices that incorporate some of the most advanced optical design tools on the market. This product’s intent is to amplify an image while providing the user with an exceptional level...
Open the catalog to page 3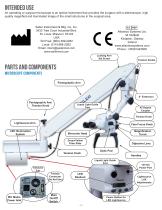
An operating or surgical microscope is an optical instrument that provides the surgeon with a stereoscopic, high quality magnified and illuminated image of the small structures in the surgical area. Seiler Instrument & Mfg. Co, Inc. 3433 Tree Court Industrial Blvd. St. Louis, Missouri 63122 USA Toll Free: (800) 489-2282 Local: (314) 968-2282 Email: [email protected] www.seilerinst.com Atlantico Systems Ltd. 34 Oldfield Kingston, Galway Ireland www.atlanticosystems.com Phone: +35391443609 Locking Arm Set Screw Tension Knobs Parts and Components microscope components Pantographic Arm Pantographic...
Open the catalog to page 4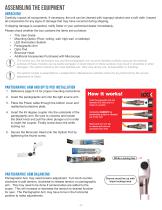
Assembling the equipment Unpacking Carefully unpack all components. If necessary, the unit can be cleaned with isopropyl alcohol and a soft cloth. Inspect all components for any signs of damage that may have occurred during shipping. If shipping damage is suspected, notify Seiler or your authorized dealer immediately. Please check whether the box contains the items set out below: • • • • • • • This User Guide Mounting Option (Floor, ceiling, wall, high wall, or tabletop) LED Illumination System Pantographic Arm Optic Pod Binocular Head Additional Accessories Purchased with Microscope The control...
Open the catalog to page 5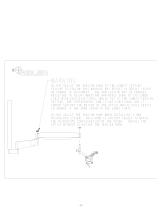
WARN ING: DO NOT ADJUST THE TENSION KNOB TO THE LOWEST SETTING. FAILURE TO FOLLOW THIS WARNING MAY RESULT IN BODILY INJURY OR DAMAGE TO EQUIPMENT. THE ARM CASTING MAY BE DAMAGED RESULTING IN INJURY WHEN THE ARM MOVES DOWN TO ITS LOWER LIMIT WITH EXCESSIVE FORCE. WHILE SET TO THE LOWEST TENSION SETTING. THE PANTOGRAPH 1C ARM IS NOT FUNCTIONAL AND IT CANNOT SUPPORT THE WEIGHT OF THE OPTICS WHICH COULD RESULT IN DAMAGE IE THE ARMS CRASH TO THE LOWER LIMIT. DO NOT ADJUST THE TENSION KNOB WHEN INSTALLING A NEW MICROSCOPE SYSTEM. THIS KNOB IS FACTORY PRESET TO MATCH THE MICROSCOPE CONFIGURATION OR...
Open the catalog to page 6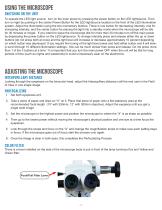
Using the Microscope Switching on the unit To operate the LED light source: turn on the main power by pressing the power button on the LED lightsource. Then turn on light by pushing in the center Power Button for the LED lightsource located on the front of the LED illumination system. Adjust the illumination using the two momentary buttons. There is one button for decreasing intensity, one for increasing intensity, and the center button for placing the light into a standby mode when the microscope will be idle for 30 minutes or longer. If you intend to leave the microscope idle for more than...
Open the catalog to page 7
MAINTENANCE AND HYGIENE CLEANING The objective, placed in front of the field under clinical or surgical treatment, is exposed to blood and topical medicine spots, etc. The spots dim the passage of the light, with loss of brightness in the optical observation. Keep dust from accumulating on the vent on the head by blowing the vents with compressed air. Alcohol or ether applied with a clean cotton swab can be used to remove all smudges. Use a soft CIRCULAR movement. Use your laboratory’s prescribe procedures to remove blood stains or other contaminants from your equipment. If the objective is blotched...
Open the catalog to page 8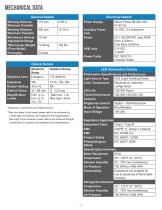
*Depends on eyepieces and Objective lens **Max low refers to the lowest power able to be achieved by combination of eyepiece and objective lens magnification. Max High is the maximum power able to be achieved through combination of eyepiece and objective lens magnification.
Open the catalog to page 9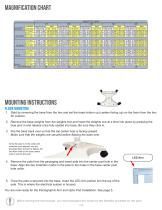
Mounting instructions Floor Mounting 1. Start by removing the base from the box and set the base bottom up (casters facing up) on the foam from the box for cushion. 2. Remove the base weights from the weights box and insert the weights one at a time into place by pressing the blue pins in and release once fully seated into base. Be sure they click in. 3. Flip the base back over so that the top center hole is facing upward. Make sure that the weights are secured before flipping the base over. Once the pole is in the collar and indentions are aligned, use the provided Allen wrench to tighten the...
Open the catalog to page 10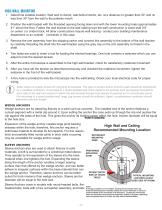
High Wall Mounting 1. Determine suitable location: Wall next to doctor, wall behind doctor, etc. at a distance no greater than 50” and no less than 30” from the wall to the patients mouth 2. Position the wall bracket with the threaded opening acing down and with the lower mounting holes pproximately f a 81” above the floor. Fasten the wall bracket to the wall making sure the wall construction is wood stud (16” on center ) or cinder block. All other constructions require wall bracing - contact your building maintenance department or an outside contractor in this case. 3. Remove the arm assembly...
Open the catalog to page 11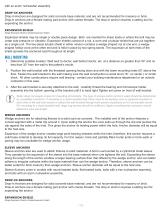
with an acorn nut/washer assembly. DROP-IN ANCHORS Drop-In Anchors are designed for solid concrete base material, and are not recommended for masonry or brick. Drop-in anchors are a female mating part anchor with coarse threads. The drop-in anchor requires a setting tool for expanding the anchor. EXPANSION SHIELD (Single Expansion Shield or Double Expansion Shield) Expansion shields may be single or double piece design. Both are inserted for shear loads or where the bolt may be under side pressure or vibration. Expansion shields consist of a nut, a cone and a tubular shield that are put together...
Open the catalog to page 12All Seiler Medical catalogs and technical brochures
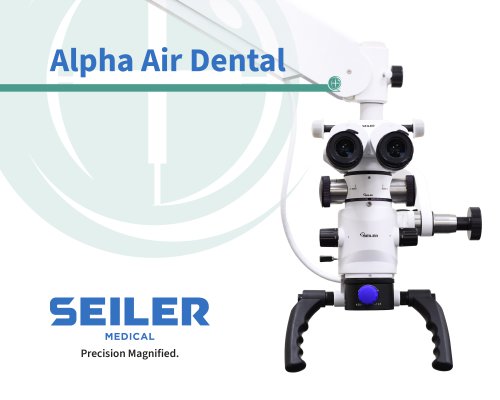 Alpha Air Dental Series
8 Pages
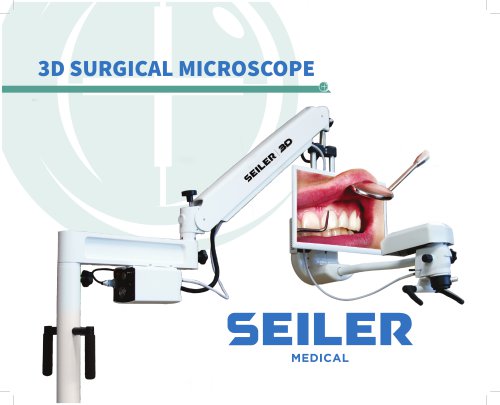 3D Dental Microscope
8 Pages
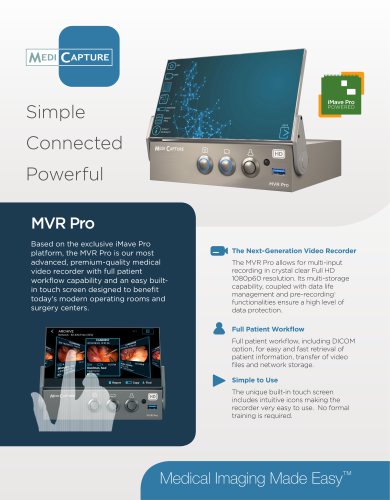 Medicapture MVR Pro PDF
2 Pages
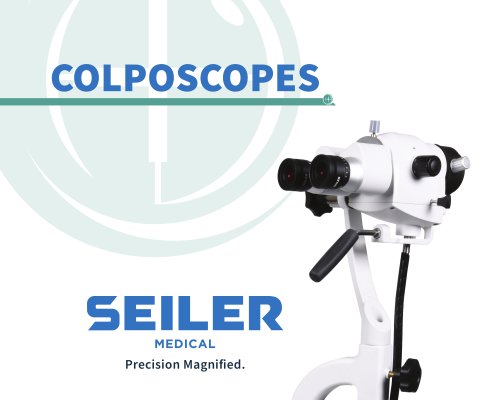 COLPOSCOPES
8 Pages
 MICROSURGEON STOOL
2 Pages
 ENT MICROSCOPES
5 Pages
 alpha slim series
2 Pages
 Loupes
2 Pages
 Medical and ENT Catalog
2 Pages
 ALPHA SLIM ENT MICROSCOPE
2 Pages
 AIR SERIES ENT MICROSCOPE
2 Pages
 AIR SERIES DENTAL MICROSCOPE
2 Pages
 2018 COMPOUND MICROSCOPES
4 Pages
 COMPOUND MICROSCOPES
1 Page
 Alpha Air ENT Spec Sheet
2 Pages
 ALPHA SLIM 6 ENT
2 Pages
 ALPHA SLIM 3 ENT
2 Pages
 Microlux IV
2 Pages


Archived catalogs
 MOH’s-Microlux IV
1 Page
- Compound microscope
- Laboratory microscope
- Desktop microscope
- CMOS camera
- LED microscope
- Surgical loupe
- Glasses-type surgical loupe
- HD camera
- Microscope camera
- Binocular microscope
- Ultra-high resolution camera
- High-resolution microscope
- Medical microscope
- Colposcope
- Phase contrast microscope
- Trolley-mounted colposcope
- Halogen microscope
- Video colposcope