 Website:
Shoprider
Group: Pihsiang Machinery MFG
Catalog excerpts

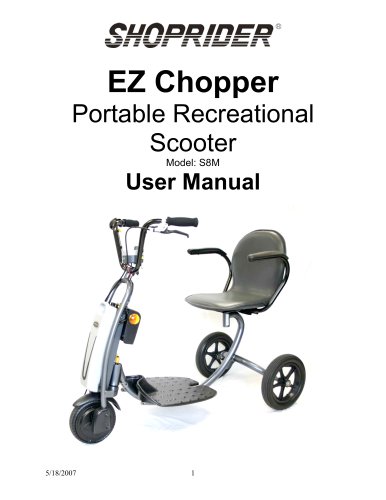
Portable Scooter User Manual
Open the catalog to page 1
Table of Contents INTRODUCTION…………………………………………………………….…………3 3 FEATURE GUIDE…………………………………………………………….………..3 3 SAFETY ADVICE………………………………………………………………….…...4 4-5 EMI WARNING………………………………………………………….…………….. 5-6 ADJUSTMENTS………………………………………………….……………………..7 7-8 SCOOTER TILLER CONTROLS………………………………….…………………..1 9 DRIVE/FREEWHEEL OPERATION…………………………………………………10 10 STARTING TO DRIVE YOUR SCOOTER………………………………………….11 11 EXTRA GUIDELINES IN THE CONTROL OF YOUR SCOOTER……………….12 12 TRANSPORT/STORAGE……………………………………………………………..13 13 BATTERIES AND BATTERY CHARGING………………………………………….14 14...
Open the catalog to page 2
INTRODUCTION Congratulations on your purchase of the Shoprider® Dasher 9 Portable scooter. The Dasher is the ultimate combination of style, comfort and portability. The Dasher comes with three interchangeable colors, giving you the choice of a different color every day, and includes several innovative and convenient features. The Dasher goes with you wherever you go and can be assembled or disassembled in just seconds with wireless quick-connect components. The Dasher is super light and compact, and can be stored in small areas such as the trunk or back seat of your car. The compact...
Open the catalog to page 3
SAFETY ADVICE • • • • • • • • • • • • • • • • • • • • • • • • • • • DO NOT carry passengers. DO NOT exceed inclines over 6 degrees (10% grade). DO NOT turn on steep inclines. DO NOT turn suddenly at high speeds. DO NOT get on or off the scooter unless the brake is on and the scooter is switched off. DO NOT switch off the scooter while the scooter is moving. DO NOT drive the scooter where you can not safely or legally walk. DO NOT drive the scooter on the road, street or highway. DO NOT attempt to drive over curbs greater than 2 inches in height. Doing so could cause your scooter to turn...
Open the catalog to page 4
Shoprider® scooters may be susceptible to electromagnetic interference (EMI), which is a kind of interfering electromagnetic energy (EM) emitted from sources such as radio stations, TV stations, amateur radio (HAM) transmitters, two-way radio, and cellular phones. The interference (from radio wave sources) can cause the scooter to release its brakes, move by itself, or move in unintended directions. It can also permanently damage the scooter’s control system. The sources of radiated EMI can be broadly classified into three types: 1. Hand-held portable transceivers (transmitters-receivers)...
Open the catalog to page 5
WARNINGS 1. Do not operate hand-held transceivers (transmitters-receivers), such as citizens band (CB) radios, or turn ON personal communication devices, such as cellular phones, while the scooter is turned ON. 2. Be aware of nearby transmitters, such as radio or TV stations, and try to avoid coming close to them. 3. If unintended movement or brake release occurs, turn the scooter OFF as soon as it is safe. 4. Be aware that adding accessories or components, or modifying the scooter may make it more susceptible to EMI. NOTE! There is no easy way to evaluate the overall immunity of the...
Open the catalog to page 6
Tiller angle adjustment Tiller Angle Adjustment (Fig 2) At the base of the tiller is a round knob. Turn the knob counterclockwise to loosen the tiller and select the desired tiller angle. Turn the knob clockwise to securely lock the tiller into place. Below the knob there is a lock designed to stop the tiller from turning left or right. **Do not forget to unlock this before driving the scooter** Tiller lock NOTE: For Safety, this lock is designed to break away if the scooter is driven when locked. Tiller angle adjustment knob Folding the Tiller (Fig 3) Fold down the tiller by loosening the...
Open the catalog to page 7
Seat Height Adjustment (Fig 5) Remove seat as described (fig 4). Remove battery pack (refer to disassembly section). Using two 13mm wrenches, remove locking bolt and nut. Adjust seat post up or down to desired position. The seat height can be adjusted to five different positions by inserting the locking bolt in the desired hole. Replace washer and nut and tighten. Replace battery pack and seat. Seat Post Serial Number Serial Number (Fig 5) Serial number is located on the seat post. It is on a white sticker with a barcode. The serial number is 13 alphanumerical digits beginning with a 1....
Open the catalog to page 8
SCOOTER TILLER CONTROLS (FIG 7) Speed Controls The speed control allows you to set a speed between slow (turtle) and fast (rabbit). Battery Level Indicator Gauge Where the needle sits, shows the amount of charge left in your batteries. The amount of charge will only show at its true level when the scooter is in drive. Always charge the batteries completely before beginning out on any journey. Caution – Do not allow the gauge needle to go down completely as complete discharge of the batteries could cause irreversible battery damage. Horn A yellow button on top of the tiller operates the...
Open the catalog to page 9All Shoprider catalogs and technical brochures
-
6Runner 10
28 Pages
-
6Runner 10 Rehab
1 Pages
-
Shoprider HD
2 Pages
-
Streamer Sport Rehab
2 Pages
-
Streamer Sport
2 Pages
-
Smartie
2 Pages
-
Jimmie
2 Pages
-
FPC
2 Pages
-
FeatherLite
2 Pages
-
6 Runner 14
2 Pages
-
6 Runner 10 REHAB
2 Pages
-
6Runner 10 DLX
2 Pages
-
Sprinter XL 4
20 Pages
-
Sunrunner 3
20 Pages
-
Compact Scooters
18 Pages
-
Start 3
20 Pages
-
Flagship
16 Pages
-
Ez Chopper
18 Pages
-
Echo 3
20 Pages
-
Dasher 4
20 Pages
-
Cooper
20 Pages
-
ECHO
2 Pages
-
COOPER
2 Pages
-
DASHER 9
2 Pages
-
6 Runner 10
2 Pages
Archived catalogs
-
DASHER 4 - 2014
2 Pages

