Flagship

Flagship
The Shoprider® Flagship™ scooter is designed for style, comfort, and ease of use. This manual provides essential safety guidelines and operational instructions for a safe and enjoyable experience.
The scooter features a delta tiller control head, headlights, indicators, a reclining captain’s seat, and a windshield wiper.
Key safety tips include not carrying passengers, avoiding steep inclines, and ensuring the scooter is off before mounting or dismounting. Always keep feet on the scooter when moving and consult a doctor if unsure about using the scooter safely.
The scooter may be susceptible to electromagnetic interference (EMI) from devices like radios and cell phones, which can affect its control system. Avoid using such devices near the scooter.
Avoid operating hand-held transceivers while the scooter is on, and be cautious of nearby transmitters. Report any unintended movements to your provider.
Instructions are provided for adjusting the tiller angle, folding the tiller, and adjusting or removing the seat.
The tiller includes speed controls, a battery level indicator, and hand lever controls for forward and reverse motion. The electromagnetic brake ensures smooth stopping.
The drive/freewheel lever allows switching between driving and pushing the scooter. Ensure the lever is in the drive position after pushing.
Before first use, fully charge the batteries. Start with a low speed setting and ensure the area is clear before moving. Use the hand levers to control speed and direction.
When navigating ramps, approach directly and avoid turns. For grass and gravel, follow previous guidelines for optimal performance.
The scooter uses maintenance-free batteries. Charge them fully before first use and regularly thereafter to extend battery life. The built-in charger port is located on the tiller.
Only use the original Shoprider approved charger for indoor use. Avoid exposure to rain or water spray and unplug when not charging.
Keep tires inflated to 30psi to prevent battery strain and ensure optimal performance. Regularly inspect for loose bolts and apply a light coat of multipurpose grease to driving axles and seat post. Check batteries regularly and ensure they are fully charged after each use to avoid performance issues.
If the scooter stops unexpectedly, check the circuit breaker under the seat. Ensure the unit is switched on, the drive mechanism is engaged, all connections are secure, and the battery is fully charged. If issues persist, consult your dealer.
The Flagship™ scooter has dimensions of 63”x 29”x 64”, supports a maximum user weight of 350 lbs, and has a total weight of 328 lbs. It features a 2 Hp motor, a maximum speed of 7 mph, and a climbing angle of 15%. The range per charge is up to 75 miles under optimal conditions.
Quarterly inspections by an authorized provider are required for safety and performance. Maintenance records should be maintained to avoid liability issues.
Refer to the warranty information provided with the unit. The scooter is not intended for individuals with physical limitations that prevent safe operation. Shoprider disclaims responsibility for injuries or damages from improper use.
Catalog excerpts

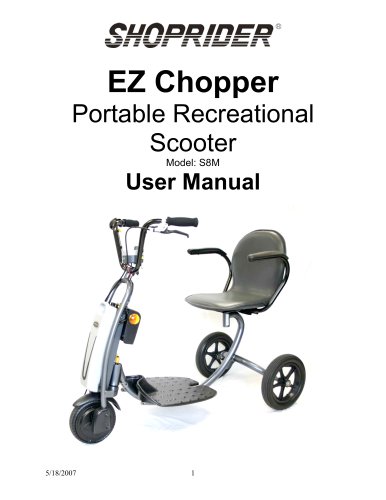
FLAGSHIP Luxury Scooter Model: TE-889XLSN User Manual
Open the catalog to page 1
INTRODUCTION Congratulations on your purchase of the Shoprider® Flagship ™ scooter. The Flagship ™ scooter is the ultimate combination of style, comfort and ease of use. The freedom that the Flagship ™ scooter offers, allows you the liberty of mobility, rain or shine. Direct drive transaxles, automatic electromagnetic brake and easy hand controls give a safe and efficient ride. We know that the Flagship ™ will provide many years of pleasure for you. Please ensure that you read this manual carefully, it is important for your safety that you understand the guidelines and instructions given. Delta...
Open the catalog to page 3
SAFETY ADVICE • • • • • • • • • • • • • • • • • • • • • • • • DO NOT carry passengers. DO NOT exceed inclines over 10 degrees (17% grade). DO NOT turn on steep inclines. DO NOT turn suddenly at high speeds. DO NOT get on or off the scooter unless the brake is on and the scooter is switched off. DO NOT switch off the scooter while the scooter is moving. DO NOT drive the scooter where you can not safely or legally walk. DO NOT attempt to drive over high curbs. Doing so could cause your scooter to turn over, causing injury or damage to the scooter. DO NOT drink or use a mobile phone when driving...
Open the catalog to page 4
EMI WARNING Shoprider® Flagship ™ may be susceptible to electromagnetic interference (EMI), which is a kind of interfering electromagnetic energy (EM) emitted from sources such as radio stations, TV stations, amateur radio (HAM) transmitters, two-way radio, and cellular phones. The interference (from radio wave sources) can cause the scooter to release its brakes, move by itself, or move in unintended directions. It can also permanently damage the scooter’s control system. The sources of radiated EMI can be broadly classified into three types: 1. Hand-held portable transceivers (transmitters-receivers)...
Open the catalog to page 5
WARNINGS 1. Do not operate hand-held transceivers (transmitters-receivers), such as citizens band (CB) radios, or turn ON personal communication devices, such as cellular phones, while the scooter is turned ON. 2. Be aware of nearby transmitters, such as radio or TV stations, and try to avoid coming close to them. 3. If unintended movement or brake release occurs, turn the scooter OFF as soon as it is safe. 4. Be aware that adding accessories or components, or modifying the scooter may make it more susceptible to EMI. NOTE! There is no easy way to evaluate the overall immunity of the scooter....
Open the catalog to page 6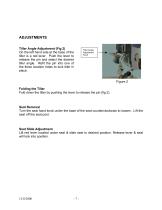
ADJUSTMENTS Tiller Angle Adjustment (Fig 2) On the left hand side at the base of the tiller is a red lever. Push the lever to release the pin and select the desired tiller angle. Refit the pin into one of the three location holes to lock tiller in place. Tiller Angle Adjustment Knob Figure 2 Folding the Tiller Fold down the tiller by pushing the lever to release the pin (fig 2). Seat Removal Turn the seat hand knob under the base of the seat counterclockwise to loosen. Lift the seat off the seat post. Seat Slide Adjustment Lift red lever located under seat & slide seat to desired position. Release...
Open the catalog to page 7
SCOOTER TILLER CONTROLS (FIG 3) Speed Controls The speed control allows you to set a speed between 1 (minimum) and 10 (maximum). There is also a high/low switch giving you a total of 20 speed settings.. Battery Level Indicator The number of red bars shows the amount of charge left in your batteries. The amount of charge will only show at its true level when the scooter is in drive. Speed Controls Battery Level Indicator Indicator Switch Speed High/Low Switch Hazard Lights Lights Finger Lever Control Caution – Do not allow the battery level indicator to go down completely as complete discharge...
Open the catalog to page 8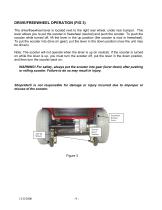
DRIVE/FREEWHEEL OPERATION (FIG 3) The drive/freewheel lever is located next to the right rear wheel, under rear bumper. This lever allows you to put the scooter in freewheel (neutral) and push the scooter. To push the scooter while turned off, lift the lever in the up position (the scooter is now in freewheel). To put the scooter into drive (in gear); put the lever in the down position (now the unit may be driven). Note: The scooter will not operate when the lever is up (in neutral). If the scooter is turned on while the lever is up, you must turn the scooter off, put the lever in the down position,...
Open the catalog to page 9
STARTING TO DRIVE YOUR SCOOTER First Time Use Prior to using your Shoprider® Flagship ™ scooter for the first time, you must charge the batteries fully (refer to Battery Charging Procedures). Charging may take up to 12 hours. Charging the batteries completely prior to first time use will benefit battery efficiency and extend battery life. Failure to do so may cause damage. Getting Started • Select a level area with plenty of space. • Mount the scooter by pushing the arm rest upward out of the way and sliding onto the seat. • Adjust the tiller and seat as previously described. Starting Scooter...
Open the catalog to page 10
EXTRA GUIDELINES IN THE CONTROL OF YOUR SCOOTER Ramps The stability of your scooter is governed by several factors such as the seating position, the angle of the slope and your height and weight. When approaching an incline, do so directly and not at an angle and where ever possible avoid making turns. When going down a ramp or slope keep the speed settings to slow. This will ensure there is a safe controlled descent. When the hand levers are released the scooter will slowly stop. Caution - Do not turn off the control key while the unit is in motion Grass and Gravel Please follow the guidelines...
Open the catalog to page 11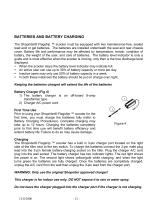
BATTERIES AND BATTERY CHARGING The Shoprider® Flagship ™ scooter must be equipped with two maintenance-free, sealed lead acid or gel batteries. The batteries are installed underneath the seat and rear chassis cover. Battery life and performance may be affected by temperature, terrain, condition of battery, the weight of the user, and care of batteries. The battery level indicator is only a guide and is most effective when the scooter is moving, only then is the true discharge level displayed. • When the scooter stops the battery level indicator may indicate full. • An active user can use up to...
Open the catalog to page 12All Shoprider catalogs and technical brochures
 6Runner 10
28 Pages
 6Runner 10 Rehab
1 Page
 Shoprider HD
2 Pages
 Streamer Sport Rehab
2 Pages
 Streamer Sport
2 Pages
 Smartie
2 Pages
 Jimmie
2 Pages
 FPC
FPC2 Pages
 FeatherLite
2 Pages
 6 Runner 14
2 Pages
 6 Runner 10 REHAB
2 Pages
 6Runner 10 DLX
2 Pages
 Sprinter XL 4
20 Pages
 Sunrunner 3
20 Pages
 Compact Scooters
18 Pages
 Start 3
20 Pages
 Ez Chopper
18 Pages
 Echo 3
20 Pages
 Dasher 9
18 Pages
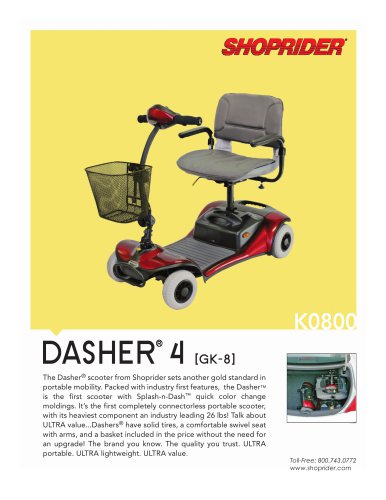
 Dasher 4
20 Pages
 Cooper
20 Pages
 ECHO
ECHO2 Pages
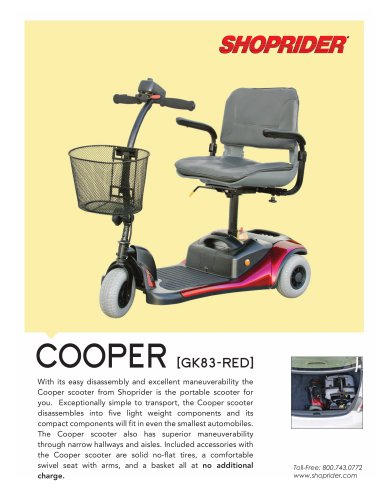 COOPER
2 Pages
 DASHER 9
2 Pages
 6 Runner 10
2 Pages
Archived catalogs
 DASHER 4 - 2014
2 Pages
- Wheelchair
- Outdoor wheelchair
- Indoor wheelchair
- Wheelchair with legrest
- Folding wheelchair
- Mobility scooter
- Electric mobility scooter
- Black wheelchair
- Electric wheelchair
- 4-wheel mobility scooter
- Height-adjustable wheelchair
- Mobility scooter with basket
- Reclining wheelchair
- Wheelchair with headrest
- 3-wheel mobility scooter
- Gray wheelchair
- Blue wheelchair
- Red wheelchair
- Folding mobility scooter
- Mobility scooter with cab