Sunrunner 3

Sunrunner 3
This manual provides guidance for the Sunrunner™ series of scooters, focusing on features and safety measures for individuals with limited mobility.
Includes diagrams of Sunrunner™ models, detailing components like the tiller control head, armrests, swivel seat, and battery charging inlet.
Key precautions include avoiding passengers, steep inclines, sudden turns, wet conditions, and ensuring the brake is engaged when mounting or dismounting. Remove the key when not in use.
Warns of electromagnetic interference from devices like radios and cell phones, advising users to avoid operating such devices near the scooter.
Instructions for adjusting the tiller angle, seat slide, and swivel for comfort and safety, with visual guidance provided.
Includes speed settings, battery indicators, lights, horn, and switches for safe operation.
Guidance on using anti-tip wheels and operating in free wheel mode for stability and safety.
Covers initial setup, movement, steering, reversing, and dismounting, emphasizing safety.
Advice for navigating ramps, grass, and gravel safely.
Details on dismantling the scooter for transport and storage to maintain condition.
Information on charging procedures and maintenance for longevity and performance.
Regular lubrication and tire checks are recommended for optimal condition.
Checklist and circuit breaker information for diagnosing and resolving common issues.
Lists detailed specifications of the scooter's capabilities and limitations.
Regular inspections advised to ensure safety and functionality.
Includes warranty information and a disclaimer regarding safe use.
Instructions for swiveling, locking, and removing the seat, with height adjustment options.
Guidance on adjusting armrest width and angle, ensuring they are fitted before use.
Details on controls including speed, battery level, lights, horn, and safety switches.
Instructions for using the free wheel release lever and ensuring anti-tip wheels are in place.
Emphasizes starting in a level area, adjusting settings, and maintaining slow speeds on ramps.
Steps for dismantling the scooter into sections for transport.
Uses maintenance-free sealed lead acid batteries, with overnight charging recommended.
Lubrication and tire pressure checks are advised, avoiding certain lubricants.
Steps to check if the scooter fails to operate, with provider consultation if issues persist.
Includes dimensions, weight limits, battery capacity, and speed, subject to change.
Quarterly inspections by an authorized provider are required for safety.
Refer to warranty information and note the scooter's intended use limitations.
Catalog excerpts

Mid-Size Scooters User Manual
Open the catalog to page 1
INTRODUCTION Congratulations on your purchase of the Shoprider® scooter. This scooter incorporates the latest innovative designs patented and only available on a Shoprider® scooter. This scooter can be used in confined spaces both indoors and out. Direct drive transaxles and electromagnetic brakes give a safe and efficient ride. This Shoprider® scooter is designed for persons with limited mobility. Please ensure that you read this manual carefully, it is important for your safety that you understand the guidelines and instructions given. FEATURE GUIDE (FIG. 1-4) Sunrunner™ 3 (Figure 1) Tiller...
Open the catalog to page 3
Sunrunner™ 3 Deluxe (Figure 3) Tiller control head Head light Rear lights & indicators Turn signal indicators Adjustable width armrests Swivel seat Seat height adjustment Black leatherette pillow top reclining captain’s seat 9. Foot rest 10. Tiller steering column w/ Vespa style cover and steering wheel angle adjustment 11. Detachable basket 12. Retractable charging cord 13. Articulating front wheels Sunrunner™ 4 Deluxe (Figure 4) Tiller control head Head light Rear lights & indicators Turn signal indicators Adjustable width armrests Swivel seat Seat height adjustment Black leatherette pillow...
Open the catalog to page 4
SAFETY ADVICE • Do not carry passengers. • Do not exceed inclines over 8 degrees (14% grade). • Do not turn on steep inclines. • Do not turn suddenly at high speeds. • Do not get on or off the scooter unless the brake is on and the scooter is switched off. • Do not switch off the scooter while the scooter is moving. • Do not drive the scooter where you can not safely or legally walk. • Do not attempt to drive over curbs greater than 2 inches (5cm.) in height. Doing so could cause your scooter to turn over, causing injury or damage to the scooter. For curbs less than 2 inches, always approach...
Open the catalog to page 5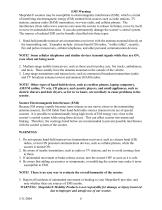
EMI Warning Shoprider® scooters may be susceptible to electromagnetic interference (EMI), which is a kind of interfering electromagnetic energy (EM) emitted from sources such as radio stations, TV stations, amateur radio (HAM) transmitters, two-way radio, and cellular phones. The interference (from radio wave sources) can cause the scooter to release its brakes, move by itself, or move in unintended directions. It can also permanently damage the scooter’s control system. The sources of radiated EMI can be broadly classified into three types: 1. Hand-held portable transceivers (transmitters-receivers)...
Open the catalog to page 6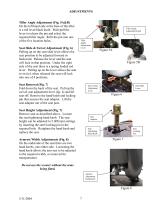
ADJUSTMENTS Tiller Angle Adjustment (Fig. 5A&B) On the left hand side at the base of the tiller is a red lever/black knob. Push/pull the lever to release the pin and select the required tiller angle. Refit the pin into one of the five location holes. Seat Slide & Swivel Adjustment (Fig. 6) Pulling up on the seat slide lever allows the seat position to be adjusted forward or backward. Release the lever and the seat will lock in that position. Under the right side of the seat there is a spring loaded red lever. Pulling up on the lever allows the seat to swivel, when released the seat will lock...
Open the catalog to page 7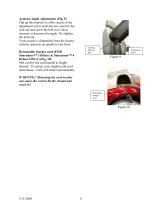
Armrest Angle Adjustment (Fig. 9) Flip up the armrests to allow access to the adjustment screw and lock nut, unscrew the lock nut and screw the bolt in or out to increase or decrease the angle. Re-tighten the lock-nut. Your scooter is dispatched from the factory with the armrests set parallel to the floor. Locking Nut and Bolt Retractable charger cord (FOR Sunrunner™ 3 Deluxe & Sunrunner™ 4 Deluxe ONLY) (Fig. 10) Pull cord by the cord handle to length desired. To retract cord, slightly pull cord and release. Cord will retract automatically. Adjustment Screw WARNING!! Releasing the cord too fast...
Open the catalog to page 8
SCOOTER TILLER CONTROLS (FIG. 11A&B) Speed Controls The speed control allows you to set a speed between 1 (minimum) and 10 (maximum). Battery Level Indicator The number of LED bars lit, shows the amount of charge left in your batteries. The amount of charge will only show at its true level when the scooter is in drive. Caution – Do not allow the LED bars go out completely as complete discharge of the batteries could cause irreversible damage. Lights A blue colored button at the rear of the tiller operates the lights. Horn A yellow button at the rear of the tiller operates the horn. Thumb/Finger...
Open the catalog to page 9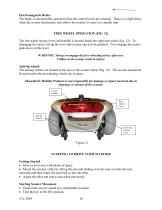
Electromagnetic Brake The brake is automatically operated when the control levers are released. There is a slight delay when the scooter decelerates; this allows the scooter to come to a smooth stop. FREE WHEEL OPERATION (FIG. 12) The free wheel release lever (red handle) is located inside the right rear wheel (Fig. 12). To disengage the motor, lift up the lever (the scooter can now be pushed). To re-engage the motor push down on the lever. WARNING! Always re-engage the free wheeling device after use. Failure to do so may result in injury. Anti-tip wheels The anti-tip wheels are located at the...
Open the catalog to page 10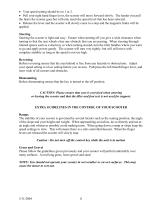
• Your speed setting should be on 1 or 2. • Pull your right hand finger lever, the scooter will move forward slowly. The harder you pull the faster the scooter goes but will only reach the speed level that has been selected. • Release the lever and the scooter will slowly come to a stop and the magnetic brake will be applied. Steering Steering the scooter is light and easy. Ensure when starting off you give a wide clearance when turning so that the rear wheels clear any obstacle that you are passing. When steering through limited spaces such as a doorway or when turning around, turn the tiller...
Open the catalog to page 11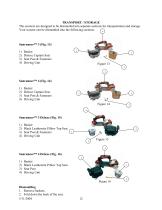
TRANSPORT / STORAGE The scooters are designed to be dismantled into separate sections for transportation and storage. Your scooter can be dismantled into the following sections: 4 Basket Deluxe Captain Seat Seat Post & Fasteners Driving Unit Basket Deluxe Captain Seat Seat Post & Fasteners Driving Unit Basket Black Leatherette Pillow Top Seat Seat Post & Fasteners Driving Unit Basket Black Leatherette Pillow Top Seat Seat Post Driving Unit Figure 16 Dismantling 1. Remove baskets. 2. Fold down the back of the seat. 5/11/2004
Open the catalog to page 12All Shoprider catalogs and technical brochures
 6Runner 10
28 Pages
 6Runner 10 Rehab
1 Page
 Shoprider HD
2 Pages
 Streamer Sport Rehab
2 Pages
 Streamer Sport
2 Pages
 Smartie
2 Pages
 Jimmie
2 Pages
 FPC
FPC2 Pages
 FeatherLite
2 Pages
 6 Runner 14
2 Pages
 6 Runner 10 REHAB
2 Pages
 6Runner 10 DLX
2 Pages
 Sprinter XL 4
20 Pages
 Compact Scooters
18 Pages
 Start 3
20 Pages
 Flagship
16 Pages
 Ez Chopper
18 Pages
 Echo 3
20 Pages
 Dasher 9
18 Pages
 Dasher 4
20 Pages
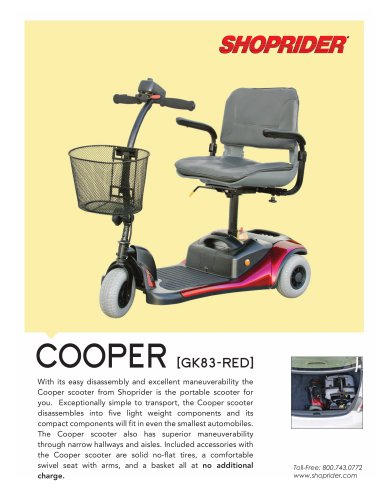
 Cooper
20 Pages
 ECHO
ECHO2 Pages
 COOPER
2 Pages
 DASHER 9
2 Pages
 6 Runner 10
2 Pages
Archived catalogs
 DASHER 4 - 2014
2 Pages
- Wheelchair
- Outdoor wheelchair
- Indoor wheelchair
- Wheelchair with legrest
- Folding wheelchair
- Mobility scooter
- Electric mobility scooter
- Black wheelchair
- Electric wheelchair
- 4-wheel mobility scooter
- Height-adjustable wheelchair
- Mobility scooter with basket
- Reclining wheelchair
- Wheelchair with headrest
- 3-wheel mobility scooter
- Gray wheelchair
- Blue wheelchair
- Red wheelchair
- Folding mobility scooter
- Mobility scooter with cab