
- Catalogs
- Smith & Nephew
- ANTHEM 2024


- Products
- Catalogs
- News & Trends
- Exhibitions
ANTHEM 2024
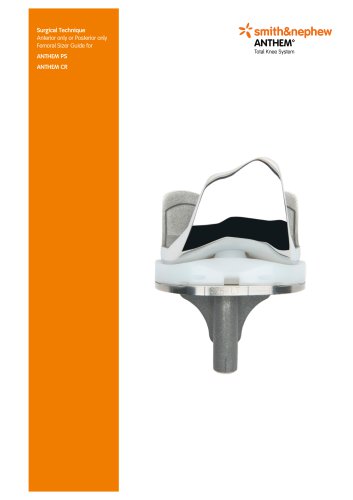
ANTHEM 2024
The ANTHEM™ PS and ANTHEM CR Total Knee System is designed to assist orthopedic surgeons in various intraoperative scenarios. It emphasizes precise surgical techniques and utilizes the ORTHOMATCH™ Universal Instrumentation system for ease and consistency. The system supports both minimally invasive and standard surgical approaches, with a focus on preoperative planning and meticulous surgical execution to optimize outcomes and minimize complications.
Preoperative planning involves determining the angle between anatomical and mechanical axes using a full lower limb radiological view. This helps in selecting the appropriate valgus angle for limb alignment. A standard angle for the distal femoral cut is chosen based on patient and surgical experience, with a recommended sawblade thickness of 0.053" or 1.35mm.
The femoral preparation process includes opening the femoral canal, assembling the valgus alignment guide, and securing the universal cutting block. The resection level and alignment are verified before resecting the distal femur.
The GENESIS II Tibia Jig uses an extramedullary guide for tibial preparation, ensuring proper alignment and slope. The tibial resection involves attaching the tibial stylus to the cutting block and pinning it to the tibia.
The ORTHOMATCH™ Femoral Sizing Guide allows for external rotation setting and size determination using anatomical landmarks. Adjustments are made if the size falls between standard measurements.
The appropriate A/P Resection Block is selected and secured, ensuring the resection plane avoids notching. The M-L dimension corresponds to the standard size ANTHEM™ femoral component.
Detailed instructions are provided for anterior, posterior, and chamfer cuts, emphasizing stability and optimal flexion by avoiding posterior impingement and ensuring correct tibial slope.
The process for trialing PS and CR implants includes securing femoral trials, using housing collets, and assessing range of motion and alignment.
Guidelines for resurfacing the patella include measuring thickness, setting the resection guide, and drilling peg holes to ensure proper patella-femoral articulation.
Instructions for cementing and seating components emphasize proper alignment and fixation, with a focus on removing excess cement and checking the locking mechanism.
Tables detail compatible components and recommended combinations for ANTHEM and GENESIS II systems, including femoral, tibial, and patellar components.
Smith & Nephew contact details are provided for further information and inquiries.
Catalog excerpts
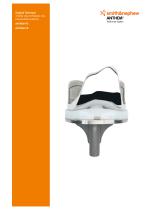
Surgical Technique Anterior only or Posterior only Femoral Sizer Guide for ANTHEM PS ANTHEM CR
Open the catalog to page 1
In consultation with: Professor T.K. Kim – Seoul, South Korea Professor D. Saris – Utrecht, Netherlands Professor R. Tözün – Istanbul, Turkey Professor Y. Zhou – Beijing, China Professor A. Belooshi – Dubai, U.A.E. Doctor M. Wadhwa – Chandigarh, India Doctor R. McLennan-Smith – Durban, South Africa Doctor J. Duboy - Sa
Open the catalog to page 2
ANTHEM™ PS and ANTHEM CR Total Knee System Contents Introduction Preoperative planning Femoral preparation Tibial preparation - GENESIS™ II tibia jig Femoral positioning and sizing Component trialling - Posterior Stabilized resection Tibial keel preparation Resurfacing patellar preparation Tibial preparation - ORTHOMATCH™ Polymer tibia jig Component trialling - Cruciate Retaining resection Implant Compatibilities ANTHEM CR Implant Compatibilities ANTHEM PS
Open the catalog to page 3
Introduction The ANTHEM™ PS and the ANTHEM CR Total Knee System have been designed to offer orthopaedic surgeons solutions to address a range of intraoperative situations. Proper implant function is dependant on an extensive and accurate surgical technique. The ORTHOMATCH™ Universal Instrumentation system is designed to be used with ANTHEM to provide an easy to use system that facilitates accurate and reproducible surgical outcome. The system is designed to accommodate either a minimally invasive or standard surgical incision and exposure. While it is the designers’ objective to develop accurate,...
Open the catalog to page 4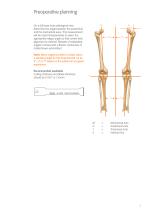
Preoperative planning On a full lower limb radiological view determine the angle between the anatomical and the mechanical axes. This measurement will be used intraoperatively to select the appropriate valgus angle so that correct limb alignment is restored. (Beware of misleading angles in knees with a flexion contracture or rotated lower extremities.) Note: Many surgeons prefer to simply select a standard angle for the distal femoral cut (ie, 5º, 6º or 7º) based on the patient and surgical experience. Recommended sawblade Cutting thickness and blade thickness should be 0.053" or 1.35mm. Mechanical...
Open the catalog to page 5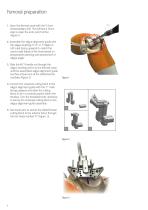
Femoral preparation 1. Open the femoral canal with the 9.5mm intramedullary drill. The drill has a 12mm step to open the entry point further (Figure 1). 2. Assemble the valgus alignment guide with the valgus bushing (5°,6° or 7°) Right or Left mark facing upwards to match the correct side (hand) of the knee based on preoperative planning and assessment of valgus angle. 3. Slide the IM T-Handle rod through the valgus bushing and in to the femoral canal until the assembled valgus alignment guide touches at least one of the distal femoral condyles (Figure 2). 4. Connect the universal cutting block...
Open the catalog to page 6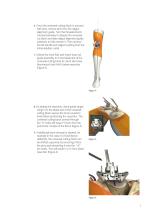
6. Once the universal cutting block is secured with pins, remove pins from the valgus alignment guide. Turn the threaded knob counterclockwise to release the universal cut block and slide valgus alignment guide anteriorly to fully remove it. Then remove the IM-handle and valgus bushing from the intramedullary canal. 7. Extend the knee fully and insert drop rod guide assembly in to the blade slot of the universal cutting block to check Hip Knee Mechanical Axis (HKA) before resection (Figure 4). 8. By sliding the resection check guide (angel wing) in to the blade slot of the universal cutting block...
Open the catalog to page 7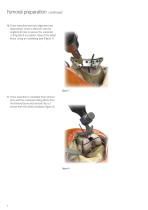
Femoral preparation 10. Once resection level and alignment are determined, insert a third pin into the angled pin hole to secure the universal cutting block in position. Resect the distal femur using an oscillating saw (Figure 7). 11. Once resection is complete then remove pins and the universal cutting block from the femoral bone and remove the cut bones from the distal condyles (Figure 8).
Open the catalog to page 8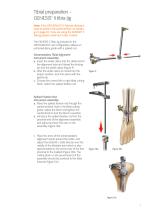
Tibial preparation GENESIS™ II tibia jig Note: If the ORTHOMATCH™ Polymer tibia jig is used to perform the proximal tibia cut, please go to page 26. If you are using the GENESIS™ II tibia jig please continue to Step 1 below. The GENESIS II Tibia Jig included in the ORTHOMATCH™ set configuration utilizes an extramedullary guide with a spiked rod. Extramedullary Tibial Alignment Instrument Assembly: a. Insert the ankle clamp into the distal end of the alignment tube and thread the locking pin into the ankle clamp (Figure 9). b. After the ankle clamp is moved into the proper position, lock into...
Open the catalog to page 9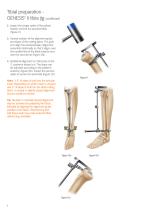
Tibial preparation GENESIS™ II tibia jig continued 2. Impact the longer spike of the spiked fixation rod into the proximal tibia (Figure 11). 3. Assess rotation of the alignment guide and slope of the cutting plane. The goal is to align the extramedullary alignment assembly rotationally so that it aligns over the medial third of the tibial tubercle and over the second toe (Figure 12a). 4. Rotational alignment is critical due to the 3° posterior sloped cut. The slope can be adjusted according to the patient’s anatomy (Figure 12b). Impact the second spike to secure the assembly (Figure 12c). Figure...
Open the catalog to page 10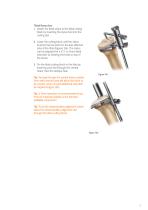
Tibial Resection 1. Attach the tibial stylus to the tibial cutting block by inserting the stylus foot into the cutting slot. 2. Lower the cutting block until the stylus touches the low point on the less affected side of the tibia (Figures 13a). The stylus can be adjusted for a 9, 11 or 13mm tibial resection by twisting the knob on top of the stylus. 3. Pin the tibial cutting block to the tibia by inserting pins first through the central holes; then the oblique hole. Tip: Pinning through the central holes marked 0mm with smooth pins will allow the block to be moved +2mm should additional resection...
Open the catalog to page 11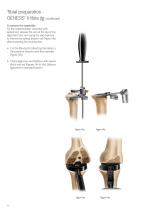
Tibial preparation GENESIS™ II tibia jig continued To remove the assembly: For the extramedullary assembly with spiked rod, release the cam at the top of the alignment tube and using the slap hammer to remove the spiked fixation rod (Figure 14a) after loosening the thumbscrew. 4. Cut the tibia by first directing the blade in the posterior direction and then laterally (Figure 14b). 5. Check alignment and balance with spacer block and rod (Figures 14c & 14d). Balance ligaments in standard fashion.
Open the catalog to page 12All Smith & Nephew catalogs and technical brochures
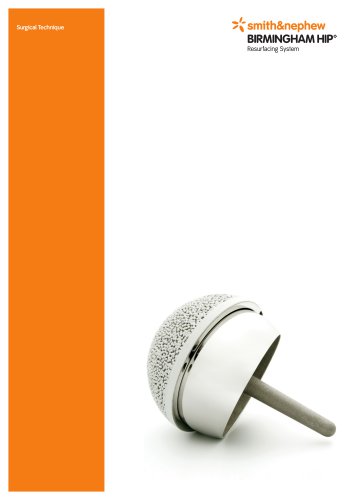 BIRMINGHAM HIP
32 Pages
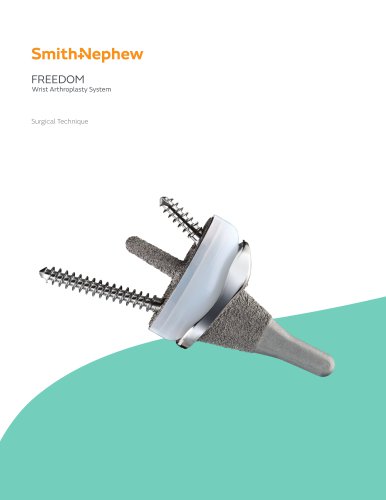 FREEDOM
16 Pages
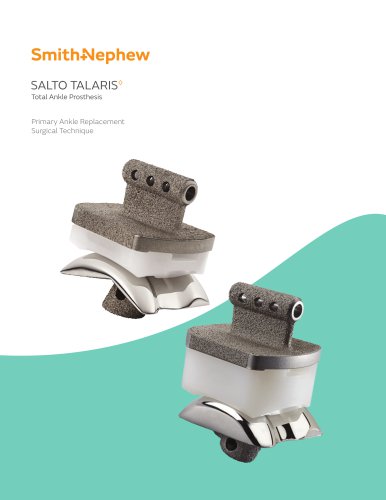 SALTO TALARIS
48 Pages
 polarstem
28 Pages
Archived catalogs
 Locking Large Fragment Overview
32 Pages
 Locking Small Fragment Overview
68 Pages
 Rediscover normal
4 Pages
 TWINFIX ULTRA HA and PK
2 Pages
 TRIGEN™ INTERTAN
12 Pages
 EVOS SMALL Resources
12 Pages
 NAVIO Message Brochure
8 Pages
 Small footprint, big impact
8 Pages
 TAYLOR SPATIAL FRAME◊
8 Pages
 Recertification Program
8 Pages
 anthem
4 Pages
 Ordering information
1 Page
 BST-CarGel ®
20 Pages
 RAPID RHINO™ NASASTENT™
6 Pages
 clancy anatomic cruiciate
2 Pages
 Electrosurgery
20 Pages
 Powered Instruments
11 Pages
 Shaver Systems
7 Pages
 Knee
Knee73 Pages
 HIP
HIP21 Pages


- Bone plate
- Compression plate
- Metallic compression plate
- Locking compression plate
- Surgery electrode
- Wound care
- Medical kit
- Electrosurgical electrode
- Surgical system
- Cutting electrosurgical system
- Reusable electrode
- Coagulation surgical system
- Monopolar electrode
- Endoscopy forceps
- Wound dressing
- Sealing forceps
- Straight electrode
- Coagulation electrode
- Bandage
- Proximal compression plate