- Catalogs
- Smith & Nephew
- Volar Distal Radius Locking Plate
- Products
- Catalogs
- News & Trends
- Exhibitions
Volar Distal Radius Locking Plate
1 /16Pages

Volar Distal Radius Locking Plate
1 /16Pages
Catalog excerpts
Surgical Technique Volar Distal Radius Locking Plate
Open the catalog to page 1
PERI-LOC™ Locked Plating System Volar Distal Radius Locking Plate Surgical TechniqueCatalog Nota Bene The technique description herein is made available to the healthcare professional to illustrate the author's suggested treatment for the uncomplicated procedure. In the final analysis, the preferred treatment is that which addresses the needs of the specific patient. 1
Open the catalog to page 3
Introduction The PERI-LOC™ Locked Plating System combines the advantages of locked plating with the versatility and benefits of traditional plates and screws. Utilizing both locking and non-locking screws, the PERI-LOC system allows for the creation of a construct that resists angular collapse and also functions as an effective fracture reduction aid. A simple, intuitive instrument set featuring standardized drill bits and screwdrivers, along with color coded drill guides, helps make the PERI-LOC system efficient and easy to use. The PERI-LOC Volar Distal Radius Plates are available in two head...
Open the catalog to page 4
Indications The PERI-LOC™ Volar Distal Radius Plates are indicated for fixation of fractures, non-unions and osteotomies of the radius. Plate Features • Two points of radial styloid fixation Oblong screw holes in plate head and shaft facilitate radial/ulnar and proximal/distal plate translation 316L stainless steel for strength Locking/non-locking option in all screw holes Distal articular screw holes accept 2.5mm Locking and 2.5mm Cortex Screws Shaft screw holes accept 3.5mm Locking and 3.5mm Cortex Screws Standard and wide plate head options for optimal fit Targeting Block option for distal...
Open the catalog to page 5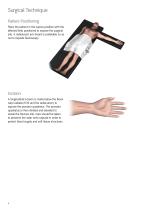
Surgical Technique Patient Positioning Place the patient in the supine position with the affected limb positioned to expose the surgical site. A radiolucent arm board is preferable so as not to impede fluoroscopy. Incision A longitudinal incision is made below the flexor carpi radialis (FCR) and the radial artery to expose the pronator quadratus. The pronator quadratus is then divided and elevated to reveal the fracture site. Care should be taken to preserve the volar wrist capsule in order to protect blood supply and soft tissue structures.
Open the catalog to page 6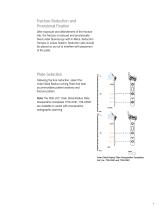
Fracture Reduction and Provisional Fixation After exposure and debridement of the fracture site, the fracture is reduced and provisionally fixed under fluoroscopy with K-Wires, Reduction Forceps or suture fixation. Reduction aids should be placed so as not to interfere with placement of the plate. Plate Selection Following fracture reduction, select the Volar Distal Radius Locking Plate that best accommodates patient anatomy and fracture pattern. Note The PERI-LOC™ Volar Distal Radius Plate Preoperative Templates (7118-0981, 7118-0982) are available to assist with preoperative radiographic planning....
Open the catalog to page 7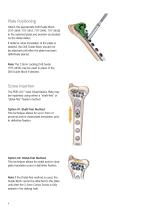
Plate Positioning Attach the appropriate Drill Guide Block (7117-3489, 7117-3457, 7117-3490, 7117-3458) to the selected plate and position as desired on the distal radius. If radial or ulnar translation of the plate is desired, the Drill Guide Block should not be attached until after the plate has been definitively placed. Note The 2.0mm Locking Drill Guide (7117-3459) may be used in place of the Drill Guide Block if desired. Screw Insertion The PERI-LOC™ Volar Distal Radius Plate may be implanted using either a “shaft-first” or “distal-first” fixation method. Option #1: Shaft-first Method This...
Open the catalog to page 8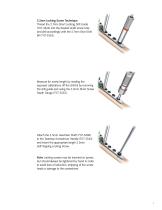
3.5mm Locking Screw Technique Thread the 2.7mm Short Locking Drill Guide (7117-3464) into the desired shaft screw hole and drill accordingly with the 2.7mm Short Drill Bit (7117-3362). Measure for screw length by reading the exposed calibrations off the drill bit by removing the drill guide and using the 3.5mm Short Screw Depth Gauge (7117-3523). Attach the 3.5mm Hexdriver Shaft (7117-3488) to the Teardrop Screwdriver Handle (7117-3543) and insert the appropriate length 3.5mm Self-Tapping Locking Screw. Note Locking screws may be inserted on power, but should always be tightened by hand in order...
Open the catalog to page 9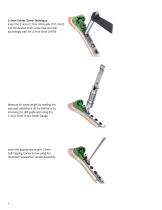
3.5mm Cortex Screw Technique Insert the 2.0mm/2.7mm Drill Guide (7117-3462) into the desired shaft screw hole and drill accordingly with the 2.7mm Short Drill Bit. Measure for screw length by reading the exposed calibrations off the drill bit or by removing the drill guide and using the 3.5mm Short Screw Depth Gauge. Insert the appropriate length 3.5mm Self-Tapping Cortex Screw using the Hexdriver/Screwdriver Handle assembly.
Open the catalog to page 10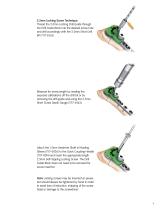
2.5mm Locking Screw Technique Thread the 2.0mm Locking Drill Guide through the Drill Guide Block into the desired screw hole and drill accordingly with the 2.0mm Short Drill Bit (7117-3555). Measure for screw length by reading the exposed calibrations off the drill bit or by removing the drill guide and using the 2.5mm Short Screw Depth Gauge (7117-3463). Attach the 1.5mm Hexdriver Shaft w/Holding Sleeve (7117-0036) to the Quick Coupling Handle (7117-0014) and insert the appropriate length 2.5mm Self-Tapping Locking Screw. The Drill Guide Block does not need to be removed for screw insertion....
Open the catalog to page 11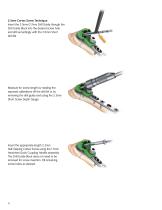
2.5mm Cortex Screw Technique Insert the 2.0mm/2.7mm Drill Guide through the Drill Guide Block into the desired screw hole and drill accordingly with the 2.0mm Short Drill Bit. Measure for screw length by reading the exposed calibrations off the drill bit or by removing the drill guide and using the 2.5mm Short Screw Depth Gauge. Insert the appropriate length 2.5mm Self-Tapping Cortex Screw using the 1.5mm Hexdriver/Quick Coupling Handle assembly. The Drill Guide Block does not need to be removed for screw insertion. Fill remaining screw holes as desired.
Open the catalog to page 12
Closure Obtain final radiographic images to confirm screw placement and fracture reduction. Wound closure follows standard technique.
Open the catalog to page 13
Catalog Information PERI-LOC™ Volar Distal Radius Implant & Instrument Set Set No. 7181-1006 Instrument Case Volar Distal Radius Tray Volar Distal Radius Screw Caddy 2.0mm Short Calibrated Drill Bit w/AO Quick Connect 2.7mm Short Calibrated Drill Bit w/AO Quick Connect Teardrop Screwdriver Handle Reduction Forceps, Serrated Jaw Quick Coupling Handle Cannulated AO-to-Trinkle Adaptor 3.5mm Self-Retaining Hexdriver Shaft 119mm Bending Iron, Right Bending Iron, Left Holding Sleeve Standard Drill Guide Block w/Set Screw, Left 3.5mm Short Screw Depth Gauge 2.5mm Short Screw Depth Gauge Wide Drill Guide...
Open the catalog to page 14All Smith & Nephew catalogs and technical brochures
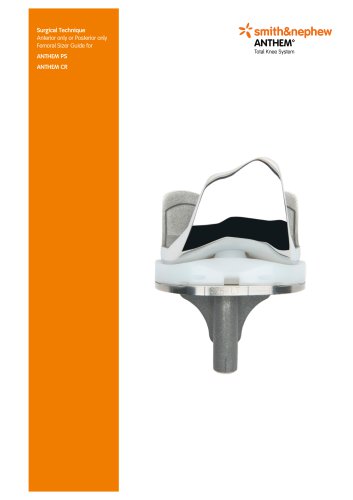 ANTHEM 2024
40 Pages
 BIRMINGHAM HIP
32 Pages
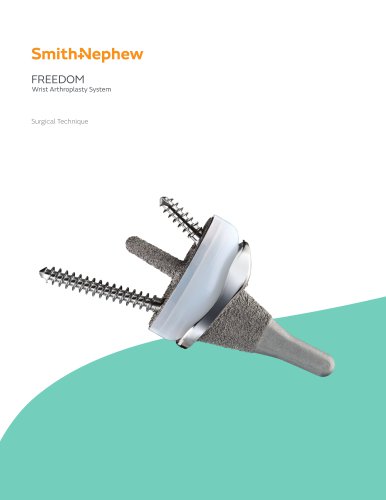 FREEDOM
16 Pages
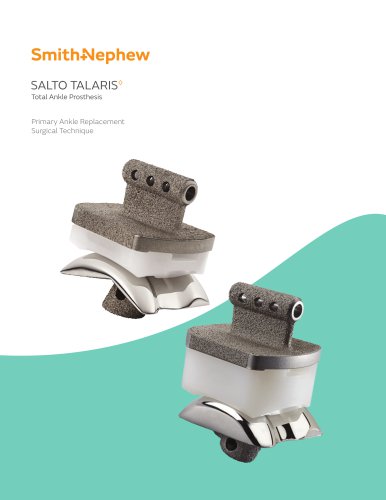 SALTO TALARIS
48 Pages
 polarstem
28 Pages
Archived catalogs
 Locking Large Fragment Overview
32 Pages
 Locking Small Fragment Overview
68 Pages
 Rediscover normal
4 Pages
 TWINFIX ULTRA HA and PK
2 Pages
 TRIGEN™ INTERTAN
12 Pages
 EVOS SMALL Resources
12 Pages
 NAVIO Message Brochure
8 Pages
 Small footprint, big impact
8 Pages
 TAYLOR SPATIAL FRAME◊
8 Pages
 Recertification Program
8 Pages
 anthem
4 Pages
 Ordering information
1 Page
 BST-CarGel ®
20 Pages
 RAPID RHINO™ NASASTENT™
6 Pages
 clancy anatomic cruiciate
2 Pages
 Electrosurgery
20 Pages
 Powered Instruments
11 Pages
 Shaver Systems
7 Pages
 Knee
Knee73 Pages
 HIP
HIP21 Pages


- Bone plate
- Compression plate
- Metallic compression plate
- Locking compression plate
- Wound care
- Medical kit
- Surgery electrode
- Electrosurgical electrode
- Surgical system
- Reusable electrode
- Cutting electrosurgical system
- Coagulation electrosurgical unit
- Endoscopy forceps
- Monopolar electrode
- Wound dressing
- Sealing forceps
- Straight electrode
- Bandage
- Proximal compression plate
- Coagulation electrode