
- Catalogs
- Soehnle Industrial Solutions
- Analytical scale Conformity assigned

Analytical scale Conformity assigned

Analytical scale Conformity assigned
This user manual is for the Soehnle Professional electronic precision scale, model 9404. It highlights the scale's high performance and reliability, featuring OneBloc cells and WindowsDirect communication for easy data transfer to PCs.
Users are advised to provide this manual to subsequent users and contact Soehnle representatives for installation or adjustments. The manual content is subject to change without notice, and reproduction is prohibited without permission.
The scale offers various functions such as continuous output, piece counting, percentage weighing, and auto tare. It also supports WindowsDirect for data transfer without additional software.
Users must follow safety instructions to avoid injury or equipment damage. This includes using the correct power supply, avoiding disassembly, and not using the scale in hazardous environments.
The scale complies with 21 CFR Part 11 for electronic records and signatures. It also adheres to WEEE regulations for electronic waste management.
Instructions are provided for choosing an installation site, unpacking, and setting up the scale. Proper calibration and warming up procedures are also outlined.
The manual includes detailed instructions on weighing procedures and utilizing various scale functions to enhance accuracy and efficiency.
This section covers the basic operations of the scale, including outputting weight readings, selecting display options, switching units, and ending weighing sessions. It also explains how to adjust the number of displayed digits and the decimal point display symbol.
The manual provides a detailed explanation of the menu structure, including a menu map and basic operations. It covers entering and changing numerical values, resetting to default settings, and locking menu settings to prevent unauthorized changes.
This section outlines the procedures for calibrating the scale, including automatic calibration, span calibration, and internal weight calibration. It also discusses how to record calibration data and set a scale ID.
The document describes various taring functions such as zero tracking, auto zero, and auto tare, which help in maintaining accurate measurements.
Instructions are provided for selecting weighing modes, adjusting response and stability settings, and setting stability detection ranges.
This section explains how to select and set units for display, including user-specified units and conversion factors.
The manual details advanced functions like piece counting, percentage weighing, and formulation, including preparation and execution steps for each function.
It describes the target and checkweighing modes, which are used for comparing weights against set targets.
This section covers connecting the scale to peripheral devices, including PCs and printers, and setting up communication functions like WindowsDirect.
Guidelines for maintaining the scale, including daily and periodic inspections, are provided to ensure long-term reliability and accuracy.
The manual includes a troubleshooting guide for addressing common issues and responding to error messages.
This section provides information on power management, setting startup displays, changing passwords, and using the GLP output function.
The document also includes a detailed description of the scale's components, such as the display panel, operation keys, and installation instructions, emphasizing the importance of proper setup and environmental considerations for accurate measurements.
1. Pan Assembly: Place the pan on the pan supporters, set the protective cover, and fit the pan ring. Align the pan notches with the scale body.
2. Protective Cover: Use the protective cover in dirty environments. Peel off the adhesive paper and fit it on the display.
3. Level Adjustment: Adjust the level screws to center the air bubble in the level indicator.
1. Warming Up: Ensure the scale is stable and warmed up by leaving it on for at least an hour before calibration.
2. Power On: Connect the AC adapter and turn on the scale. The scale performs a self-check.
3. Span Calibration: Perform span calibration after moving the scale. Ensure no air flow or vibration during calibration.
1. Sample Placement: Open the glass door, place the sample on the pan, and close the door.
2. Stability: Avoid touching samples with bare hands and ensure temperature consistency to prevent display instability.
3. Outputting Readings: Connect to a PC or printer for output. Use WindowsDirect for PC output.
1. Menu Structure: The menu is divided into groups for application functions, calibration, zero/tare, data output, and unit settings.
2. Menu Navigation: Use operation keys to navigate and select menu options.
3. Numerical Entry: Enter numerical values for settings like calibration weights and scale ID.
1. Power Off: Establish standby mode by pressing the ready symbol. Disconnect the AC adapter to shut off completely.
1. Decimal Point Display: Choose between period or comma for decimal display.
2. Menu Map: Use the menu map for quick access to menu options.
The document provides detailed instructions on navigating and configuring menu settings for a weighing scale. It includes steps for entering numeric values, changing decimal point positions, and resetting menu settings to default. The default password is set to '9999', and users can lock the menu to prevent unauthorized changes.
Calibration is essential for accurate measurements and should be performed after moving the scale or significant temperature changes. The document outlines procedures for span calibration using internal or external weights. Automatic calibration occurs under specific conditions, such as temperature changes or after a set time interval.
Users are cautioned against moving the scale during calibration to avoid failures. The document provides guidance on handling error messages like 'ERR C' and 'BUSY', which indicate issues during calibration.
The scale can output menu settings to a PC or printer for record-keeping. The document details the process for connecting the scale to peripheral devices and outputting calibration records.
To ensure stability and accuracy, users are advised to avoid touching samples with bare hands and to use forceps or gloves. Samples should be acclimatized to the scale's environment before weighing to prevent convection effects.
The document outlines the calibration process for a scale, emphasizing the importance of performing actions within 60 seconds of the flashing weight value or zero display. It details the steps for removing the calibration weight and addresses potential error messages such as 'ERR H' and 'ERR C', providing troubleshooting steps for each.
It is possible to leave a record of calibration execution and set an ID for scale management. The document provides an example printout of a calibration record, including details like the type of calibration, manufacturer, scale model, serial number, and weight used. However, the 9404 series does not have a clock function to output date and time.
The document describes various functions related to zero tracking and taring, such as the Zero Tracking Function, Auto Zero Function, and Auto Tare Function. These functions help maintain zero indication and automatically compensate for drifts or material left on the pan.
The 9404 series offers two weighing modes: General Weighing Mode and Pouring Mode. The document explains how to select and adjust these modes based on the environment and application, emphasizing the balance between response and stability.
Instructions are provided for adjusting the response and stability of the scale in real-time during weighing. The document highlights the antagonistic relationship between response and stability and offers guidance on using the smart setting function to achieve the desired balance.
This document provides detailed instructions on adjusting the response and stability of a weighing scale, setting units for display, and using application function modes such as piece counting, percentage weighing, and formulation.
The document explains how to adjust the stability mark, which indicates when a weight reading is stable. Users can prioritize either response speed or stability by adjusting the level indicator. The stability detection range can be set to various values (e.g., 0.5d, 1d, 10d) depending on the application. If data output is slow due to environmental factors, increasing the stability detection range is recommended.
Users can select and set the units to be displayed during weighing operations. The document lists various units (e.g., grams, milligrams, carats) and their conversion factors. It also provides instructions for setting user-specified units, including entering conversion factors and minimum indications.
The document describes three modes:
- Piece Counting: Allows setting the unit weight of a sample to count the number of pieces. Up to five different unit weights can be set simultaneously.
- Percentage Weighing: Measures weights as a percentage of a reference weight.
- Formulation: Useful for mixing different samples according to a formula.
- Ensure the sample is evenly distributed on the pan for accurate piece counting.
- Use a large number of pieces for setting unit weight to minimize counting errors.
- Adjust settings based on environmental conditions to improve data output speed and accuracy.
This section explains how to set or change the unit weight for an item number. If the display indicates that the unit weight is not set, follow the procedure outlined in the document to establish or modify it. This involves placing a container on the scale, selecting the number of pieces for setting, and confirming the stability mark before adding the sample to be counted.
To count pieces by weight, establish the piece counting mode, select the item number, and place the sample in the container. The scale will display the number of pieces based on the set unit weight.
This mode converts the sample weight into a percentage of a reference weight. Two methods are available: setting the reference as 100% or as a specific percentage. The procedure involves selecting the percentage weighing mode, setting the reference weight, and confirming the stability mark.
Formulation mode is used for mixing components by weight. The process includes setting the scale to formulation mode, weighing each component, and outputting the gross weight. The auto zero function is disabled during formulation.
This function compares the weight reading to a target or reference value. Two modes are available: target mode and checkweighing mode. In target mode, excesses and deficits are indicated by comparator symbols. In checkweighing mode, pass or fail is determined based on set threshold values.
The document outlines the procedures for setting and updating the checkweighing range on a scale. It includes instructions for entering the lower and upper limit values of the checkweighing range and emphasizes the importance of logical consistency in these values. If incorrect values are entered, the system will automatically correct them.
The comparator function is used to determine pass or fail conditions based on the weight of a sample. The document provides a table that explains the conditions under which the scale will indicate 'HI', 'PASS', 'LO', or 'Out of Range'.
The document describes various output functions, including auto print and continuous output functions. The auto print function allows automatic output of weight readings under specific conditions, while the continuous output function outputs readings at regular intervals. The document also explains how to set these functions and the significance of the stability mark.
Instructions are provided for connecting the scale to a PC or printer using an RS-232 interface. The document details the settings required for WindowsDirect communication, which allows weight data to be transferred directly to a Windows application without additional software.
This section explains how to set up and use the WindowsDirect communication function, including the necessary settings on both the scale and the PC. It also provides troubleshooting tips for common issues related to this function.
- Ensure all entered values are logically consistent to avoid automatic corrections.
- Use the appropriate RS-232 interface and cable for connecting to peripheral devices.
- Follow the detailed steps for setting up WindowsDirect communication to ensure proper data transfer.
- The document highlights the importance of checking the stability mark and ensuring the correct output mode is selected.
- It provides detailed instructions for setting up communication functions, emphasizing the need for correct cable connections and settings.
The document provides guidance on setting up a USB serial converter, emphasizing the need to assign it to a COM port number between 1 and 4 for compatibility with serial key devices. It also suggests reinstalling the driver if setup issues occur and checking notebook PC settings that may disable RS-232C ports for power-saving.
Several common issues are addressed, such as the function not working after a PC restart, compatibility with Windows Vista, and data input errors like garbled characters or cursor movement issues in Excel. Solutions include adjusting settings, contacting representatives for specific OS issues, and ensuring proper data format settings.
The document details the data format for RS-232C communication, including standard and extended formats with stability information. It explains the significance of data length, delimiters, and ASCII codes for various data positions.
A comprehensive list of command codes is provided for various operations such as data output, calibration, and unit registration. Commands are categorized by function, including continuous output, single output, and application-specific commands like piece counting and percentage weighing.
Instructions for connecting scales to PCs and printers via RS-232C are included, with emphasis on using the correct cables and settings. The document also covers communication settings for different modes and manufacturers, detailing baud rates, parity, stop bits, and handshake protocols.
Guidance is provided for connecting scales to electronic printers, including power sequence and cable connections. The document notes that simultaneous use of WindowsDirect communication and printer output is possible with specific printer models.
The document outlines the procedure for setting communication parameters for peripheral devices. Key settings include baud rate, parity, stop bit, data format, and handshake type. Baud rates range from 300 bps to 38.4k bps. Parity options include no parity, odd parity, and even parity. Stop bits can be set to 1 or 2. Data formats include standard, expanded, and formats compatible with Mettler and Sartorius scales. The default handshake is hardware, but no handshake is recommended for PC connections.
Delimiters can be set to CR, LF, CR+LF, or Comma. The document also describes the output timing change function, allowing data to be output immediately or after stability is detected.
Maintenance involves cleaning the scale's pan, display, main body, and glass door. The pan should be removed and washed separately. The document advises against using harsh chemicals on the display. Regular inspections are recommended to ensure accuracy and functionality.
Daily and periodic inspections are necessary to maintain scale performance. Daily inspections should be simple and frequent, while periodic inspections should be comprehensive, covering all aspects of the scale's performance and appearance. The document provides criteria for judgment and methods for assessing errors.
Proper weights are essential for calibration and inspection. Weights are classified by accuracy, with E2 class recommended for analytical scales. Calibration weights should be close to the scale's capacity to ensure accuracy.
The document provides solutions for common issues such as display errors, inaccurate weighing, and communication problems. It includes a section on responding to error messages, with specific countermeasures for each type of error.
1. ERR N - Numerical value entry error. Correct the value entered.
2. ERR W - Operation error. Follow the correct operation.
3. COM ERR - External input error. Set the correct command code.
4. OL - Overload. Ensure the pan or supporter is correctly placed.
5. ABORT - Operation aborted. The scale returns to an operable state.
6. WAIT - Waiting for permission for the operation.
7. BUSY - Load detected during calibration. Remove the item from the pan.
1. Auto Power-Off Function: Automatically turns off the display after a set time of inactivity.
2. Startup Display: Choose from different display types when the scale is turned on.
1. Change Password: Default is "9999". Can be changed for menu access and calibration.
2. GLP Output Function: Adds scale ID and other information to calibration records. Note that it may affect printing speed and accuracy.
1. Models: 9404.12.001 and 9404.22.001.
2. Capacity: 120g and 220g respectively.
3. Accuracy: Class I with a verification scale interval of 0.001g.
4. Operating Temperature: 10-30°C.
5. Dimensions: 210(W) x 340(D) x 325(H) mm.
1. List of parts including pan, supporter, AC adaptor, and glass doors.
2. Optional accessories like electronic printers and RS-232C interface.
1. Menu Map: Provides a graphical representation of menu options for easy navigation.
2. Data Output Menu: Includes settings for communication, data format, and auto print functions.
This document provides technical specifications and operational procedures for a legal measuring instrument, specifically focusing on unit settings, calibration, and zero/tare functions.
The unit setting menu allows users to select measurement units such as grams (g), milligrams (mg), user-specified units, and carats (ct). Note that some units may not be selectable in certain countries due to legal restrictions. The menu can be accessed by pressing a button for about 3 seconds in weighing mode.
The calibration menu includes options for calibrating the internal weight (P.CAL), span calibration using the internal weight (I.CAL), and span calibration using an external weight (E.CAL). This menu is also accessed by pressing a button for about 3 seconds in weighing mode.
This menu provides functions such as zero tracking (Z.TRC), auto tare (A.TARE), zero/tare timing change (TARE.F), and auto zero (A.ZERO). These functions help in maintaining accuracy and are accessed similarly by pressing a button for about 3 seconds in weighing mode.
For further details, users are directed to the Soehnle Industrial Solutions GmbH website or can contact them via phone or email. The document emphasizes that any form of reproduction or disclosure without consent is prohibited.
Catalog excerpts

Analysis Scale User Manual 9404 www.soehnle-professional.com
Open the catalog to page 1
Model 9404 Requests ► Provide this manual to the next user in the event that the instrument is transferred. ► To ensure safe operation, contact your Soehnle Professional scale representative for installation, adjustment, or reinstallation after moving the instrument to a different site. Notices ► The content of this manual is subject, without notice, to modifications for the sake of improvement. ► Every effort has been made to ensure that the content of this manual was correct at the time of creation. However, in the event that any mistakes or omissions are discovered, it may not be possible...
Open the catalog to page 2
This manual allows you to search for a function or operating procedure in a number of ways. 10. Connection & Communication with Peripheral Devices \ Convenient Functions Relating to Output ■ Printing / Outputting Continuously (Continuous Output Function) This function allows displayed weight readings to be automatically output continuously in the same timing as the display refresh cycle (approximately 100 msec intervals) while weighing, without having to press . "What You Can Do”, Search for what you want to do. Page 6 "Menu Map”, Search quickly for the menu option you want to use. Page 146...
Open the catalog to page 3
What You Can Do Methods & Functions ► Iwant to weigh up to a fixed quantity by adding increments of the same sample (item to be weighed: powder, liquid, etc.) a little at a time. ► Iwant to adjust the conditions under which the stability Adjusting the mark lights up. Stability Mark Various weighing methods ► Iwant to stabilize the display at zero when an empty Zero Tracking Function sample container is placed on the pan. Page 60 Zero point, and taring ► Iwant to adjust the scale so that it is very accurate after stabilization. Printing / output
Open the catalog to page 4
Safety Precautions Safety Precautions To ensure that you use the scale safely and correctly, read the following precautions carefully and observe them. The levels of danger and damage that will arise if the scale is used incorrectly are classified and indicated as shown below. Indicates a potentially hazardous situation which, if not avoided, may result in minor to moderate injury or equipment damage. Do not connect anything other than peripheral devices specified by Soehnle Professional to the scale’s connector. If you do, the scale may stop working normally. In order to avoid trouble, always...
Open the catalog to page 5
Soehnle Professional Scales and 21 CFR Part 11 To all of Soehnle Professional equipment in the European Union: 21 CFR Part 11, Electronic Records, Electronic Signatures, Final Rule (often referred to as Part 11) is the United States Food and Drug Administration (FDA) regulation affecting computer resources and electronic records that are used for any document that is required to be kept and maintained by FDA regulations. Requirements concerning computer resources security are key elements in Part 11. The controls implemented as a result of security related requirements are intended to result...
Open the catalog to page 6
Soehnle Professional Scale 9404 Soehnle Professional Scale 9404 6. djusting Response and Stability A with Peripheral Devices Printing / Outputting Automatically Prohibiting Changes to the Menu Settings Units that can be displayed and What Is the WindowsDirect Communication 8. Application Function Mode Preparation for Piece Counting (Including Setting Selecting the Minimum Number of 5. Functions Relating to Taring Changing a Unit Weight, or Adding a New
Open the catalog to page 7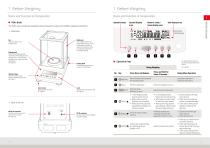
Name and Function of Components Name and Function of Components Operation keys Symbol display area Numeric value / menu display area Unit display area BEFORE WEIGHING Main body The 9404 series comprises toploading electromagnetic scales with OneBloc weighing mechanism. Windbreak Even a slight breeze may affect measurement, so the windbreak is provided to avoid air movements in the surroundings influencing the weight reading. Pan Place the object to be weighed here. Display panel Shows the weighing results, information for making function settings, the current function setting, errors, codes...
Open the catalog to page 9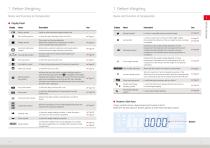
Name and Function of Components Name and Function of Components Display Name Description See: Display Name Description See: Battery symbol Zero tracking symbol Weight symbol Automatic calibration symbol Easy setting indicator Pouring symbol Formulation symbol Menu lock symbol Lights up when the power supply voltage is low. Lit when the zero tracking function is set ON. This symbol is lit during calibration. Blinks when calibration is necessary for a verified scale as a legal measuring instrument. Blinks before automatic calibration starts applicable to a verified scale as a legal...
Open the catalog to page 10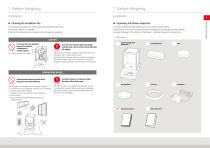
Installation Unpacking and Delivery Inspection The measuring performance of the scale is greatly influenced by the environment where it is installed. Observe the following points to ensure safe and accurate weighing. Do not use the scale anywhere exposed to explosive, combustible or corrosive gases. The items packed will differ depending on the model of scale ordered. Check that all of the items indicated below are included in the package, and that nothing has been damaged. The numbers in the boxes [ ] indicate the quantity of each item. 9404 series ff BEFORE WEIGHING Choosing the Installation...
Open the catalog to page 11
Installation Adjusting the Level of the Scale The procedure for fitting the components differs depending on the model of the scale. Turn all the level screws (total two at front) counterclockwise as viewed from above until they come to a gentle stop. The scale will now be tilting toward the front. Protective cover If the scale is used in an environment where it gets dirty easily, use the protective cover available. Peel ff off the paper to expose the adhesive on it. Fit ff it on the display. Press the adhesive parts firmly to keep fitting it on ff the display. Turning the level screws clockwise,...
Open the catalog to page 12
■ Turning the Power ON Insert the plug of the AC adapter into the DC IN connector on the back of the scale. □ Warming Up Before performing span calibration on the scale or measuring its accuracy, you must ensure that it is in a stable state. When stabilizing the scale, it is important that its temperature is stable. Put the scale in weighing mode (for example showing the gram display) and leave it with the power ON for at least an hour in advance of calibration. This is called “warming up". Warming up is also accomplished in the standby mode. For details on the standby mode, see "Turning the...
Open the catalog to page 13All Soehnle Industrial Solutions catalogs and technical brochures
 Baby scale "Multina Comfort"
3 Pages
 Compact scale
3 Pages
 8310.01
3 Pages
 7857
78572 Pages
 6858
68582 Pages
 9202/9203
3 Pages
 8320
83203 Pages
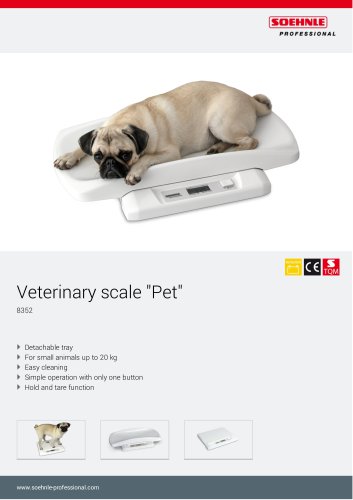 8352 Veterinary scale "Pet"
3 Pages
 6958
69583 Pages
 5005
50052 Pages
 5002.02
2 Pages
 5002.01
2 Pages
 7763, 2823
3 Pages
 7787, 2817
3 Pages
 7786, 2816
3 Pages
 7708.88
3 Pages
 7808
78083 Pages
 6808
68083 Pages
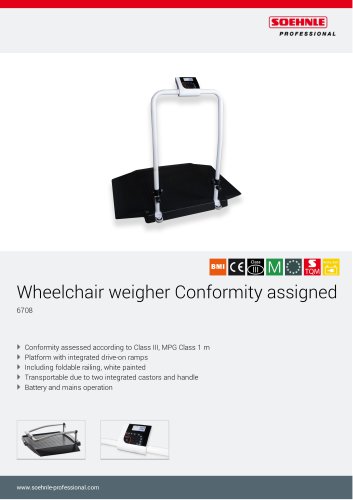 6708
67082 Pages
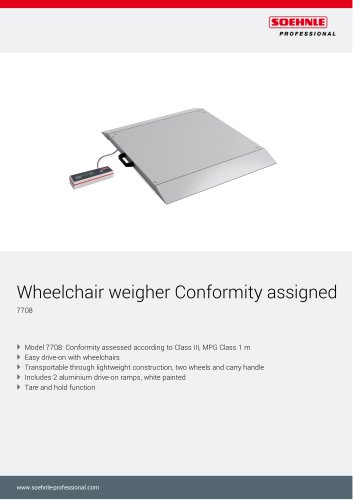 7708
77083 Pages
 7802
78022 Pages
 7702
77022 Pages
 6702
67022 Pages
 6831
68313 Pages
 6803
68033 Pages
 7850 Fitness scale
3 Pages
 6731
67312 Pages
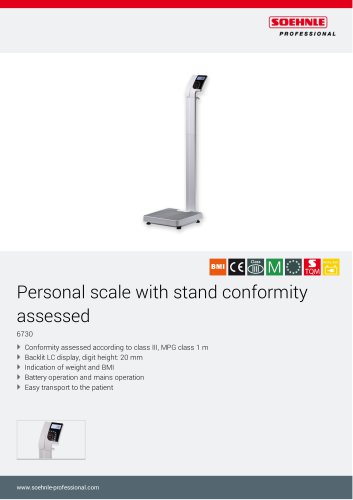 6730
67302 Pages
 7835
78353 Pages
 6163
61632 Pages
 Neo 6752
2 Pages
 7752.01.001
3 Pages
 Baby scale "Cosy" 8310.02
3 Pages
 8310.01 Baby scale "Home"
3 Pages
 Baby scale "Easy"
3 Pages
 Floor scale 7786, 2816
3 Pages
 Digital personal scale 7810
2 Pages
 Floor scale 7787, 2817
3 Pages


Archived catalogs
 7730
77303 Pages
 7731
77313 Pages
 5003
50032 Pages
 3025
30254 Pages
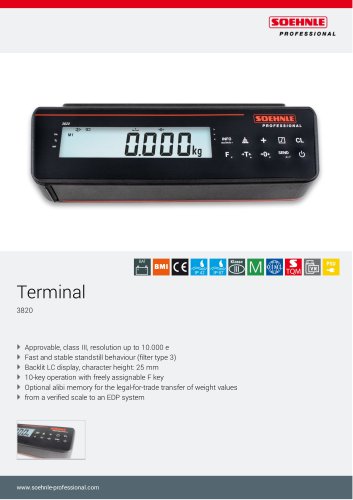 3820
38204 Pages
 5850
58502 Pages
 2021 Medical catalogue
76 Pages
 7801.70.002, 7801.75.002
3 Pages
 Precision scale
170 Pages
 Moisture Analyser
3 Pages
 transport & logistics
8 Pages
 Food industry
8 Pages
 catalogue medical
68 Pages
 Accessories
2 Pages
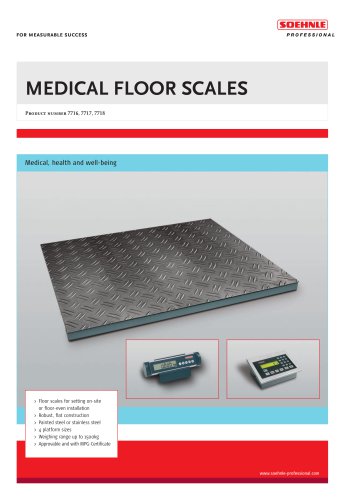 MEDICAL FLOOR SCALES
6 Pages
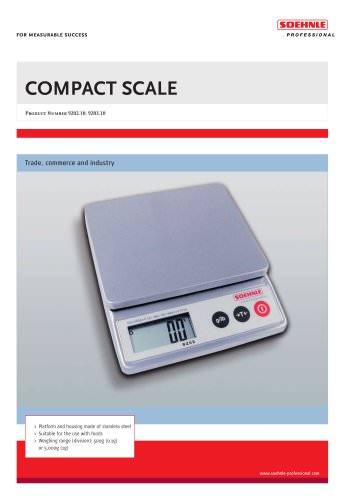 COMPACT SCALE
2 Pages
 Veterinary scales
2 Pages
 7710 Bed scale approved
2 Pages
 Product portfolio 2014/2015
152 Pages
 7871 Chair weigher "Comfort"
2 Pages
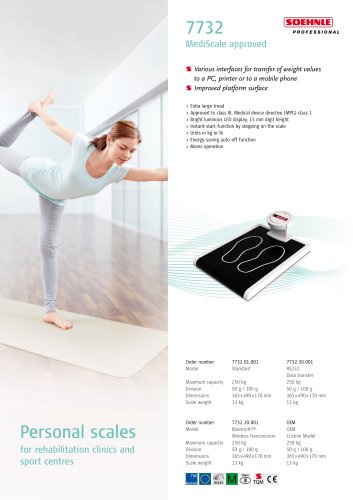 7732 MediScale, approved
1 Page
 7830 Stand scale
2 Pages
 7730 Stand scale, approved
2 Pages
 7710 Bed scale, approved
2 Pages
 BABY HEIGHT ROD
2 Pages
 HEIGHT ROD
2 Pages
 STANDARD TERMINAL
6 Pages
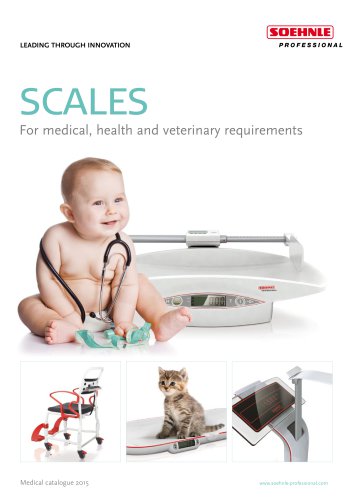 Product portfolio 2015
36 Pages
 7711
77112 Pages
 7702 Chair weigher, approved
2 Pages
 7725 Baby scale, approved
2 Pages
 7808 Multifunction scale
2 Pages






- Examination couch
- Height-adjustable examination couch
- Electric examination couch
- Automatic balance
- Gray treatment table
- Patient scale
- Electronic patient scale
- Platform patient weighing scale
- 1-section treatment table
- Patient weighing scale with digital display
- Platform scale
- Electronic platform scale
- Battery-powered patient scale
- Patient weighing scale with BMI calculation
- Patient weighing scale with LCD display
- Veterinary examination table
- Baby scale
- Platform scale with digital display
- Electronic baby scale
- Height rod