


Distal Targeting System - Gamma3 Long Nail R1.5/T2 Recon Nail R1.5

Distal Targeting System - Gamma3 Long Nail R1.5/T2 Recon Nail R1.5
The document outlines operative techniques for the Stryker Osteosynthesis Distal Targeting System, focusing on Gamma3 Long Nails and T2 Recon Nails. It stresses the importance of surgeon discretion and recommends completing the "Distal Targeting Training Module" before surgery. Devices must be cleaned and sterilized, with warnings about fixation screws.
Distal Targeting System Overview
The system enhances distal locking screw placement, minimizing repeated drilling and X-ray adjustments. It is compatible with Gamma3 Long Nail and T2 Recon Nail systems, with components made of carbon fiber for radiolucency and stiffness.
Operative Technique
- Calibration: Essential for alignment with distal locking holes, involving assembly and length adjustment, followed by anterior/posterior adjustment using the Calibration Stand.
- Locking Options: Offers static, dynamic, and static/dynamic locking, each requiring specific screw placements.
- Device Calibration: Involves selecting the appropriate Adjusting Device based on locking mode and ensuring alignment using the Adjusting Screw.
- Distal Locking Procedure: Adjust the operating table for visual guidance, securely attach the proximal targeting device, and properly ream the nail.
- Reassembly: Reassemble the calibrated Distal Targeting Arm onto the Gamma3 Targeting Arm for proper fixation and alignment.
- Oblique Approach: Position the C-Arm approximately 30 degrees oblique to the Drill Sleeve Assembly for optimal visualization.
Warnings and Recommendations
Includes warnings such as ensuring the Nail Holding Screw is fully tightened and avoiding skin incisions before final adjustments. Emphasizes using the system as intended to prevent complications.
Conclusion
The document is a comprehensive guide for surgeons using the Stryker Distal Targeting System, highlighting the importance of training, calibration, and adherence to procedures for successful outcomes.
Overview
Provides detailed instructions for the distal guided locking procedure using the Gamma3 system by Stryker, including specifications, operative techniques, and system components.
Specifications
Involves using a C-Arm for fluoroscopic imaging to ensure proper alignment of the Drill Sleeve Assembly and the nail, positioned obliquely at approximately 30 degrees.
Operative Technique
Divided into key steps:
- Oblique Positioning of the C-Arm: Position obliquely for correct projection, with necessary adjustments based on the image.
- Height and Orbital Rotation Adjustment: Adjust to ensure the nail and sleeve are parallel on the image.
- Sleeve Adjustment to the Nail Position: Adjust using the Adjusting Screw if not aligned, with maximum adjustments of ±14 mm.
- Distal Drilling and Locking: After alignment, perform a skin incision, drill, measure screw length, and insert locking screws.
Warnings and Notes
Ensure proper contact of the Tissue Protection Sleeve with the bone and avoid overtightening screws. Do not exceed mechanical limits.
System Components
Lists instruments and optional components required, including the Distal Targeting Arm, Drill Sleeves, and Screwdriver Bits.
Manufacturer Information
Produced by Stryker Trauma GmbH and distributed by Stryker in the USA, emphasizing professional clinical judgment and training in product use.
Catalog excerpts

Distal Targeting System Gamma3 Long Nail R1.5 / T2 Recon Nail R1.5 Operative Technique
Open the catalog to page 1
Distal Targeting Device Contributing Surgeons Prof. Gilbert Taglang, M.D. Department of Traumatology University Hospital, Strasbourg France Florian Krug, Ph.D. Head of Trauma Department Klinikum Eilbek, Schoen Kliniken, Hamburg Germany This publication sets forth detailed recommended procedures for using Stryker Osteosynthesis devices and instruments. Clinical Assistant Professor Department of Orthopaedic Surgery University of Illinois, Chicago USA Robert Probe, M.D. Chairman − Department of Orthopaedic Surgery Scott & White Memorial Hospital, Temple, Tx USA It offers guidance that you should...
Open the catalog to page 2
Distal Targeting System 4 Distal Targeting System Components 5 Distal Targeting Device Calibration 6 Prior to the Distal Locking Procedure 11 Distal Drilling and Locking 17
Open the catalog to page 3
Introduction Distal Targeting System for Gamma3 Long Nails and T2 Recon Nails In response to the request of surgeons around the world, Stryker Osteosynthesis has created a dedicated Distal Targeting System. Without using the Distal Targeting System, the placement of the distal locking screws is done primarily by a variety of freehand techniques, using conventional or radiolucent drilling devices. These methods may result in repeated drilling, repeated X-Ray adjustment, which may require longer exposure as well as higher potential for mis-drilling2. Compatibility Using the Distal Targeting System...
Open the catalog to page 4
Introduction Distal Targeting System Components The major components of the device are made of carbon fiber material, providing radiolucency under the C-Arm imaging and stiffness for the distal locking procedure. Distal Targeting System with T2 Recon Targeting Device Fixation Bolt Storage Pocket Adjusting Device Adjusting Screw Sleeve Fixation Button Adjusting Device Lever Positioning Pins Targeting Holes
Open the catalog to page 5
Operative Technique Distal Targeting Device Calibration This operative technique does not describe the entire surgical procedure. For full Gamma3 Long Nail R1.5 and for full T2 Recon Nail R1.5 surgical procedures, please refer to the dedicated operative techniques. It is important to perform Distal Targeting Device calibration prior to the nail insertion. Then, follow the operative technique until “Distal Screw Locking”. The following description of the surgical technique is using a Gamma3 Long Nail R1.5 / LEFT and will describe distal locking in a static locking configuration. Calibration Calibration...
Open the catalog to page 6
Operative Technique Distal Targeting Device Calibration Assembly and Length Adjustment Slide the Distal Targeting Arm R1.5 (REF 1320-5315) onto the Gamma3 Targeting Arm until a click is felt (Fig. 4). The white line must be seen through the Alignment Indicator Window for correct assembly (Fig. 4a). Insert the Fixation Bolt completely (Fig. 5 1 ) from the lateral opening until a click is felt. The Fixation Lever must then be securely locked (Fig. 5 2 ). Alignment Indicator Window Fixation Lever Fixation Bolt Note: Be sure that the Distal Targeting Arm is positioned anteriorly to the chosen nail...
Open the catalog to page 7
Operative Technique Distal Targeting Device Calibration The length of the chosen nail determines where the Adjusting Device should be attached. The selected Adjusting Device (in this case we chose a left Gamma3 Long Nail R1.5 - 360mm to be locked in a static/static configuration) is placed into the Pin Positioning Holes that match the length of the selected nail. The corresponding nail lengths are marked on the Distal Targeting Arm (Fig. 12). Positioning Pins Insert the Positioning Pins into the Pin Positioning Holes, then lock the Adjusting Device Lever by turning it in a clockwise direction...
Open the catalog to page 8
Operative Technique Distal Targeting Device Calibration A/P Adjustment The Instrument Tray has a dedicated Calibration Stand. Place the assembled device onto this by placing it onto the metal pin as shown (Fig. 16a). Then, look through the Tissue Protection Sleeve and adjust the targeting position by turning the Adjusting Screw until the holes of the sleeve and the nail appear coaxial. Now make final adjustments with the drill, passing it through the most proximal hole in the nail as shown. The drill must go through the nail hole smoothly and easily. If not, turn the Adjusting Screw until passage...
Open the catalog to page 9
Operative Technique — Distal Guided Locking After the calibration steps have been completed, remove the Sleeve Assembly (Fig. 17 2 ) by pressing the Sleeve Fixation Button (Fig. 17 1 ) of the Adjusting Device. Release the Fixation Lever (Fig. 18a 1 ), then remove the Fixation Bolt (Fig. 18a 2 ) and place it into the Fixation Bolt Storage Pocket (Fig. 18b 3 ). Detach the Distal Target Arm assembly and store it back onto the Tray (Fig. 19). Warning: Keep the Adjusting Device in its position as calibrated. Do NOT remove the Adjusting Device from the Distal Targeting Arm at this point.
Open the catalog to page 10
Operative Technique — Distal Guided Locking Prior to the Distal Locking Procedure Reattach the proximal Gamma3 Targeting Sleeve Assembly to the Gamma3 Targeting Arm according the Gamma3 Long Nail R 1.5 operative technique and select the chosen CCD angle on the device. Follow the Gamma3 Operative Technique, Long Nail R1.5, up to that part of the chapter entitled “Distal Screw Locking”. When this chapter is completed, the Set Screw has been properly positioned in a groove of the Lag Screw (Fig. 20) and a check has been done with the Lag Screwdriver T-handle to make sure that the Lag Screw can not...
Open the catalog to page 11
Operative Technique — Distal Guided Locking Reassembly of the Calibrated Distal Targeting Arm The calibrated Distal Targeting Arm is slid over the Gamma3 Targeting Arm (Fig. 22 1 ). The white line must be visible in the Alignment Indicator Window (Fig. 22a). The Fixation Bolt is removed from the Fixation Bolt Storage Pocket and reinserted into the hole (Fig. 23 2 ), going completely through the Targeting Arm until a click is felt. Then, the Fixation Lever must be locked to ensure proper fixation. This is required to secure the arm to the targeter and stabilize the system. (Fig. 23 3 ). Alignment...
Open the catalog to page 12All Stryker catalogs and technical brochures
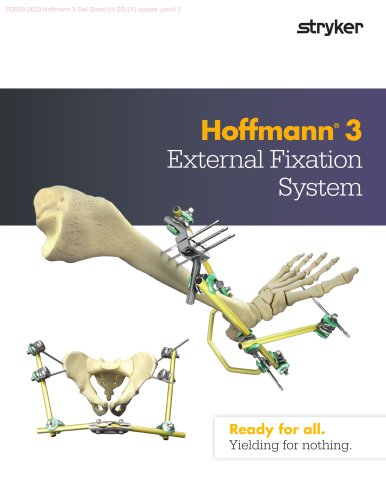 Hoffmann® 3
2 Pages
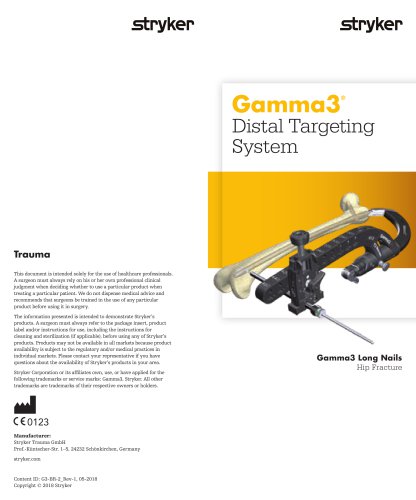 Gamma3
2 Pages
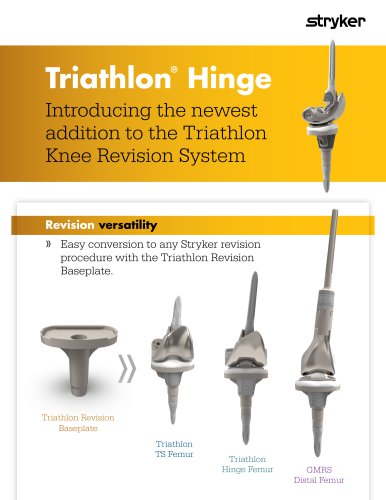 Triathlon Hinge Sell Sheet
2 Pages
 ICU Brochure
6 Pages
Archived catalogs
 C-Arm T racking System
2 Pages
 ACL Instrumentation Brochure
6 Pages
 System 7
7 Pages
 System 7 Precision
2 Pages
 System 7 Battery
2 Pages
 System 7 Sterilization Case
2 Pages
 CD4 & SABO2 Family
5 Pages
 Gamma3 Trochanteric Nail 180
48 Pages
 Gamma3 Long Nail R2.0
48 Pages
 Gamma3 Fragment Control Clip
6 Pages
 Gamma3 U-Blade Lag Screw
18 Pages
 trident
12 Pages
 GMRS
GMRS13 Pages
 Scorpio ®Knee TS
6 Pages
 CBC II
2 Pages
 the Mill
2 Pages
 Gamma3 T
6 Pages
 Label Changes
2 Pages
 SmartTip ™
3 Pages
 SDC 3
SDC 32 Pages
 System 7 Family
7 Pages
 Mixevac III
2 Pages
 InterPulse - Orthopaedics
4 Pages
 Neptune 2
2 Pages
 Neptune E-SEP
2 Pages
 Right Angled Screwdriver
8 Pages
 Universal Neuro III
10 Pages
 EasyClip
2 Pages
 Asnis ® Micro Xpress
2 Pages
 S3 MedSurg Bed
8 Pages
 Stryker NAV3i
4 Pages
 Cast Cutter
2 Pages
 Cast Vac
2 Pages
 Revolution
6 Pages
 SmartPump
2 Pages
 Disposable Cuff
2 Pages
 Patient Education
2 Pages
 Reusable Cuff
2 Pages
 SurgiCount
4 Pages
 OASYS®
44 Pages
 Reflex®
24 Pages
 Escalate®
16 Pages
 Stryker Biologics
46 Pages
 Aero® -C
6 Pages
 Dynatran
13 Pages
 Aviator™
2 Pages
 AVS Anchor® -C
2 Pages
 Humeral Nailing System
44 Pages
 Luxor
Luxor4 Pages
 OrthoMap®
4 Pages
 ENT navigation system
7 Pages
 AxSOS 3® Titanium
36 Pages
 Smart Equipment Management
3 Pages
 Prime TC®
4 Pages
 TruRize™ Clinical Chair
4 Pages
 TruRize® Clinical Chair
2 Pages
 VariAx® 2
20 Pages
 ACCOLADE® II
20 Pages
 VariAx® DistalFibula
20 Pages
 company overview
12 Pages


- Hospital bed
- Bone plate
- Compression plate
- Catheter
- Metallic compression plate
- Locking compression plate
- Inclinable bed
- Universal operating table
- Adjustable height operating table
- Surgical system
- Electric operating table
- Cutting electrosurgical system
- Tilting surgical table
- Distal compression plate
- Coagulation surgical system
- Surgical table with legrest
- Agitator
- Interbody fusion cage
- Drill