VariAx® 2
1 /20Pages

VariAx® 2
1 /20Pages
Catalog excerpts

Distal Radius Locking Plate System Operative Technique • Anatomical & Universal Volar Plates • Dorsal Plates • Fragment Specific Plates • XXL Anatomical Volar Plates • ariAx 2 Color Coded Screws V and I
Open the catalog to page 1
VariAx 2 Distal Radius Locking Plate System This publication sets forth detailed recommended procedures for using Stryker devices and instruments. It offers guidance that you should heed, but, as with any such technical guide, each surgeon must consider the particular needs of each patient and make appropriate adjustments when and as required. A workshop training is recommended prior to first surgery. All non-sterile devices must be cleaned and sterilized before use. Follow the instructions provided in our reprocessing guide (L24002000). Multi-component instruments must be disassembled for cleaning....
Open the catalog to page 2
Contents 1. Indications, Precautions & Contraindications 2. Overview Plate Options Screw/Peg Options 3. Operative Technique Anatomical Volar Plate Universal Volar Plate Dorsal Plate Lateral Distal Radius Plate Aiming Block
Open the catalog to page 3
Indications, Precautions & Contraindications Intended Use The VariAx 2 Distal Radius Locking System including the XXL Volar Distal Radius Plates is intended for internal fixation of small bone fractures, primarily including distal radius fractures. The physician’s education, training and professional judgment must be relied upon to choose the most appropriate device and treatment. The following contraindications may be of a relative or absolute nature, and must be taken into account by the attending surgeon: • Any active or suspected latent infection or marked local inflammation in or about the...
Open the catalog to page 4
Overview Plate Options Anatomical Volar Plates Anatomical Volar Plates Narrow Intermediate Anatomical Volar Plates Standard Universal Volar Plates Dorsal Plates Dorsal Medial DR Plate Note: Plates are not scaled to size. XXL Anatomical Volar Plates Color Coding and Screw/Peg Options 2.7mm Screws T8 Interface Note: • ocking and Non-Locking screws L can be used in any round hole. 2.4mm Screws & 2.0 Pegs T8 Interface Pre-Angled Distal Screw Holes The distal screw holes in the anatomic plates are angled to give a predetermined screw pattern in the distal bone block. The image here shows the various...
Open the catalog to page 5
SmartLock1 Polyaxial / Compression Drill Guide Allows for ±15 degrees of angulation. A lip on the drill sleeve will engage and allow toggling in the hole. The range in which the drill guide toggles will create a 30-degree cone and every angle in this range will be a locking position. This may allow the surgeon to aim where the screw/ peg should be placed. Also, depending on the placement of the plate, there may be a need to angle a screw/peg out of the fracture line. Note: • hen drilling eccentrically, the W arrow marked on the compression side of the drill guide should be pointing towards the...
Open the catalog to page 6
Modular Handle VariAx 2 offers a modular handle system. This is composed of two handle grip sizes (medium and large) that can be interchanged with either a bi-directional ratcheting AO-Coupling insert or a standard AO-Coupling insert. Both handle sizes are equipped with a spin-cap to allow insertion using a twofinger technique. In order to disengage the insert from the handle, push down on the button on the distal part of the handle and pull the insert away from the handle. Note: The inserts must be removed from the handles before cleaning. The ratcheting insert can work in three modes: clockwise...
Open the catalog to page 7
Operative Technique Anatomical Volar Plate 1. An incision is made approximately 5-8cm long just radial to the FCR tendon. If more exposure is necessary, the incision can be extended radially at 45 degrees along the wrist flexion creases. 2. The FCR tendon is retracted ulnarly and dissection is carried down through the floor of the FCR sheath. 7. Choose the appropriate implant according to patient anatomy and fracture pattern. or the use of K-Wires for temporary fixation may be helpful. The use of AP/Lateral fluoroscopy is helpful to determine correct fracture reduction and plate position. 3....
Open the catalog to page 8
Operative Technique Anatomical Volar Plate 12. non-locking screw is placed in A the oblong gliding hole but not completely tightened to allow adjustment of the plate in distal or proximal directions. 13. After confirmation of the correct positioning of the anatomic volar plate by use of fluoroscopy, tighten the first screw. 14. nce the position of the plate has O been determined, it is time to decide which drill guide to use based upon preference and/or fracture pattern. 15. sing the desired drill guide, repeat U drilling, measuring and placement of screws/pegs in the distal holes. 17. Verify...
Open the catalog to page 9
Operative Technique Universal Volar Plate 1. An incision is made approximately 5-8cm long directly over the FCR tendon. If more exposure is necessary, the incision can be extended radially at 45 degrees along the wrist flexion creases. 2. The FCR tendon is retracted ulnarly and dissection is carried down through the floor of the FCR sheath. 7. The plate should be placed slightly below the distal edge of the distal radius to avoid inserting screws or pegs into the joint. The use of AP/Lat fluoroscopy is helpful to determine correct fracture reduction and plate position. external traction, and/or...
Open the catalog to page 10
Operative Technique Universal Volar Plate 12. fter confirmation of the correct A positioning of the volar plate by use of fluoroscopy, tighten the first screw. 13. Repeat drilling, measuring and placing of screws/pegs in the distal holes of the plate. The position and number of screws applied depends on the type of fracture. 14. Place Non-Locking or Locking screws in the proximal end of the plate. 15. erify proper placement of screws and pegs by use of fluoroscopy to ensure V that neither penetrates the joint. 16. Close the incision. Note: The tips of the screws in the distal holes should not...
Open the catalog to page 11
Operative Technique Dorsal Plate 1. Longitudinal incision is made just ulnar to Lister’s tubercle at the distal radius region. 2. Dissection is performed down to the extensor retinaculum. The third compartment is opened and the extensor pollicis longus is displaced radially. 3. The second compartment wrist extensors are subperiosteally elevated radially and the fourth compartment is subperiosteally elevated ulnarly. The terminal branches of the posterior interosseous nerve may be excised for pain reduction. an external traction device and/or K-Wires for temporary fixation may be helpful. 6. The...
Open the catalog to page 12All Stryker catalogs and technical brochures
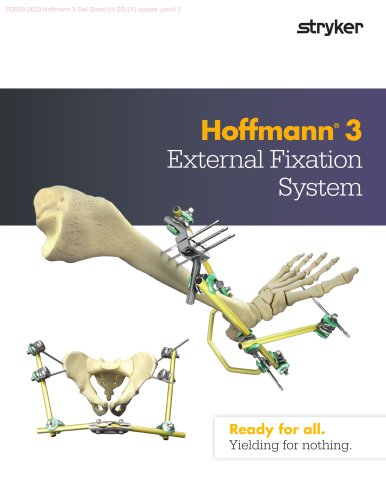 Hoffmann® 3
2 Pages
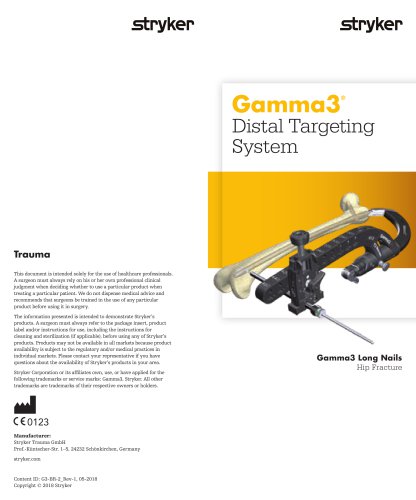 Gamma3
2 Pages
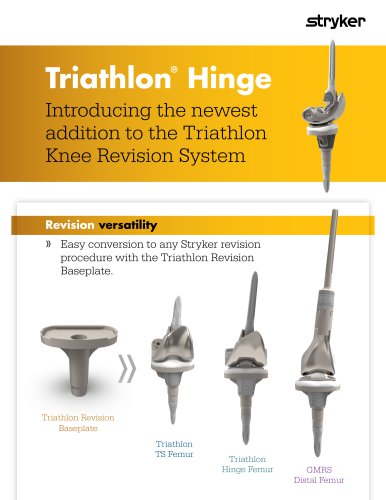 Triathlon Hinge Sell Sheet
2 Pages
 ICU Brochure
6 Pages
Archived catalogs
 C-Arm T racking System
2 Pages
 ACL Instrumentation Brochure
6 Pages
 System 7
7 Pages
 System 7 Precision
2 Pages
 System 7 Battery
2 Pages
 System 7 Sterilization Case
2 Pages
 CD4 & SABO2 Family
5 Pages
 Gamma3 Trochanteric Nail 180
48 Pages
 Gamma3 Long Nail R2.0
48 Pages
 Gamma3 Fragment Control Clip
6 Pages
 Gamma3 U-Blade Lag Screw
18 Pages
 trident
12 Pages
 GMRS
GMRS13 Pages
 Scorpio ®Knee TS
6 Pages
 CBC II
2 Pages
 the Mill
2 Pages
 Gamma3 T
6 Pages
 Label Changes
2 Pages
 SmartTip ™
3 Pages
 SDC 3
SDC 32 Pages
 System 7 Family
7 Pages
 Mixevac III
2 Pages
 InterPulse - Orthopaedics
4 Pages
 Neptune 2
2 Pages
 Neptune E-SEP
2 Pages
 Right Angled Screwdriver
8 Pages
 Universal Neuro III
10 Pages
 EasyClip
2 Pages
 Asnis ® Micro Xpress
2 Pages
 S3 MedSurg Bed
8 Pages
 Stryker NAV3i
4 Pages
 Cast Cutter
2 Pages
 Cast Vac
2 Pages
 Revolution
6 Pages
 SmartPump
2 Pages
 Disposable Cuff
2 Pages
 Patient Education
2 Pages
 Reusable Cuff
2 Pages
 SurgiCount
4 Pages
 OASYS®
44 Pages
 Reflex®
24 Pages
 Escalate®
16 Pages
 Stryker Biologics
46 Pages
 Aero® -C
6 Pages
 Dynatran
13 Pages
 Aviator™
2 Pages
 AVS Anchor® -C
2 Pages
 Humeral Nailing System
44 Pages
 Luxor
Luxor4 Pages
 OrthoMap®
4 Pages
 ENT navigation system
7 Pages
 AxSOS 3® Titanium
36 Pages
 Smart Equipment Management
3 Pages
 Prime TC®
4 Pages
 TruRize™ Clinical Chair
4 Pages
 TruRize® Clinical Chair
2 Pages
 ACCOLADE® II
20 Pages
 VariAx® DistalFibula
20 Pages
 company overview
12 Pages


- Hospital bed
- Bone plate
- Compression plate
- Metallic compression plate
- Catheter
- Locking compression plate
- Inclinable bed
- Surgical table
- Universal operating table
- Adjustable height operating table
- Surgical system
- Distal compression plate
- Electric operating table
- Tilting surgical table
- Cutting electrosurgical system
- Coagulation electrosurgical unit
- Agitator
- Surgical table with legrest
- Interbody fusion cage
- Proximal compression plate