
- Catalogs
- SuperHandy
- SuperHandy Electric Snow Thrower Pro

SuperHandy Electric Snow Thrower Pro
SuperHandy Electric Snow Thrower Pro
The 17" Cordless Snow Thrower operates at 48V DC with a no-load speed of 2000 RPM. It has a clearing width of 17 inches (43 cm) and a maximum snow intake height of 5.7 inches (145 cm). The maximum throwing distance is 23 feet (7 meters), and it weighs 19.8 lbs (9 kg). The battery is a 48V DC 2Ah Li-ion, and the charger input is 100~240V AC 50/60Hz with an output of 50.4V DC, 1A.
Operators must read the manual before use. Key safety measures include wearing eye, face, and ear protection, keeping the work area clean and well-lit, and avoiding operation in explosive atmospheres. Children and bystanders should be kept away, and the tool should not be exposed to rain or wet conditions.
Ensure proper circuit protection and ventilation for batteries and chargers to prevent overheating, which can cause damage or fire.
Familiarize yourself with the controls and proper use of the equipment. Keep the operation area clear, avoid using on gravel surfaces, and do not make adjustments while the motor is running. Stop the motor and remove the battery when leaving the operating position or performing maintenance.
Never use hands to clear a clogged rotor housing. Shut off the motor, remove the battery, and use a clean-out tool.
Fully charge the battery before first use and store it fully charged. Charge in a well-ventilated area and avoid overcharging. The charger has built-in overcharge protection, and charging time is approximately 1.5 to 2 hours.
The snow thrower includes components such as the shovel blade, splitter blade, adjustment handle, wheels, poles, handles, safety lock switch, ON/OFF switch, motor housing, scraper blade, battery, and charger.
Assemble the pole by aligning and connecting the upper and lower pole assemblies. Assemble the wheels using the provided screws. To start the machine, use the safety lock switch and ON/OFF switch.
Push the shovel forward at a comfortable speed, adjust the snow throwing angle, and remove snow efficiently by overlapping swaths. Remove the battery after use and store the shovel properly.
Regularly check fasteners for tightness, refer to the manual for storage instructions, and maintain safety labels. Run the machine briefly after use to prevent freezing.
The product has a 12-month warranty covering workmanship, excluding wear parts. The warranty is void if the product is improperly used or modified.
Catalog excerpts
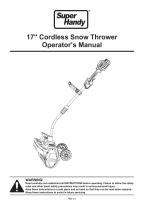
17" Cordless Snow Thrower Operator’s Manual Read carefully and understand all INSTRUCTIONS before operating. Failure to follow the safety rules and other basic safety precautions may result in serious personal injury. Save these instructions in a safe place and on hand so that they can be read when required. Keep these instructions to assist in future servicing. REV 1.0
Open the catalog to page 1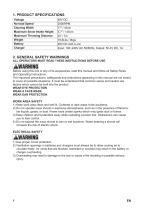
ALL OPERATORS MUST READ THESE INSTRUCTIONS BEFORE USE. Before using this tool or any of its accessories, read this manual and follow all Safety Rules and Operating Instructions. The important precautions, safeguards and instructions appearing in this manual are not meant to cover all possible situations. It must be understood that common sense and caution are factors which cannot be built into the product. WEAR EYE PROTECTION WEAR A FACE MASK WEAR EAR PROTECTION WORK AREA SAFETY 1) Keep work area clean and well lit. Cluttered or dark areas invite accidents. 2) Do not operate snow shovel in explosive...
Open the catalog to page 2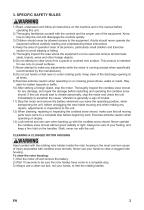
3. SPECIFIC SAFETY RULES 1) Read, understand and follow all instructions on the machine and in the manual before operating this unit. 2) Thoroughly familiarize yourself with the controls and the proper use of the equipment. Know how to stop the unit and disengage the controls quickly. 3) Children should never be allowed access to the equipment. Adults should never operate the equipment without carefully reading and understanding these instructions 4) Keep the area of operation clear of all persons, particularly small children and Exercise caution to avoid slipping or falling. 5) Thoroughly inspect...
Open the catalog to page 3
3. IMPORTANT SAFETY INSTRUCTIONS FOR BATTERY AND CHARGER 1) Battery must be fully charged before first use. 2) Insert charger pin to battery. Plug the charger into a 100-240 AC outlet, a red light should appear on the charger. Charge the battery until the light on the charger turns solid green. 3) Always charge the battery at room temperature (suggest temperature range is 32°F/0°C to 120°F/49°C). If the battery is used in a cold environment, allow it to warm up for at least an hour before charging. Cold batteries will not be charged completely and battery components may be damaged. 4) Only charge...
Open the catalog to page 4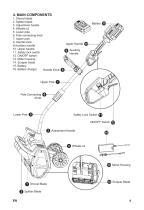
4. MAIN COMPONENTS 1. Shovel blade 2. Splitter blade 3. Adjustment handle 4. Wheels x2 5. Lower pole 6. Pole connecting knob 7. Upper pole 8. Handle knob Upper Handle 10 9.Auxiliary handle 10. Upper handle 9 Auxiliary 11. Safety lock switch Handle 12. ON/OFF switch 13. Motor housing 14. Scraper blade 15. Battery 16. Battery charger Handle Knob 8 Pole Connecting 6 Knob Safety Lock Switch 11 ON/OFF Switch 12 3 Adjustment Handle
Open the catalog to page 5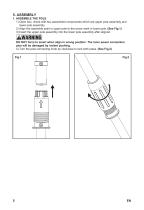
1) Open box, check with two assembled components which are upper pole assembly and lower pole assembly. 2) Align the assemble point in upper pole to the arrow mark in lower pole. (See Fig.1) 3) Insert the upper pole assembly into the lower pole assembly after aligned. DO NOT force to insert when align in wrong position. The inner power connection pins will be damaged by violent pushing. 4) Turn the pole connecting knob by clockwise to lock both poles. (See Fig.2)
Open the catalog to page 6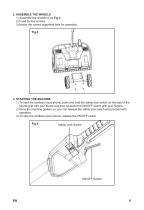
2) Fixed by four screws. 3) Notice the correct alignment hole for assembly. 1) To start the cordless snow shovel, push and hold the safety lock switch on the side of the handle grip with your thumb and then squeeze the ON/OFF switch with your fingers. 2) Once the machine powers on, you can release the safety lock switch and proceed with operation. 3) To stop the cordless snow shovel, release the ON/OFF switch.
Open the catalog to page 7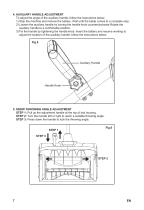
To adjust the angle of the auxiliary handle, follow the instructions below. 1) Stop the machine and remove the battery. Wait until the blade comes to a complete stop. 2) Loosen the auxiliary handle by turning the handle knob counterclockwise Rotate the auxiliary handle to a comfortable position. 3) Fix the handle by tightening the handle knob. Insert the battery and resume working to adjust the location of the auxiliary handle, follow the instructions below. 5. SNOW THROWING ANGLE ADJUSTMENT STEP 1: Pull up the adjustment handle at the top of tool housing. STEP 2: Turn the handle left or right...
Open the catalog to page 8
1. Start the cordless snow shovel. Push the shovel forward at a comfortable forward speed, and slow enough to clear the path completely. The clearing width of the snow shovel and the depth of snowfall should dictate your forward speed. 2. Direct the snow discharge to the right or to the left by adjusting the snow throwing angle. 3. To remove snow most efficiently, throw the snow downwind and slightly overlap each swath. 4. When clearing deeper drifts, hold the cordless snow shovel by the upper and lower handles and use a swinging or sweeping motion. Remove up to 6"/16cm. 5. Remove the battery...
Open the catalog to page 9
Great Circle USA Support Line: 1-866-493-0524 Email: [email protected] www.greatcircleus.com www.greatcircleca.com Scan me to get more new products.
Open the catalog to page 12All SuperHandy catalogs and technical brochures
 Vacuum Kit
2 Pages
 SuperHandy Electric Snow Thrower
12 Pages
 SuperHandy Electric Mini Chainsaw
12 Pages
 SuperHandy Wood Chipper Mini
13 Pages
 Superhandy Bath Lift Cushion
2 Pages
 Superhandy Mobility Scooter
9 Pages
 Passport Flex
2 Pages
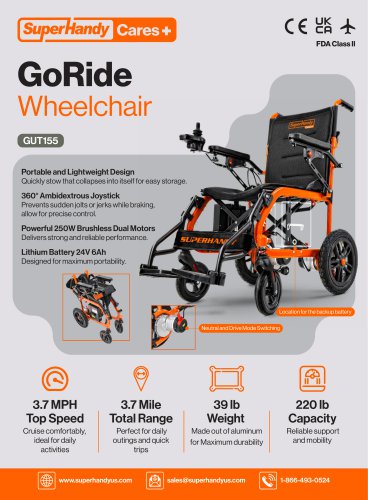
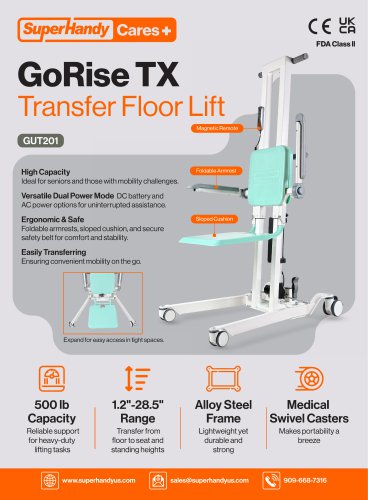
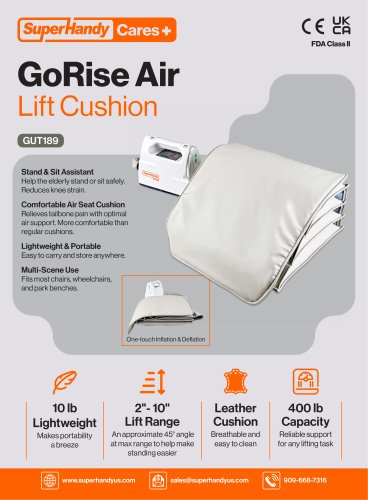

- Wheelchair
- Outdoor wheelchair
- Indoor wheelchair
- Wheelchair with legrest
- Folding wheelchair
- Black wheelchair
- Patient lifter
- Electric wheelchair
- Electric patient lift
- Mobility scooter
- Electric mobility scooter
- Aluminium frame wheelchair
- Seat cushion
- Patient lift on casters
- Lifting patient lift
- 4-wheel mobility scooter
- Washable pad
- Anatomical pad
- Wheelchair with armrests
- Mobility scooter with basket