
- Catalogs
- SuperHandy
- SuperHandy Snow Plow Blade Attachment

SuperHandy Snow Plow Blade Attachment
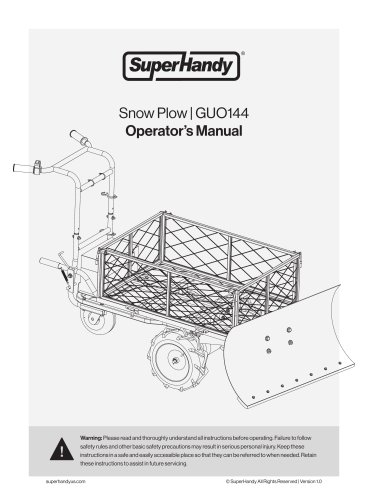
SuperHandy Snow Plow Blade Attachment
Catalog excerpts
Snow Plow | GUO144 Operator’s Manual Warning: Please read and thoroughly understand all instructions before operating. Failure to follow safety rules and other basic safety precautions may result in serious personal injury. Keep these instructions in a safe and easily accessible place so that they can be referred to when needed. Retain these instructions to assist in future servicing. superhandyus.com © SuperHandy All Rights Reserved | Version 1.0
Open the catalog to page 1
General Operating Safety Technical Specifications Main Components •- Exploded and Parts List <
Open the catalog to page 2
This product functions as an accessory attachment and must be mounted to an electric cart for operation. Snow removal is achieved by propelling the cart forward. It is not designed or intended for other uses. 1. You must read, understand and comply with all safety and operating instructions in this manual before attempting to setup and operate your Snow Plow. 2. Failure to comply with all safety and operating instructions can result in loss of machine control, serious personal injury to you and/or bystanders, and risk of equipment and property damage. The triangle in the text signifies important...
Open the catalog to page 3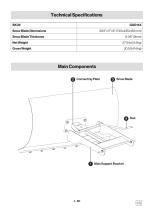
Snow Blade Dimensions Snow Blade Thickness Gross Weight Main Components 2 Connecting Plate Main Support Bracket
Open the catalog to page 4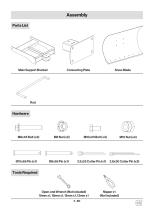
Assembly Parts List Main Support Bracket Connecting Plate Snow Blade Tools Required
Open the catalog to page 5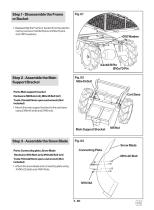
Step 1 - Disassemble the Frame or Bucket 1. Disassemble the Frame or bucket from the electric cart by remove 2 3.2x62 R pins, 2 Ø10x70 pins and 4 Ø10 washers. Step 2 - Assemble the Main Support Bracket Parts: Main support bracket Cart Base Hardware: M8 Nuts (x2), M8x45 Bolt (x2) Tools: 12mm&13mm open-end wrench (Not included) 1. Mount the main support bracket to the cart base using 2 M8x45 bolts and 2 M8 nuts. Main Support Bracket Step 3 - Assemble the Snow Blade Parts: Connecting plate, Snow Blade Connecting Plate Tools: 15mm&16mm open-end wrench (Not included) 1. Attach the snow blade and connecting...
Open the catalog to page 6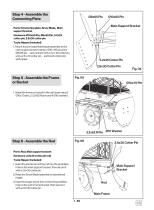
Step 4 - Assemble the Connecting Plate Ø10x65 Pin Main Support Bracket Parts: Connecting plate, Snow Blade, Main support bracket Hardware: Ø10x65 Pin, Ø8x65 Pin, 3.2x25 cotter pin, 2.8x30 cotter pin Tools: Nipper (Included) 1. Mount the pre-assembled blade assembly to the main support bracket using a Ø10 x 65 pin and a Ø8x65 pin,secure them with a 3.2 x 25 cotter pin and a 2.8 x 30 cotter pin,and bend cotter pins with nipper. Step 5 - Assemble the Frame or Bucket 1. Install the frame or bucket to the cart base using 2 Ø10x70 pins, 2 3.2x62 R pins and 4 Ø10 washers. Parts: Rod, Main support bracket...
Open the catalog to page 7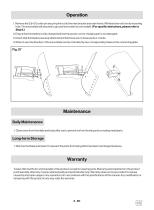
Operation 1. Remove the 2.8×30 cotter pin securing the rod to the main bracket and main frame. Withdraw the rod from its mounting hole. The snow blade will descend to ground level under its own weight. ( For specific instructions, please refer to Step 6.) 2. Ensure that the battery is fully charged and that the power cord or charging port is not damaged . 3. Check that the blade is securely attached and that there are no loose parts or cracks. 4. When in use, the direction of the snow blade can be controlled by two corresponding holes on the connecting plate. Maintenance Daily Maintenance 1. Clean...
Open the catalog to page 8
While normal care and regular maintenance will extend the life of your equipment, prolonged or constant use may eventually require that service be performed to allow it to continue operating properly.
Open the catalog to page 9
Thank you for supporting our brand! Great Circle USA Support Line: 1-866-493-0524 [email protected] www.superhandyus.com Follow us on social media @SuperHandy
Open the catalog to page 12All SuperHandy catalogs and technical brochures
 Vacuum Kit
2 Pages
 SuperHandy Electric Snow Thrower
12 Pages
 SuperHandy Electric Mini Chainsaw
12 Pages
 SuperHandy Wood Chipper Mini
13 Pages
 Superhandy Bath Lift Cushion
2 Pages
 Superhandy Mobility Scooter
9 Pages
 Passport Flex
2 Pages



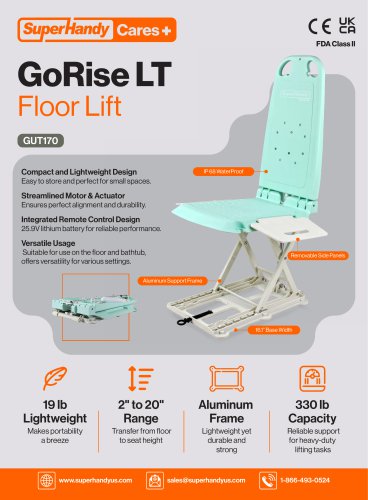

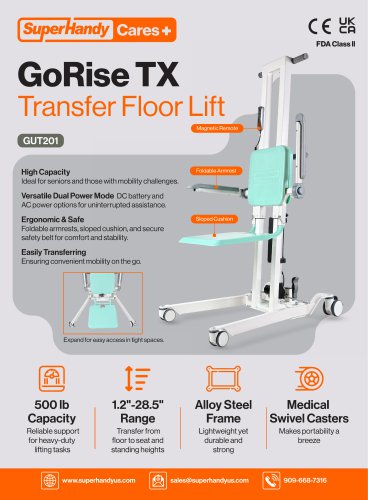


- Wheelchair
- Outdoor wheelchair
- Indoor wheelchair
- Wheelchair with legrest
- Folding wheelchair
- Black wheelchair
- Patient lifter
- Electric wheelchair
- Electric patient lift
- Mobility scooter
- Electric mobility scooter
- Aluminium frame wheelchair
- Seat cushion
- Patient lift on casters
- Lifting patient lift
- 4-wheel mobility scooter
- Washable pad
- Anatomical pad
- Wheelchair with armrests
- Mobility scooter with basket