PHLP
1 /20Pages
PHLP
1 /20Pages
Catalog excerpts
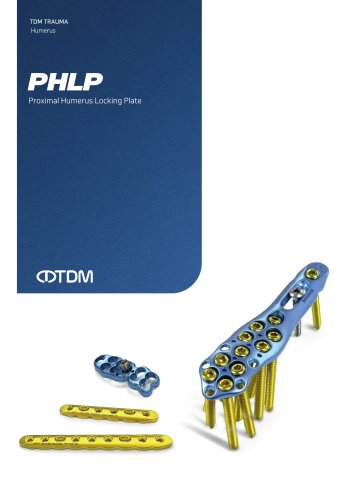
Proximal Humerus Locking Plate
Open the catalog to page 1
201,Jungang innotceh B/D, 148, Sagimakgol-ro, Jungwon-gu, Seongnam-si Gyeonggi-do, Korea Tel. 82-31-732-0631 Fax. 82-31-732-0632 69, Cheomdan venture so-ro 37beon-gil, Buk-gu, Gwangju, Korea Tel. 82-62-971-7460 Fax. 82-62-971-7461
Open the catalog to page 2
Surgical Technique Ordering Information Part I. Ordering Information Part II.
Open the catalog to page 3
It has already been more than a decade since the company was founded to become a leading company for fracture treatment. While keeping the basics, all employees have worked together and have been quick to reflect customers’ needs. The constant dedication and efforts of physicians for patients always present us with new challenges. TDM knows that these challenges are none other than the minds of doctors for patients. To know this, we wanted to reflect customer requests into our products and services as much as possible, and we will continue to do so in the future. Basic Plus One That ONE for the...
Open the catalog to page 4
- PHLP Plate Design All plates are designed to replicate as possible as the anatomical contours of the proximal Humerus and have various sizes - short to long / 3H~11H. Suture Holes #_ Suture hole shape change for easy / convenient wire insertion to help maintain fracture reduction A variety of screw combinations in the proximal part is possible K-wire Hole * Calcar Hole with Oblique Angle provides additional support and stability
Open the catalog to page 6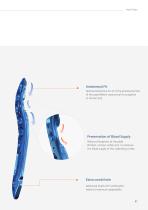
PHLP Plate Optimal Anatomical Fit of of the proximal portion of the plate (Better anatomical fit compared to old version) Reduced footprints of the plate (limited- contact undercuts) to preserve the blood supply of the underlying cortex.
Open the catalog to page 7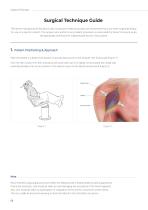
Surgical Technique TDM as the manufacturer of this device, does not practice medicine and does not recommend this or any other surgical technique for use on a specific patient. The surgeon who performs any implant procedure is responsible for determining and using the appropriate techniques for implanting the device in each patient. Place the patient in a beach chair position to provide easy access to the shoulder with fluoroscope (Figure 1). Start the skin incision from the coracoid process and make sure it is slightly convex toward the medial side, extending distally as far as the insertion...
Open the catalog to page 8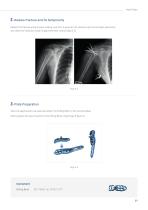
PHLP Plate 2. Reduce fracture and fix temporarily Reduce the fracture using K-wires making sure that K-wires do not interfere with correct plate placement, and check the reduction under image intensifier control (Figure 3). 3. Plate Preparation Select an appropriate size plate and attach the Drilling Block to the selected plate. Gently tighten the securing bolt on the Drilling Block using finger (Figure 4).
Open the catalog to page 9
Surgical Technique Insert a 1,5mm Guide Pin into the plate to temporarily fix the plate to the desired position of the bone. Attach the plate temporarily with a 3.5mm cortex screw in the elongated hole in the plate shaft (Figure 5). Placing the plate too high increases the risk of subacromial impingement. Placing the plate too low can prevent the optimal distribution of screws in the humeral head.
Open the catalog to page 10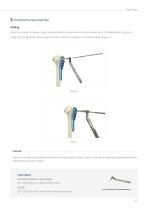
PHLP Plate Place the Locking Drill Sleeve, single handle(for 4.0mm Locking Screw) into the desired hole of the Drilling Block. (Figure 6) Using a Drill bit (03.5mm) under image intensifier control, drill carefully to the desired depth. (Figure 7) Caution Care must be taken not to allow the drill bit to penetrate the joint surface. The tip of the drill bit should be stopped approximately 5-8mm below the joint surface. Locking Drill Sleeve, Single Handle 901 -02235,03.5 for 4.0mm Locking Screw Drill Bit
Open the catalog to page 11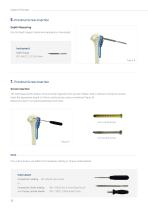
Surgical Technique Use the Depth Gauge to determine appropriate screw lenght Depth Gauge 7. Proximal Screw InsertionScrew Insertion This technique permits fixation of the proximal fragments first and then fixation with or without compression distally. Insert the appropriate length of 4.0mm Locking Screw using a screwdriver (Figure 9). Repeat this step for all required proximal screw holes. For Locking Screws, use either the Screwdriver, Holding or Torque Limited Handle. Instrument Screwdriver, Holding 901-05425, Hex 2.5mm or Screwdriver Shaft, Holding 901 -15425, Hex 2.5mm/Small Chuck with Torque...
Open the catalog to page 12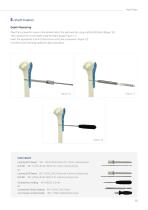
PHLP Plate 8. Shaft FixationDepth Measuring Place the Locking drill sleeve in the desired hole of the plate and drill using a drill bit (03.5mm) (Figure 10). Then measure the screw length using the depth gauge (Figure 11). Insert the appropriate 3.5mm Cortical Screw using the screwdriver. (Figure 12). For other screw inserting, repeat the above procedure. Instrument Locking Drill Sleeve 901 -12535,03.5x75mm for 3.5mm Locking Screw Drill Bit 901 -01125,02.5x130mm for 3.5mm Locking Screw or Locking Drill Sleeve 901 -12535,03.5x75mm for 4.0mm Locking Screw Drill Bit 901 -22335,03.5X160mm for 4.0mm...
Open the catalog to page 13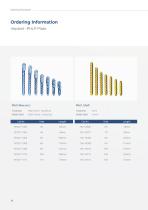
Ordering Information PHLP, Shaft Thickness 4mm Width Shaft 14mm Thickness Shaft 4mm / Distal End Width Shaft Shaft 14mm / Distal End Hole Length
Open the catalog to page 14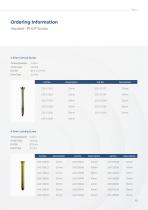
Ordering InformationImplant -PHLP Screw 3.5mm Cortical Screw Thread Diameter Screw Type Drill Bit Drive Type Thread Diameter 4.0mm Screw Type Locking
Open the catalog to page 15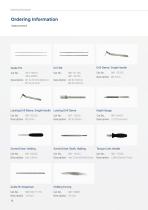
Ordering Information Drill Sleeve, Single Handle Depth Gauge Locking Drill Sleeve, Single Handle Locking Drill Sleeve Screw Driver, Holding Screw Driver Shaft, Holding Torque Limit Handle Description Hex 2.5mm/Small Chuck Description 2.0Nm/Small Chuck Holding Forcep
Open the catalog to page 16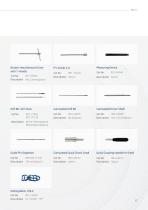
Broken Hexa Remove Driver with T-Handle Pin Guide 4.0 Cat No. 901-14240 Description Option Measuring Device Cat No. 901-04240 Description Option Cannulated Quick Chuck Small Cat No. 904-40012 Description Option Drilling Block, PHLP Cat No. 901-10563 Description for 197201 -10**
Open the catalog to page 17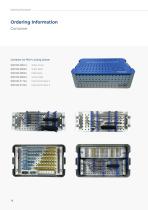
Ordering Information Container for PHLP Locking System Outer Cover Outer Body Plate Rack Screw Rack Instrument Rack 1 Instrument Rack 2
Open the catalog to page 18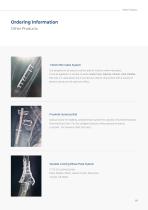
Other Products Ordering InformationOther Products a 1.0mm Mini Cable System It is designed to be easy to use but also to function when necessary. It can be applied to a variety of areas. Hand, Foot, Clavicle, Fibular, Ulna, Patella-Not only is it used alone, but it can also be used in conjunction with a variety of plates to produce the optimum effect. Proximal Humerus Nail Various choice for Stability, comprehensive system for solution of humeral fractures. Proximal Short Nail: For the complex fracture of the proximal humerus. Long Nail: For Humeral shaft fractures. Variable Locking Elbow Plate...
Open the catalog to page 19All TDM catalogs and technical brochures
 VA Snowman
8 Pages
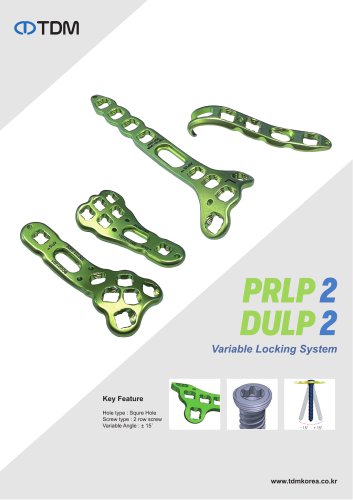 DULP & PRLP
2 Pages
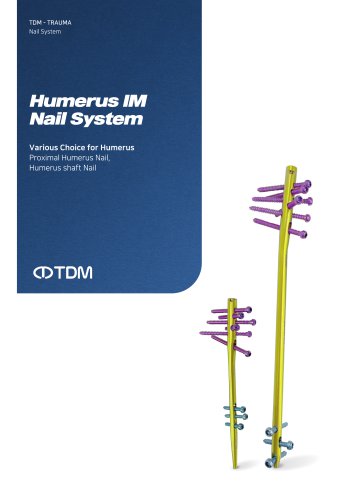 Humerus IM Nail
24 Pages
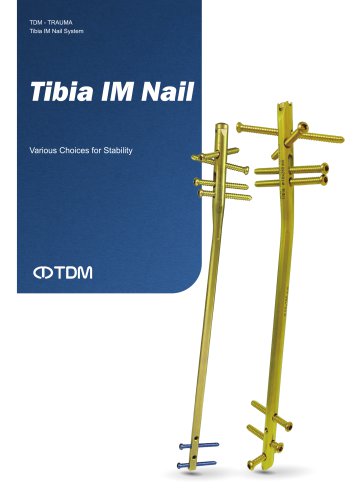 Tibia IM Nail
26 Pages
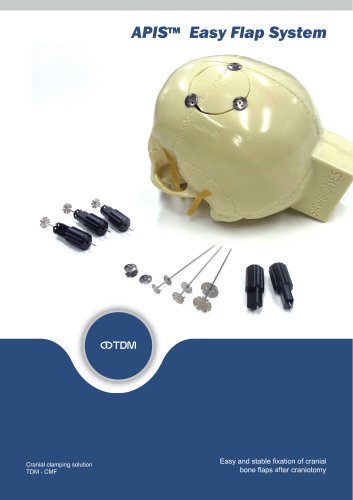 Easy Flap
4 Pages
 Trasorb+
4 Pages
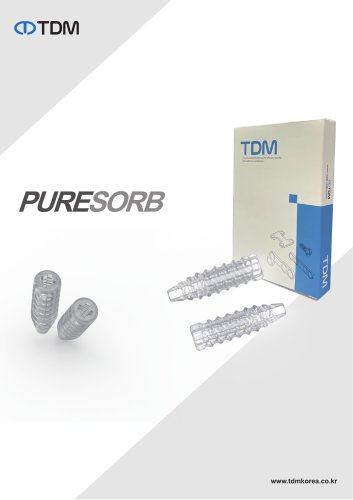 Puresorb
2 Pages
 Safe-seal
2 Pages
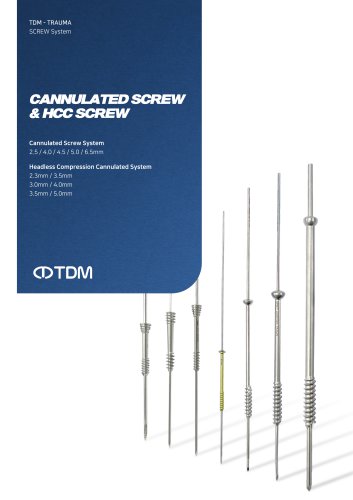 Cannulated & HCC Screws
24 Pages
 NewMalle
28 Pages
 NewColle v3
8 Pages
 Product Overview
47 Pages
- Bone plate
- Compression plate
- Metallic compression plate
- Locking compression plate
- Titanium compression plate
- Distal compression plate
- Compression bone screw
- Metallic compression bone screw
- Proximal compression plate
- Forearm compression plate
- Bone substitute
- Arthrodesis nail
- Medial compression plate
- Lateral compression plate
- Tibia compression plate
- General purpose compression bone screw
- Radius compression plate
- Metallic intramedullary nail
- Humerus compression plate
- External fixation system