

User Manual
User Manual
This document is a user guide for the MK3 Implant Scanner, designed and manufactured in Oxford. It provides instructions for accurate scanning of dental implants, ensuring reliable and precise measurements.
Specifications
The scanner features a 14.2 x 9.1 x 11.4 cm size, weighs 650 g, and consumes 15W of power. It supports up to 25 scans per charge with a 2.5-hour battery life. Connectivity options include WiFi and USB, and it operates optimally between 18-28°C.
Setup and Calibration
Users must note the post set and calibration plate numbers for accurate scanning. Calibration is necessary before scanning and should be done with the scanner parallel to the calibration plate. The scanner should be moved slowly in a radial motion during calibration.
Scanning Procedure
Dot posts are screwed into the patient's abutments and tightened to a specific torque. The scanner is calibrated, and scanning is initiated. The process takes less than 2 minutes, and results are exported as STL files.
Precautions and Warnings
Users should avoid staring at LED lights and ensure the scanner does not get wet. The device should not be disassembled, and damaged scanners should not be used. Protective glasses are provided for patient safety.
Cleaning and Maintenance
The scanner and dot posts require regular cleaning with specific detergents and sterilization in an autoclave. The calibration plate should be cleaned with mild soap and water.
Software and Updates
Keeping the software and firmware updated is crucial for optimal performance. Updates can be checked and downloaded from the Tupel 3D website.
Technical Support
For any issues, users can send debug data to Tupel for diagnosis. Additional support and instructional videos are available on the company's website.
Catalog excerpts

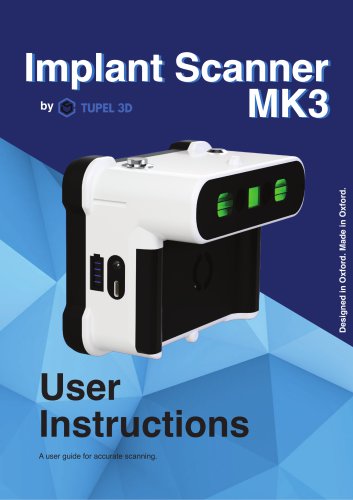
Implant Scanner MK3 Designed in Oxford. Made in Oxford. User Instructions A user guide for accurate scanning.
Open the catalog to page 1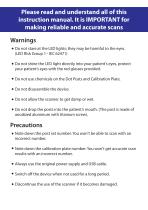
Please read and understand all of this instruction manual. It is IMPORTANT for making reliable and accurate scans • Do not stare at the LED lights; they may be harmful to the eyes. • Do not shine the LED light directly into your patient's eyes, protect your patient's eyes with the red glasses provided. • Do not use chemicals on the Dot Posts and Calibration Plate. • Do not allow the scanner to get damp or wet. • Do not drop the posts into the patient's mouth. (The post is made of anodized aluminum with titanium screw). • Note down the post set number. You won’t be able to scan with an incorrect...
Open the catalog to page 2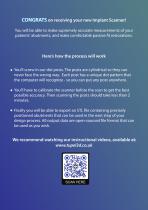
You will be able to make supremely accurate measurements of your patients' abutments, and make comfortable passive fit restorations. • You'll screw in our dot posts. The posts are cylindrical so they can never face the wrong way. Each post has a unique dot pattern that the computer will recognize - so you can put any post anywhere. • You'll have to calibrate the scanner before the scan to get the best possible accuracy. Then scanning the posts should take less than 2 minutes. • Finally you will be able to export an STL file containing precisely positioned abutments that can be used in the next...
Open the catalog to page 3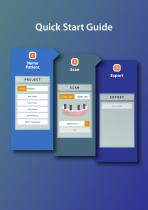
Quick Start Guide 1 Name Patient
Open the catalog to page 4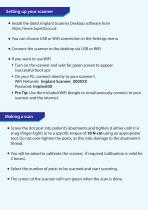
• Install the latest Implant Scanner Desktop software from • You can choose USB or WiFi connection in the Settings menu • Connect the scanner to the desktop via USB or WiFi • Turn on the scanner and wait for green screen to appear (successful boot up) • On your PC, connect directly to your scanner's WiFi Network: Implant Scanner_000XXX Password: ImplantOO • Pro Tip: Use the included WiFi dongle to simultaneously connect to your scanner and the internet • Screw the dot post into patient's abutments and tighten it either until it is snug (finger-tight) or to a specific torque of 10 N-cm using an...
Open the catalog to page 5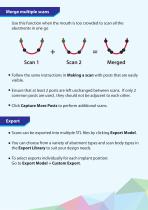
Use this function when the mouth is too crowded to scan all the abutments in one go • Follow the same instructions in Making a scan with posts that are easily visible. • Ensure that at least 2 posts are left unchanged between scans. If only 2 common posts are used , they should not be adjacent to each other. • Click Capture More Posts to perform additional scans. • Scans can be exported into multiple STL files by clicking Export Model. • You can choose from a variety of abutment types and scan body types in the Export Library to suit your design needs. • To select exports individually for each...
Open the catalog to page 6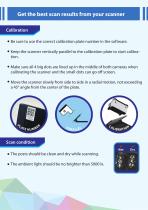
• Be sure to use the correct calibration plate number in the software. • Keep the scanner vertically parallel to the calibration plate to start calibration. • Make sure all 4 big dots are lined up in the middle of both cameras when calibrating the scanner and the small dots can go off screen. • Move the scanner slowly from side to side in a radial motion, not exceeding a 45° angle from the center of the plate. • The posts should be clean and dry while scanning. • The ambient light should be no brighter than 5000 lx,
Open the catalog to page 7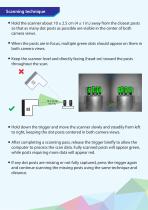
• Hold the scanner about 10 ± 2.5 cm (4 ± 1 in.) away from the closest posts so that as many dot posts as possible are visible in the center of both camera views. • When the posts are in focus, multiple green dots should appear on them in both camera views. • Keep the scanner level and directly facing (head-on) toward the posts throughout the scan. • Hold down the trigger and move the scanner slowly and steadily from left to right, keeping the dot posts centered in both camera views. • After completing a scanning pass, release the trigger briefly to allow the computer to process the scan data....
Open the catalog to page 8
• Make sure that the dots on the post are not obscured (by stitches for example). • Do not cross-thread the post, ensure it is screwed in straight. • Allow more than 1 minute between scans for the most accurate results. Temperature changes can cause slight accuracy loss. • Please check the Tupel 3D website (www.tupel3d.co.uk) for the latest information and instruction.
Open the catalog to page 9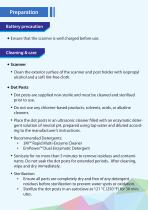
• Ensure that the scanner is well charged before use. • Clean the exterior surface of the scanner and post holder with isopropyl alcohol and a soft lint-free cloth. • Dot posts are supplied non-sterile and must be cleaned and sterilised prior to use. • Do not use any chlorine-based products, solvents, acids, or alkaline cleaners. • Place the dot posts in an ultrasonic cleaner filled with an enzymatic detergent solution of neutral pH, prepared using tap water and diluted according to the manufacturer's instructions. • Recommended Detergents: ■ 3M™ Rapid Multi-Enzyme Cleaner ■ EmPower™ Dual-Enzymatic...
Open the catalog to page 10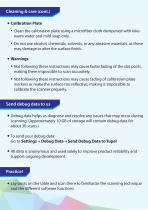
• Calibration Plate • Clean the calibration plate using a microfiber cloth dampened with lukewarm water and mild soap only. • Do not use alcohol, chemicals, solvents, or any abrasive materials, as these may damage or alter the surface finish. • Not following these instructions may cause faster fading of the dot posts, making them impossible to scan accurately. • Not following these instructions may cause fading of calibration plate markers or make the surface too reflective, making it impossible to calibrate the scanner properly. • Debug data helps us diagnose and resolve any issues that may...
Open the catalog to page 11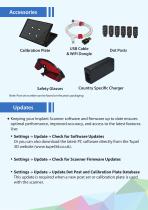
Calibration Plate Safety Glasses USB Cable & WiFi Dongle Country Specific Charger Note: Post set number can be found on the posts packaging. Updates Keeping your Implant Scanner software and firmware up to date ensures optimal performance, improved accuracy, and access to the latest features. Use: • Settings → Update → Check for Software Updates Or you can also download the latest PC software directly from the Tupel 3D website (www.tupel3d.co.uk). • Settings → Update → Check for Scanner Firmware Updates • Settings → Update → Update Dot Post and Calibration Plate Database This update is required...
Open the catalog to page 12All TUPEL 3D catalogs and technical brochures
 Brochure
4 Pages
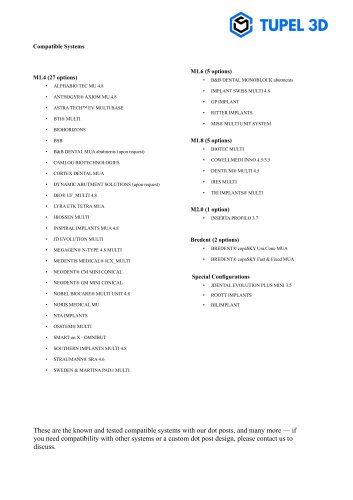 Compatible Systems
1 Page
 Warranty
2 Pages