
- Catalogs
- Zimmer Biomet
- Constrained Posterior Stabilized


Constrained Posterior Stabilized

Constrained Posterior Stabilized
The Constrained Posterior Stabilized (CPS) bearings are designed to provide moderate varus/valgus constraint in patients, aiding in soft tissue balance and stability. These bearings are used when the posterior cruciate ligament (PCL) is removed and must be paired with PS femoral components. They are compatible only with cemented nonporous femoral and tibial components.
Constraint Options
CPS bearings offer ±1.5 degrees varus/valgus and ±5.5 degrees internal/external rotation constraint. They are suitable for marked valgus deformity, prior high tibial osteotomies, patellectomy, and most revision situations where the PCL is deficient. Greater constraint needs may require a revision implant system.
Initial Knee Assessment
Bone preparation for CPS bearings involves making an anterior to posterior CPS box cut using a reciprocating saw blade. Proper sizing and seating of the PS-CPS box provisional are crucial for ensuring adequate bone removal and proper patella trialing.
CPS Tibial Bearing Provisional (TASP) Assembly
The CPS TASP consists of a bottom, shim, and top, which must be assembled before insertion. The components are color-coded for compatibility, and shims are available in 10, 12, and 14 mm increments to match implant offerings. Proper alignment and assembly are essential for effective trialing.
Stemmed Tibial Provisional Insertion
Insertion steps are detailed in the Persona Primary Surgical Technique. Gentle manual pressure is recommended during insertion to avoid damaging the TASP construct.
CPS TASP Insertion
The CPS TASP construct should be inserted in mid-flexion, starting with the thinnest construct for initial range of motion (ROM) assessment. Provisional lockdown screws provide rigidity during assessment.
CPS TASP Shim Exchange
If a thicker construct is needed, shims can be exchanged by loosening the lockdown screw and inserting a new shim. Proper alignment is crucial to avoid resistance during insertion.
CPS TASP Removal
To remove the CPS TASP, disengage the lockdown screw and lift the construct using the tibial sizing plate handle. Ensure the joint is in a neutral position to facilitate removal.
Conclusion
This document provides specific instructions for CPS components, emphasizing the importance of proper technique and component compatibility. For complete product information, including contraindications and warnings, refer to the package inserts.
Catalog excerpts
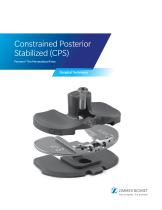
Constrained Posterior Stabilized (CPS) Persona® The Personalized Knee Surgical Technique
Open the catalog to page 1
2 | Persona Constrained Posterior StabilizedSurgical Technique Constraint Options The constrained posterior stabilized (CPS) bearings can be used to provide moderate varus/valgus constraint in patients to facilitate soft tissue balance and stability. The CPS bearing provisionals and implants can only be used when the PCL is removed and should be used in conjunction with the PS femoral components. The CPS bearings are to be used with cemented nonporous femoral and tibial components only and cannot be used with the CR femoral components. The constrained posterior stabilized (CPS) bearings are designed...
Open the catalog to page 4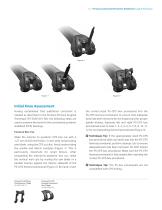
3 | Persona Constrained Posterior StabilizedSurgical Technique Initial Knee Assessment Having established that additional constraint is needed as described in the Persona Primary Surgical Technique (97-5026-001-00), the following steps are used to prepare the bone for the constrained posterior stabilized (CPS) bearings. Femoral Box Cut Make the anterior to posterior CPS box cut with a 1.27 mm (0.050 inch) thick, ½ inch wide reciprocating saw blade, using the CPS cut slot. Avoid undercutting the medial and lateral condyles (Figure 1). This is particularly important for small femurs. After completing...
Open the catalog to page 5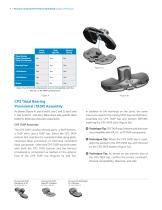
4 | Persona Constrained Posterior StabilizedSurgical Technique Color Coded Side Specific Shared Sizing Tibial Sizing Plate/Stemmed Tibial Provisional Bearing Tops Note: The CPS TASP components are not compatible with the CR, UC, or PS TASP components. Figure 4 CPS Tibial Bearing Provisional (TASP) Assembly As shown (Figure 4), size A and B, size C and D, size E and F, size G and H, and size J tibias share side-specific tibial bottoms, tibial tops and color, respectively. CPS TASP Assembly In addition to the markings on the parts, the same colors are used for the mating TASP tops and bottoms....
Open the catalog to page 6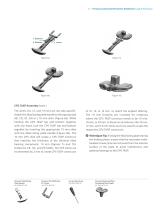
5 | Persona Constrained Posterior StabilizedSurgical Technique CPS TASP Assembly (cont.) The shims (10, 12, and 14 mm) are not side-specific. Attach the tibial sizing plate handle to the appropriate AB, CD, EF, GH or J 10 mm shim (Figure 6a). While holding the CPS TASP top and bottom together with one hand, lock the CPS TASP top and bottom together by inserting the appropriate 10 mm shim with the tibial sizing plate handle (Figure 6b). The 10 mm CPS shim will create a CPS TASP construct that matches the thickness of the thinnest tibial bearing component, 10 mm (Figures 7a and 7b). Unlike the...
Open the catalog to page 7
6 | Persona Constrained Posterior StabilizedSurgical Technique Stemmed Tibial Provisional Insertion Steps to insert and fixate the stemmed tibial provisional can be found in the Persona Primary Surgical Technique (97-5026-001-00). Utilizing the fixation screws specified in the Persona Primary Surgical Technique will provide additional stability during trial range of motion. Insert and remove the CPS TASP construct in midflexion with the CPS box provisional in place (Figure 8). It is recommended that the thinnest CPS TASP construct (10 mm) be inserted into the joint space to perform an initial...
Open the catalog to page 8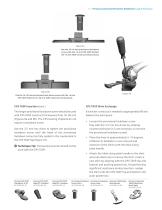
7 | Persona Constrained Posterior StabilizedSurgical Technique Figure 9a Use the 10–14 mm provisional lockdown screw with the +0 mm CPS TASP bottom (10–14 mm TASP construct thicknesses). Use the 16–20 mm provisional lock down screw with the +6 mm CPS TASP bottom (16–20 mm TASP construct thicknesses). CPS TASP Insertion (cont.) CPS TASP Shim Exchange The longer provisional lockdown screw should be used with CPS TASP construct thicknesses from 16–20 mm (Figures 9a and 9b). The CPS bearing implants do not require a lockdown screw. If a thicker construct is needed to appropriately fill and balance...
Open the catalog to page 9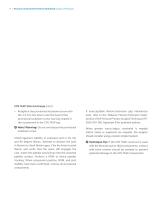
8 | Persona Constrained Posterior StabilizedSurgical Technique CPS TASP Shim Exchange (cont.) • Retighten the provisional lockdown screw with the 3.5 mm hex driver until the head of the provisional lockdown screw has fully seated in the countersink in the CPS TASP top. Note/Warning: Do not overtorque the provisional lockdown screw. Check ligament stability in extension and in 30, 60, and 90 degree flexion. Attempt to distract the joint in flexion to check flexion gaps. Flex the knee to peak flexion and verify that the spine still engages the cam. Insert the patellar provisional onto the resected...
Open the catalog to page 10
9 | Persona Constrained Posterior StabilizedSurgical Technique CPS TASP Removal Disengage the provisional lockdown screw by rotating the 3.5 mm hex driver in a counterclockwise direction. With the joint in mid-flexion, attach the tibial sizing plate handle to the CPS TASP and lift proximally (Figure 11) until the CPS TASP disassociates from the tibial sizing plate, stemmed tibial provisional or stemmed cemented tibial component. Note/Warning: Do not implant the stemmed tibial provisional, CPS TASP, or provisional lockdown screws. Technique Tip: Varus/valgus forces may make it difficult to remove...
Open the catalog to page 11
This documentation is intended exclusively for physicians and is not intended for laypersons. Information on the products and procedures contained in this document is of a general nature and does not represent and does not constitute medical advice or recommendations. Because this information does not purport to constitute any diagnostic or therapeutic statement with regard to any individual medical case, each patient must be examined and advised individually, and this document does not replace the need for such examination and/or advice in whole or in part. Please refer to the package inserts...
Open the catalog to page 12All Zimmer Biomet catalogs and technical brochures
 Oxford® Partial Kne
60 Pages
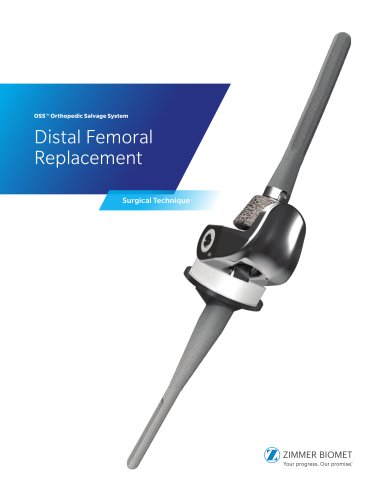 Distal Femoral Replacement
72 Pages
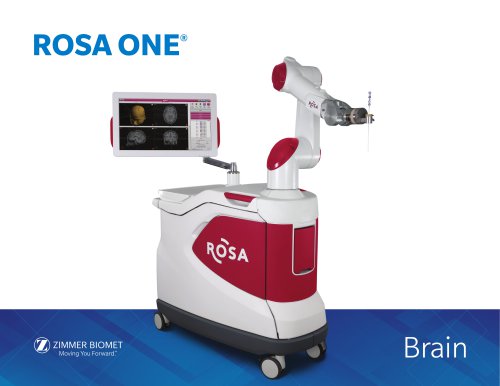 ROSA ONE® Brain System
7 Pages
Archived catalogs
 MODULAR FEMORAL Revision System
14 Pages
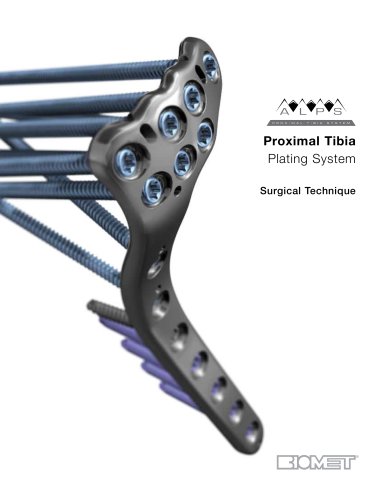
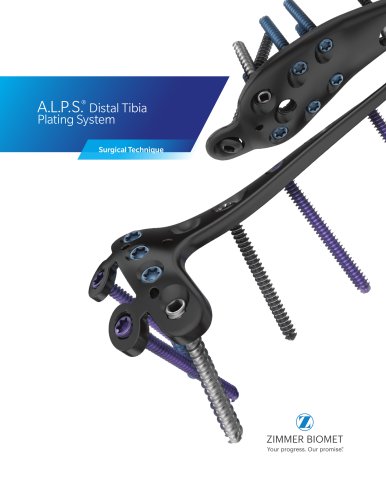 A.L.P.S.®
44 Pages
 Persona PERSONALIZED KNEE
7 Pages
 Avenir® Femoral Hip System
12 Pages
 The CLS® Spotorno® Stem
16 Pages
 Alloclassic®Zweymüller®Stem
12 Pages
 ®Zimmer® Segmental System
6 Pages
 Zimmer Natural Nail System
8 Pages
 modern-cementing-technique
16 Pages
 CoAxial Spray Kit
8 Pages
 Biologics
24 Pages
 PowerPump DP System
2 Pages
 Sidus
Sidus40 Pages
 Ankle Fix System 4.0
8 Pages
 Anatomical Shoulder System
6 Pages
 NexGen® RH Knee
8 Pages
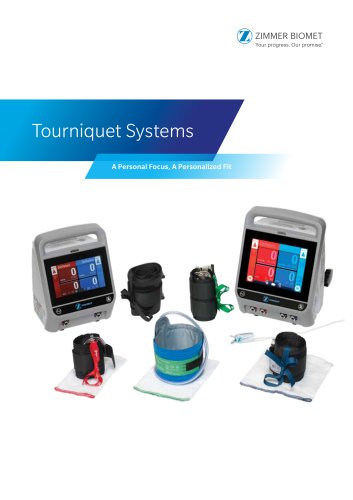
 tourniquet-systems-brochure
8 Pages
 Persona-Partial
12 Pages
 Fitmore Hip Stems
6 Pages
 NexGen High-Flex Implant
8 Pages
 Trabecular Metal ™Glenoid
4 Pages
 Anatomical Shoulder ™ System
6 Pages
 Zimmer ® PSI Shoulder
6 Pages
 Zimmer personna
12 Pages
 ZImmer iASSIST
44 Pages
 Fitmore ® Hip Stem
24 Pages
 Persona Knee
6 Pages
 Trauma Solutions
10 Pages
 Colagen Repair Patch
2 Pages
 Fitmore® Hip Stem
6 Pages
 Zimmer® Segmental System
6 Pages



- Detection kit
- ZIMMER BIOMET bone plate
- ZIMMER BIOMET compression plate
- ZIMMER BIOMET metallic compression plate
- Immunoassay detection kit
- ZIMMER BIOMET locking compression plate
- Infectious disease detection kit
- Titanium compression plate
- Surgical system
- Distal compression plate
- Cutting electrosurgical system
- Tablet computer software
- Cassette detection kit
- Chromatographic immunoassay test kit
- Coagulation surgical system
- Agitator
- ELISA detection kit
- Proximal compression plate
- Benchtop agitator
- Planning software