
- Catalogs
- Zimmer Biomet
- IMAGE TO COME Zimmer ® Gender Solutions ™ Patello-Femoral Joint (PFJ) System


IMAGE TO COME Zimmer ® Gender Solutions ™ Patello-Femoral Joint (PFJ) System

IMAGE TO COME Zimmer ® Gender Solutions ™ Patello-Femoral Joint (PFJ) System
The Zimmer® Gender Solutions™ Patello-Femoral Joint (PFJ) System is designed for replacing the femoral trochlea in the patellofemoral joint due to disease or injury. It is compatible with various knee systems and patella types, made from Cobalt-Chromium-Molybdenum alloy with PMMA precoat.
The PFJ system is indicated for conditions like osteoarthritis, traumatic arthritis, and patellar dislocation history. Contraindications include previous joint infections, insufficient bone stock, and severe instability.
The procedure involves several steps: exposure, patella resection, marking femoral landmarks, femoral anterior cut, sizing and milling the femoral trochlea, drilling peg and tail holes, trial reduction, and implantation of the prostheses. Proper alignment and sizing are crucial to avoid complications.
Use 33 mm screws to avoid posterior cortex violation and ensure proper positioning of the Milling Guide.
Install the PFJ Mill Burr, ensure the Milling Handpiece is engaged, and mill the central, lateral, and medial tracks in order.
Secure the Peg/Tail Guide with 33 mm screws and drill peg holes to full depth.
Attach the Inserter/Extractor Handle to the PFJ Provisional, evaluate tracking, apply bone cement, and confirm alignment.
The system is compatible with Zimmer Unicompartmental Knee Systems, with specific instructions for simultaneous procedures.
Cleanse the surgical site and close the incision.
Details the use of the PFJ Drill Milling Adapter as a backup, emphasizing proper fixation and engagement to prevent injury.
The PFJ Drill Milling Adapter may become warm or spin intermittently. Ensure full engagement in the Milling Guide tracks to prevent injury.
Insert the adapter into the Milling Guide tracks, proceed slowly, and maintain perpendicular alignment. Check for axial burr migration and avoid forcing the adapter.
Inspect the Milling Guide and Adapter for damage and replace if necessary.
For assistance, contact Zimmer or visit their website.
Catalog excerpts

Zimmer ® Gender Solutions™ Patello-Femoral Joint (PFJ) System Surgical Technique IMAGE TO COME Advancing the science of partial knee replacement.
Open the catalog to page 1
Zimmer® Gender Solutions™ Patello-Femoral Joint (PFJ) System Description The Zimmer® Gender Solutions™ Patello-Femoral Joint Prosthesis (PFJ) is intended for replacement of the femoral trochlea of the patellofemoral joint that has been affected by the disease process and/or injury. The PFJ prosthesis may be used alone or with the Zimmer Unicompartmental Knee System or M/G® Unicompartmental Knee System to treat conditions of the patellofemoral or tibiofemoral regions of the knee. The PFJ prosthesis is compatible with either an unresurfaced patella, a NexGen® all-polyethylene, porous or augmentation...
Open the catalog to page 2
Zimmer® Gender Solutions™ Patello-Femoral Joint (PFJ) System Zimmer® Gender Solutions™ Patello-Femoral Joint (PFJ) System Surgical Technique Table of Contents SECTION Exposure Exposure . . . . . . . . . . . . . . . . . . . . . . . . . . . . . . . . . . . . . . . . . . . . . . . . . . . . . . Resect Patella Resecting the Patella . . . . . . . . . . . . . . . . . . . . . . . . . . . . . . . . . . . . . . . . . . . . Mark Femoral Landmarks Marking Femoral Anatomic Landmarks . . . . . . . . . . . . . . . . . . . . . . . . . . . . . . Perform Femoral Anterior Cut 4.1 Drilling the IM Hole . . . . ....
Open the catalog to page 3
Zimmer® Gender Solutions™ Patello-Femoral Joint (PFJ) System Implant Trochlea and Patella Prostheses 9.1 Cementing/Implanting the PFJ Implant . . . . . . . . . . . . . . . . . . . . . . . . . . 9.2 Cementing/Implanting the Patella and Checking Motion . . . . . . . . . . . Bicompartmental Arthroplasty: Using the Zimmer Gender Solutions PFJ with a Zimmer Unicompartmental Implant 10.1 Compatibility . . . . . . . . . . . . . . . . . . . . . . . . . . . . . . . . . . . . . . . . . . . . . . 10.2 Sequence - Implanting the Gender Solutions Patello-Femoral Joint First . . . . . . . . . . . . . . . ....
Open the catalog to page 4
Exposure The Gender Solutions PFJ instrumentation is compatible with MIS arthrotomies. Various exposures can be considered including medial parapatellar, lateral parapatellar, midvastus, subvastus, etc. Resection of the infrapatellar fat pad can facilitate exposure. During arthrotomy it is important to avoid inadvertently cutting the anterior horns of the menisci or intermeniscal ligament.
Open the catalog to page 5
Surgical Technique Header Resect Patella Resect Patella • After selecting the appropriate Zimmer patellar system, one of the following options may be used to prepare the patella. - MIS Patella Resection Guide - Standard Patella Instruments - Patella Reamer System • Select the appropriate size patella which provides for the best support of the patella on the condyles after it transitions off of the trochlear component.
Open the catalog to page 6
Mark Femoral Landmarks Surgical Technique Header Mark Femoral Landmarks • Mark the A/P axis (Whiteside’s line) from the lowest part of the trochlea to the highest part of the intercondylar notch (Fig1). • With a skin marker, mark a line perpendicular to the A/P axis (Fig2). Fig. 1 TECHNIQUE TIP Technique Tip: Alternatively, the transepicondylar axis may be used as reference. NOTE: These marks will serve as references in setting external rotation in subsequent steps. Fig. 2 Mark a line perpendicular to the A/P axis.
Open the catalog to page 7
Surgical Technique Header Femoral Anterior Cut Femoral Anterior Cut 4.1 Drilling the IM Hole • Use the 6mm Intramedullary (IM) drill to drill the hole (Fig. 3). NOTE: Hole location is 10 mm anterior to the origin of the posterior cruciate ligament. 4.2 Assembling the Telescoping Boom to the IM Anterior Cut Guide • Unlock the Telescoping Boom by loosening the knurled knob. (Fig. 4). NOTE: The locking boom (00-5983-028-00) is compatible with the IM Anterior Cut Guide and is available separately. Fig.4 Unlock Telescoping Boom.
Open the catalog to page 8
Femoral Technique Header Surgical Anterior Cut • Push down and hold adjustment knob on the IM Anterior Cut Guide (Fig.5) while sliding the Telescoping Boom onto the IM guide collar (Fig.6). Boom may be inserted from either medial or lateral side. • Release the IM guide adjustment knob. • Lock the Telescoping Boom by tightening the knurled knob on the boom. It may be necessary to slightly rotate adjustment knob while depressing to allow boom insertion. Fig.5 Push down and hold adjustment knob. Fig.6 Slide on Telescoping Boom.
Open the catalog to page 9
Surgical Technique Header Femoral Anterior Cut 4.3 Inserting the IM Anterior Cut Guide With Telescoping Boom • Insert the IM Guide into the medullary canal until the proximal aspect of the guide slightly contacts the distal femoral sulcus. The guide may be inserted by hand (Fig. 7) or with the Inserter/Extractor handle (Fig. 8). To provide additional clearance for the Telescoping Boom to clear the anterior femur during insertion, adjust the IM guide to the “open” position (turning adjustment knob on top of IM guide counter-clockwise). - If impaction is required, impact using the Inserter/ Extractor...
Open the catalog to page 10
Femoral Technique Header Surgical Anterior Cut 4.4 Setting External Rotation and Depth for Anterior Cut • Rotate the IM guide to the desired external rotation. - To align to the A/P axis, rotate the IM guide until the vertical reference lines on the guide are parallel with the A/P axis. - If using transepicondylar axis or line perpendicular to the A/P axis, rotate until the horizontal lines on the guide are parallel to the marked lines. (Fig. 10). TECHNIQUE TIP Fig. 10 Setting external rotation parallel to marked lines. Moving the knee closer to extension will improve visibility of the anterior...
Open the catalog to page 11
Surgical Technique Header Femoral Anterior Cut • Adjust A/P height of the cut guide by turning the IM guide adjustment knob until the boom tip just contacts the cortex (Fig. 12). NOTE: Avoid excessive pressure on the boom tip. • Confirm anterior cut with the Resection Guide (Fig.13). Fig. 12 Adjusting height of cut guide.
Open the catalog to page 12All Zimmer Biomet catalogs and technical brochures
 Oxford® Partial Kne
60 Pages
 Distal Femoral Replacement
72 Pages
 ROSA ONE® Brain System
7 Pages
Archived catalogs
 MODULAR FEMORAL Revision System
14 Pages
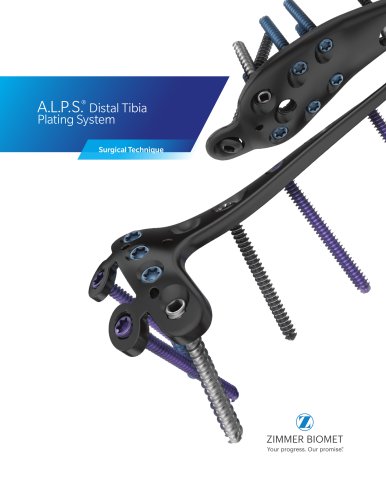 A.L.P.S.®
44 Pages
 Constrained Posterior Stabilized
12 Pages
 Persona PERSONALIZED KNEE
7 Pages
 Avenir® Femoral Hip System
12 Pages
 The CLS® Spotorno® Stem
16 Pages
 Alloclassic®Zweymüller®Stem
12 Pages
 ®Zimmer® Segmental System
6 Pages
 Zimmer Natural Nail System
8 Pages
 modern-cementing-technique
16 Pages
 CoAxial Spray Kit
8 Pages
 Biologics
24 Pages
 PowerPump DP System
2 Pages
 Sidus
Sidus40 Pages
 Ankle Fix System 4.0
8 Pages
 Anatomical Shoulder System
6 Pages
 NexGen® RH Knee
8 Pages
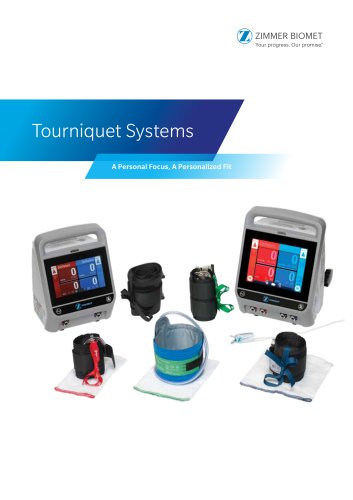
 tourniquet-systems-brochure
8 Pages
 Persona-Partial
12 Pages
 Fitmore Hip Stems
6 Pages
 NexGen High-Flex Implant
8 Pages
 Trabecular Metal ™Glenoid
4 Pages
 Anatomical Shoulder ™ System
6 Pages
 Zimmer ® PSI Shoulder
6 Pages
 Zimmer personna
12 Pages
 ZImmer iASSIST
44 Pages
 Fitmore ® Hip Stem
24 Pages
 Persona Knee
6 Pages
 Trauma Solutions
10 Pages
 Colagen Repair Patch
2 Pages
 Fitmore® Hip Stem
6 Pages
 Zimmer® Segmental System
6 Pages



- Detection kit
- ZIMMER BIOMET bone plate
- ZIMMER BIOMET compression plate
- ZIMMER BIOMET metallic compression plate
- Immunoassay detection kit
- ZIMMER BIOMET locking compression plate
- Infectious disease detection kit
- Titanium compression plate
- Surgical system
- Distal compression plate
- Cutting electrosurgical system
- Tablet computer software
- Cassette detection kit
- Chromatographic immunoassay test kit
- Coagulation surgical system
- Agitator
- ELISA detection kit
- Proximal compression plate
- Benchtop agitator
- Planning software