
- Catalogs
- Zimmer Biomet
- Oxford® Partial Kne


Oxford® Partial Kne
Oxford® Partial Kne
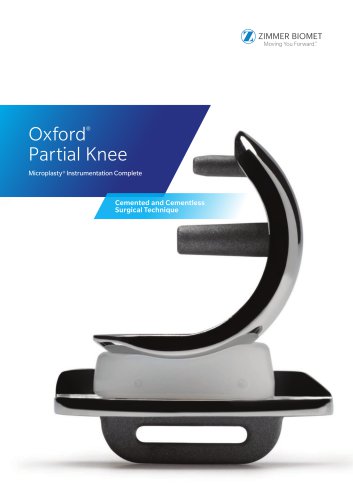
The Oxford Partial Knee is an advanced meniscal arthroplasty system designed for treating anteromedial osteoarthritis, boasting a 98% survivorship rate at 10 years. It features components made from cobalt chromium molybdenum alloy and ultra-high molecular weight polyethylene, available in various sizes to ensure optimal fit and wear resistance.
- Femoral Components: Made from cobalt chromium molybdenum alloy, available in five sizes.
- Tibial Components: Also made from cobalt chromium molybdenum alloy, available in seven sizes.
- Meniscal Bearings: Made from ultra-high molecular weight polyethylene, available in five sizes and seven thicknesses.
The procedure is suitable for patients with anteromedial osteoarthritis, intact lateral compartments, and correctable varus deformity. It is contraindicated in inflammatory arthritis and unsuitable for lateral compartment replacement. Surgeons are advised to attend an Advanced Instructional Course to minimize errors.
- Preoperative X-ray Template: Used to determine femoral component size.
- Open vs. Minimally Invasive Technique: Minimally invasive technique is preferred to reduce postoperative pain and recovery time.
- Positioning and Incision: The limb is positioned with a thigh tourniquet, and a medial parapatellar incision is made.
- Osteophyte Excision and Tibial Plateau Resection: Osteophytes are removed, and the tibial plateau is resected using specific guides and tools.
- Femoral Sizing and Tibial Saw Guide Placement: Involves securing guides with a G-clamp and pins.
- Vertical and Horizontal Cuts: Made to ensure proper alignment and avoid over-resection.
- Femoral Drill Holes and Alignment: Ensures correct positioning of the femoral drill guide.
- Equalizing Flexion and Extension Gaps: Achieved using feeler gauges and spigots.
- Cementing Components: Instructions for roughening surfaces and applying cement to ensure proper fixation.
- Cementless Procedure: Discusses the use of coatings and bone preparation to minimize loosening risks.
- Postoperative Treatment: Advises against forcing knee flexion in the first week and describes radiographic assessment criteria.
Details the radiographic changes post-surgery, emphasizing the stability of these changes and providing criteria for evaluating component placement and bone interfaces. Consistent radiographic techniques are recommended for follow-up assessments.
This document serves as a comprehensive technical guide for medical professionals involved in knee replacement surgeries, offering detailed specifications and procedural insights for the Oxford Partial Knee system.
Catalog excerpts
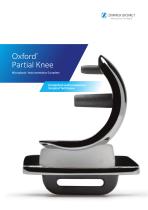
Oxford Partial Knee ® Microplasty ® Instrumentation Complete Cemented and Cementless Surgical Technique
Open the catalog to page 1
Not all shown instruments/surgical options are available in each country.
Open the catalog to page 2
2 | Oxford Partial Knee Oxford Partial Knee Introduction Tibial Components The Oxford Partial Knee is the natural evolution of the original meniscal arthroplasty, which was first used in 1976.1 It continues to offer the advantage of a large area of contact throughout the entire range of movement for minimal polyethylene wear, as seen in the Oxford Partial Knee Phase I and II.2–4 The tibial components, also made of cast cobalt chromium molybdenum alloy, are available in seven sizes, both right and left. Their shapes are designed to provide optimal bone coverage while avoiding component overhang...
Open the catalog to page 4
3 | Oxford Partial Knee Patient Selection There are well-defined circumstances in which the Oxford Partial Knee for medial arthroplasty is appropriate and certain criteria must be fulfilled for success: • The operation is indicated for the treatment of anteromedial osteoarthritis.4 • There must be full thickness cartilage loss on both sides of the medial compartment with bone on bone contact (Figure 1). This may be demonstrated radiographically (weight bearing A/P, Rosenberg or varus stress) or arthroscopically. The results of replacement for partial thickness cartilage loss are unpredictable.9...
Open the catalog to page 5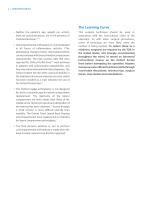
4 | Oxford Partial Knee • Neither the patient's age, weight nor activity level are contraindications, nor is the presence of chondrocalcinosis.13-15 • Unicompartmental arthroplasty is contraindicated in all forms of inflammatory arthritis. (The pathological changes of early rheumatoid arthritis can be confused with those of medial compartment osteoarthritis). The high success rates that were reported for Oxford Partial Knee5,6 were achieved in patients with anteromedial osteoarthritis, and they may not be achieved with other diagnoses. The Oxford implant has also been used successfully in the...
Open the catalog to page 6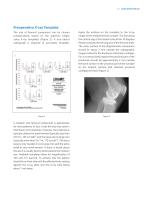
5 | Oxford Partial Knee Preoperative X-ray Template The size of femoral component can be chosen preoperatively based on the patient’s height using X-ray templates (Figure 2). A true lateral radiograph is required to accurately template. Apply the outlines on the template to the X-ray image of the medial femoral condyle. The line along the central peg of the implant should be 10 degrees flexed compared to the long axis of the femoral shaft. The outer surface of the diagrammatic component should lie about 2 mm outside the radiographic image to allow for the thickness of articular cartilage. For...
Open the catalog to page 7
6 | Oxford Partial Knee Open vs. Minimally Invasive Technique One advantage of unicompartmental arthroplasty is that it can be performed through a small incision without dislocating the patella, thus avoiding damage to the synovial reflections of the suprapatellar pouch. This can reduce postoperative pain and allow a more complete and rapid recovery of flexion.18 With proper use of the Oxford Partial Knee instrumentation, the operation can be performed through a small incision with great precision. However, surgeons learning the procedure can extend the soft tissue incision beyond the limits...
Open the catalog to page 8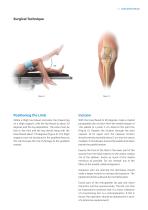
7 | Oxford Partial Knee Surgical Technique Inflate a thigh tourniquet and place the draped leg on a thigh support, with the hip flexed to about 30 degrees and the leg dependent. The knee must be free to flex fully and the leg should hang with the knee flexed about 110 degrees (Figure 4). The thigh support must not be placed in the popliteal fossa as this will increase the risk of damage to the popliteal vessels. With the knee flexed to 90 degrees, make a medial parapatellar skin incision from the medial margin of the patella to a point 3 cm distal to the joint line (Figure 5). Deepen the incision...
Open the catalog to page 9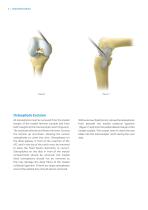
8 | Oxford Partial Knee Osteophyte Excision All osteophytes must be removed from the medial margin of the medial femoral condyle and from both margins of the intercondylar notch (Figure 6). The assistant extends and flexes the knee, moving the incision up and down, allowing the various osteophytes to come into view. Osteophytes on the tibial plateau in front of the insertion of the ACL and in the top of the notch must be removed to allow the fixed flexion deformity to correct. Osteophytes on the tibia in front of the medial compartment should be removed, but medial tibial osteophytes should not...
Open the catalog to page 10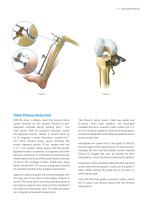
9 | Oxford Partial Knee Tibial Plateau Resection With the knee in flexion, insert the femoral sizing spoon centrally on the condyle (based on preoperative estimate sizing) starting with 1 mm thick spoon. With all retraction removed, assess the ligament tension. Ideally it should twist up to 20 degrees in both directions. Usually the 1 mm thick femoral sizing spoon achieves the proper ligament tension. If not, replace with the 2 or 3 mm generic sizing spoon until the proper ligament tension is achieved. The optimal size of the femoral component is confirmed by examining the relationship of the...
Open the catalog to page 11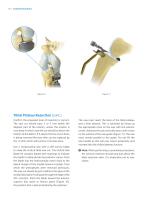
10 | Oxford Partial Knee Tibial Plateau Resection (cont.) Confirm the proposed level of resection is correct. The saw cut should pass 2 or 3 mm below the deepest part of the erosion, unless the erosion is very deep in which case the cut should be above the bottom of the defect. If it seems that too much bone is being removed the zero shim can be replaced by the +2 shim which will remove 2 mm less bone. Use a reciprocating saw with a stiff narrow blade to make the vertical tibial saw cut. The Oxford Saw Blade Kit contains blades with markings to indicate the depth to safely divide the posterior...
Open the catalog to page 12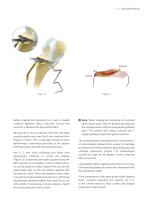
11 | Oxford Partial Knee Before making the horizontal cut, insert a medial collateral ligament (MCL) retractor. Ensure this retractor is between the saw and the MCL. Remove the 0 mm uncaptured shim from the tibial resection guide and insert the 0 mm captured shim (Figure 12 inset). This is especially important when performing a cementless procedure as the capture will help create a smooth horizontal resection. Use a 12 mm wide oscillating saw blade with appropriate markings to excise the plateau (Figure 12). Ensure the saw blade is guided along the MCL retractor to completely cut the medial cortex....
Open the catalog to page 13All Zimmer Biomet catalogs and technical brochures
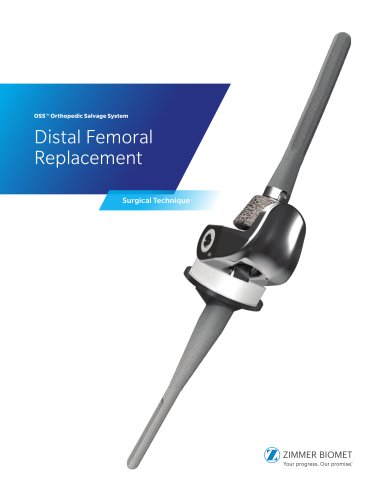 Distal Femoral Replacement
72 Pages
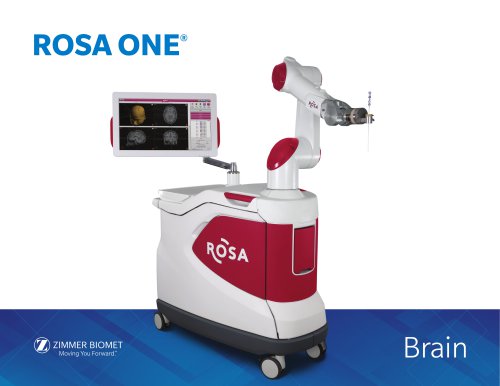 ROSA ONE® Brain System
7 Pages
Archived catalogs
 MODULAR FEMORAL Revision System
14 Pages
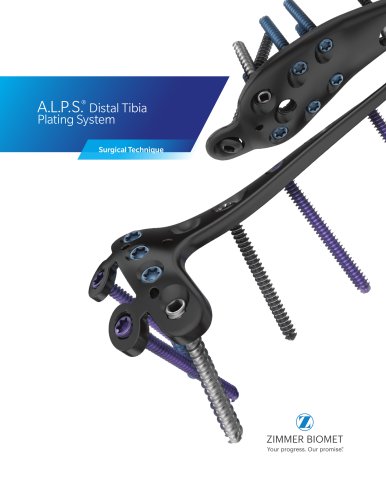 A.L.P.S.®
44 Pages
 Constrained Posterior Stabilized
12 Pages
 Persona PERSONALIZED KNEE
7 Pages
 Avenir® Femoral Hip System
12 Pages
 The CLS® Spotorno® Stem
16 Pages
 Alloclassic®Zweymüller®Stem
12 Pages
 ®Zimmer® Segmental System
6 Pages
 Zimmer Natural Nail System
8 Pages
 modern-cementing-technique
16 Pages
 CoAxial Spray Kit
8 Pages
 Biologics
24 Pages
 PowerPump DP System
2 Pages
 Sidus
Sidus40 Pages
 Ankle Fix System 4.0
8 Pages
 Anatomical Shoulder System
6 Pages
 NexGen® RH Knee
8 Pages
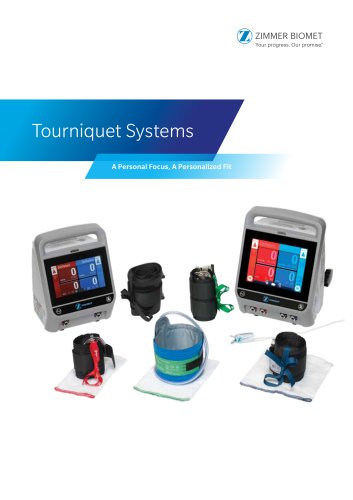
 tourniquet-systems-brochure
8 Pages
 Persona-Partial
12 Pages
 Fitmore Hip Stems
6 Pages
 NexGen High-Flex Implant
8 Pages
 Trabecular Metal ™Glenoid
4 Pages
 Anatomical Shoulder ™ System
6 Pages
 Zimmer ® PSI Shoulder
6 Pages
 Zimmer personna
12 Pages
 ZImmer iASSIST
44 Pages
 Fitmore ® Hip Stem
24 Pages
 Persona Knee
6 Pages
 Trauma Solutions
10 Pages
 Colagen Repair Patch
2 Pages
 Fitmore® Hip Stem
6 Pages
 Zimmer® Segmental System
6 Pages



- Detection kit
- ZIMMER BIOMET bone plate
- ZIMMER BIOMET compression plate
- ZIMMER BIOMET metallic compression plate
- Immunoassay detection kit
- ZIMMER BIOMET locking compression plate
- Infectious disease detection kit
- Titanium compression plate
- Surgical system
- Distal compression plate
- Cutting electrosurgical system
- Tablet computer software
- Cassette detection kit
- Chromatographic immunoassay test kit
- Coagulation surgical system
- Agitator
- ELISA detection kit
- Proximal compression plate
- Benchtop agitator
- Planning software