
- Catalogs
- Zimmer Biomet
- ZImmer iASSIST


ZImmer iASSIST

ZImmer iASSIST
- Indication for Use: The iASSIST™ Knee System is a computer-assisted surgical instrument system for Total Knee Arthroplasty, aiding in precise implant positioning.
- Training: Surgeons must complete training provided by Zimmer CAS or the distributor.
- Contraindications: Includes severe hip pathology, significant bone loss, and specific surgical techniques like the Quad-Sparing™ technique.
- Complications: Potential complications include infection and implant misplacement, affecting mobility.
- System Controller Setup: Set up outside the sterile zone, connected to an AC outlet, and positioned for optimal wireless communication.
- Application Launch: Scan a barcode on the iASSIST Knee Pod Kit to launch the application.
- Settings and Status: Set cut targets and monitor pod status through the System Controller Computer.
- Powering-On Pods: Pods should be powered on and calibrated before surgery, with a backup kit available.
- Pod Assembly: Assemble and connect pods to instruments, ensuring proper calibration on a sterile surface.
- Distal Femur Cut: Involves specific instrument assembly and femur registration, requiring stable fixation for accuracy.
- Retrieve surgical procedure archives and shut down the System Controller Computer.
- Details sterilization parameters and lists components of the iASSIST Knee Master Instruments Kit.
- Use the Natural-Knee® II Axial Alignment Rod to verify the cut.
- Remove the Femoral Adjustment Mechanism and associated screws and spikes.
- Adjust resection level manually if needed, using the Femoral Distal Cut Guide.
- Secure the Femoral Saw Slot with a 3.2 mm Headless Trocar Drill Pin.
- Validate the distal femur cut using the Validation Tool and follow feedback for leg positioning.
- Assemble instruments specific to the patient's side.
- Position and secure the Tibial Alignment Guide and Tibial Adjustment Mechanism.
- Follow feedback for leg positioning during tibia registration.
- Adjust resection level using the Tibial Cut Guide and secure it with screws.
- Validate the proximal tibia cut using the Validation Tool and follow feedback for leg positioning.
- Retrieve surgical procedure logs using a USB key.
- Activate the Field Issue Recorder for anomaly investigation.
- Shut down the System Controller Computer following specified steps.
- Ensure careful insertion of screws and pins to avoid perforating the cortex.
- Maintain stability of instruments during procedures to ensure accuracy.
- Use compatible saw blades and follow specific instructions for each tool.
This section details the instruments provided by Zimmer CAS and their recommended sterilization methods. Reusable instruments must be cleaned before sterilization, and should not be sterilized in their protective packaging. Cleaning involves disassembling multi-component instruments, pre-soaking in enzyme solution, scrubbing, and using a water jet for hard-to-reach areas. Ultrasound cleaning is recommended, followed by thorough rinsing and lubrication of screws and mechanisms.
Steam sterilization (autoclave) parameters are provided, including temperature, exposure time, and drying/cooling times. Adjustments may be necessary based on local requirements.
Specific cleaning instructions are provided for each instrument, including disassembly, water jet flushing, and ultrasonic cleaning. Instruments are listed with catalog numbers, quantities, and additional notes on cleaning requirements.
Details on disposable items, including sterilization instructions and warnings against using non-recommended fasteners. Some items are provided sterile and should not be re-sterilized.
Instructions for cleaning the System Controller Computer using disinfectant wipes, with warnings against using sprays or allowing liquids to enter the equipment. Specific cleaning instructions are provided for the computer, power supply, carrying case, and shipping case.
Warnings about handling the System Controller Computer, including avoiding overheating, not inserting foreign objects, and ensuring proper shutdown. The computer should not be exposed to extreme temperatures or humidity. Instructions for volume and brightness adjustment, touchscreen calibration, and stylus use are included.
Storage and shipping conditions for Pods are specified, along with warnings about exposure to heat, impacts, magnetic fields, and X-ray radiation. Instructions for Pod replacement during procedures and battery disposal are provided.
The document outlines the electromagnetic immunity requirements for Pods, specifying compliance with IEC 60601 standards. It emphasizes maintaining a separation distance between RF communications equipment and the Pods to prevent interference. The recommended distances vary based on the frequency and power output of the transmitters.
According to IEC 61000-4-8, the Pods should operate in environments with power frequency magnetic fields typical of commercial or hospital settings.
The document provides a list of symbols used on the product, including those for disposal, sterilization, caution, manufacturing date, and compliance marks like CE and FCC.
The manufacturer, Zimmer CAS, provides contact details for customer support and emphasizes that the device is restricted to sale by or on the order of a physician. The document includes a disclaimer stating that the information is intended for physicians and does not constitute medical advice.
The document clarifies that it is not intended for laypersons and advises consulting package inserts for detailed product information.
Catalog excerpts
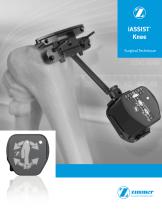
Surgical Technique Personal Fit. Renewed Life™
Open the catalog to page 1
Table of Contents Page 2.1 System Controller Computer Setup 5 2.3 Settings, Snapshot, Patient Side and Pod Status Bar 6 3.1 Powering-On Pods and Intra-Operative Calibration 7 4.1 Retrieve Surgical Procedures Archives 20 4.2 Activate the Field Issue Recorder 20 4.3 Shut Down the System Controller Computer 20 5. Equipment Inventory and Cleaning/Sterilization Methods 21 5.2 iASSIST Knee Master Instruments Kit 22 5.5 General Equipment Information 28 5.6 Product Specifications and Regulatory Notices 32 6. General & Contact Information 41
Open the catalog to page 3
1. Overview 1.1 Indication for Use The iASSIST™ Knee System is a computer assisted stereotaxic surgical instrument system to assist the surgeon in the positioning of orthopedic implant system components intra-operatively. It involves surgical instruments and position sensors to determine alignment axes in relation to anatomical landmarks and to precisely position alignment instruments and implant components relative to these axes. The present iASSIST Knee System is designed for Total Knee Arthroplasty. 1.4 Contraindications 1.4.1 Clinical The system should not be used: a. In cases of hip pathology...
Open the catalog to page 4
Pre-Operative Guide 2. Pre-Operative Guide WARNINGS The surgical procedure must take place in an operating room theater with temperatures ranging from 15°C to 30°C (59°F to 86°F). Ensure that the Pods are maintained in this temperature range before being use in a surgical procedure. Otherwise, the system may indicate that the Pods are outside their operational temperature range and the Pods cannot be used until they reach an adequate temperature. Ensure that one iASSIST Knee Pod Kit will be used per surgical procedure. User must exit and restart the application with a new pod kit to begin another...
Open the catalog to page 5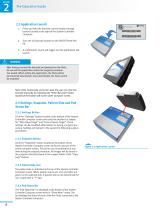
Pre-Operative Guide 2.2 Application Launch 1. Press and hold the barcode scanner button (orange button) located at the right of the System Controller Computer. 2. Scan the 2D barcode located on the iASSIST Knee Pod Kit. 3. A confirmation sound will trigger and the application will launch. WARNING After having scanned the barcode and powered on the Pods, do not exit the application unless the surgical procedure has ended. When exiting the application, the Pods will be permanently deactivated. Once deactivated, the Pods cannot be restarted. Note: If the 2D barcode cannot be read, the user can...
Open the catalog to page 6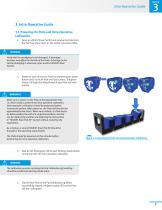
Intra-Operative Guide 3. Intra-Operative Guide 3.1 Powering-On Pods and Intra-Operative Calibration 1. Open an iASSIST Knee Pod Kit and remove the Pods from the Pod Tray. Place them on the sterile instrument table. WARNING Verify that the packaging is not damaged. A damaged package may affect the sterility of the Pods. If damage to the sterile packaging is observed, open another iASSIST Knee Pod Kit. 2. Power-on each of the four Pods by depressing the power button until it is flush with the Pods surface. The green status LED (Light Emitting Diode) of each Pod will blink quickly. WARNINGS Make...
Open the catalog to page 7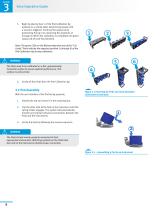
Intra-Operative Guide 5. Begin by placing face 1 of the Pod Calibration Jig upwards on a sterile table. Keep the jig steady until a sound is triggered. Continue the sequence by positioning the jig in its remaining five positions (2 through 6). When the calibration is completed, the green status LED of each Pod will blink. Note: The green LEDs on the flexion/extension axis of the “Cut Guide” Pods indicate the expected position (1 through 6) of the Pod Calibration Jig during calibration. WARNING The Pods need to be calibrated on a flat, approximately horizontal surface to ensure optimal performance....
Open the catalog to page 8
Intra-Operative Guide 3.3 Distal Femur Cut 3.3.1 Instrument Assembly The Tibial Adjustment Mechanisms are side specific and are used to correctly determine the patient side. One “Cut Guide” Pod must be attached to the corresponding Tibial Adjustment Mechanism. This is required even when performing the distal femur cut. 1. Depending on the patient side: For a left knee procedure, clip one “Cut Guide” Pod marked with a on the back face to the Tibial Left Adjustment Mechanism. For a right knee procedure, clip one “Cut Guide” Pod marked with a on the back face to the Tibial Right Adjustment Mechanism....
Open the catalog to page 9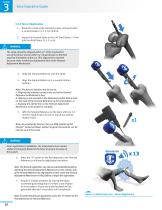
Intra-Operative Guide 3.3.2 Femur Registration 1. Break the cortex at the mechanical axis entry point with a cortex breaker or a 3.2 mm drill bit. 2. Impact the Femoral Spike or the CAS Small Spike 7.9 mm into the distal femur (2.5-3.5 cm). WARNING The spike should be aligned within 15° of the mechanical axis of the femur and be within 15° perpendicular to the final required orientation of the cut. This alignment is required because of the mechanical adjustment limit of the Femoral Adjustment Mechanism. 3. Slide the Femoral Reference onto the spike. 4. Align the Femoral Reference in a neutral...
Open the catalog to page 10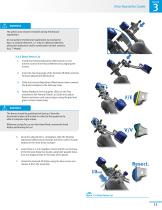
Intra-Operative Guide WARNINGS The pelvis must remain immobile during the femoral registration. Do not perform the femoral registration by moving the leg in a uniaxial direction, i.e. only in a flexion/extension, abduction/adduction and/or combination of both motions (e.g. T-shape). 3.3.3 Distal Femur Cut 1. Install the Femoral Adjustment Mechanism on the anterior side of the Femoral Reference by aligning the arrows. 2. Insert the two long pegs of the Femoral AP Slider into the Femoral Adjustment Mechanism. 3. Slide the Femoral Adjustment Mechanism down towards the distal condyles to the half...
Open the catalog to page 11
Intra-Operative Guide 8. Slide the Femoral Adjustment Mechanism away from the distal femur so both arrows are aligned and pull it off the assembly. 9. Remove the 3.5 mm Hex Head Screw x 38 mm and the Femoral Reference. 10. Remove the spike using a slaphammer. Note: As provided by Zimmer, the PersonaTM Slaphammer (425099-037-00) can be used to remove the Femoral Spike. Note: As provided by Zimmer, the NexGen® Slaphammer Extractor (00-5785-097-00) can be used to remove the Femoral Spike or the CAS Small Spike 7.9 mm. 11. Manually adjust the resection level if desired. Loosen the screw on the...
Open the catalog to page 12All Zimmer Biomet catalogs and technical brochures
 Oxford® Partial Kne
60 Pages
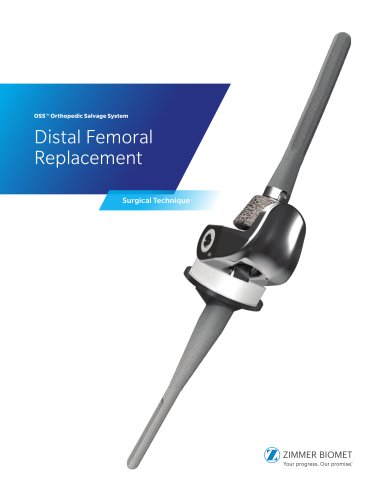 Distal Femoral Replacement
72 Pages
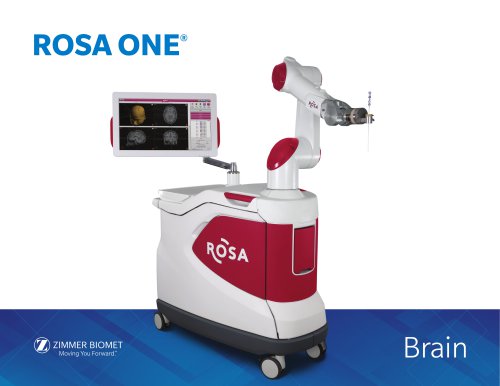 ROSA ONE® Brain System
7 Pages
Archived catalogs
 MODULAR FEMORAL Revision System
14 Pages
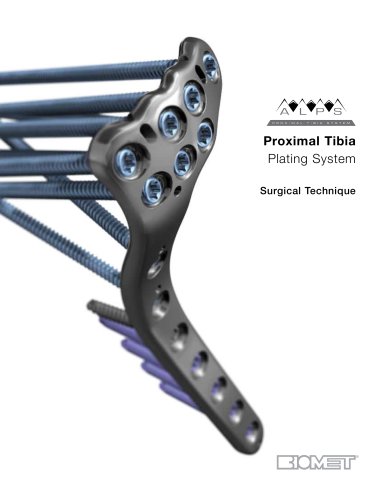
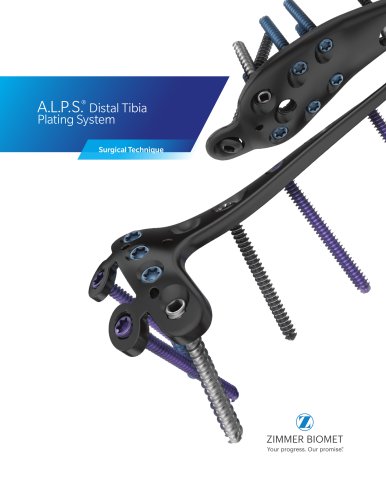 A.L.P.S.®
44 Pages
 Constrained Posterior Stabilized
12 Pages
 Persona PERSONALIZED KNEE
7 Pages
 Avenir® Femoral Hip System
12 Pages
 The CLS® Spotorno® Stem
16 Pages
 Alloclassic®Zweymüller®Stem
12 Pages
 ®Zimmer® Segmental System
6 Pages
 Zimmer Natural Nail System
8 Pages
 modern-cementing-technique
16 Pages
 CoAxial Spray Kit
8 Pages
 Biologics
24 Pages
 PowerPump DP System
2 Pages
 Sidus
Sidus40 Pages
 Ankle Fix System 4.0
8 Pages
 Anatomical Shoulder System
6 Pages
 NexGen® RH Knee
8 Pages
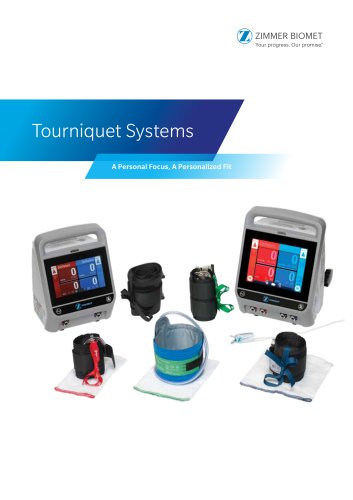
 tourniquet-systems-brochure
8 Pages
 Persona-Partial
12 Pages
 Fitmore Hip Stems
6 Pages
 NexGen High-Flex Implant
8 Pages
 Trabecular Metal ™Glenoid
4 Pages
 Anatomical Shoulder ™ System
6 Pages
 Zimmer ® PSI Shoulder
6 Pages
 Zimmer personna
12 Pages
 Fitmore ® Hip Stem
24 Pages
 Persona Knee
6 Pages
 Trauma Solutions
10 Pages
 Colagen Repair Patch
2 Pages
 Fitmore® Hip Stem
6 Pages
 Zimmer® Segmental System
6 Pages



- Detection kit
- ZIMMER BIOMET bone plate
- ZIMMER BIOMET compression plate
- ZIMMER BIOMET metallic compression plate
- Immunoassay detection kit
- ZIMMER BIOMET locking compression plate
- Infectious disease detection kit
- Titanium compression plate
- Surgical system
- Distal compression plate
- Cutting electrosurgical system
- Tablet computer software
- Cassette detection kit
- Chromatographic immunoassay test kit
- Coagulation surgical system
- Agitator
- ELISA detection kit
- Proximal compression plate
- Benchtop agitator
- Planning software