
- Catalogs
- Zimmer Biomet
- Zimmer personna


Zimmer personna

Zimmer personna
Zimmer® Patient Specific Instruments (PSI) are designed for use with a femur-first technique and are not compatible with the Zimmer MIS Quad-Sparing™ Total Knee Procedure. Stability and fixation of all pins must be verified, and spring pins should be avoided to prevent stress or unwanted shifts on the cutting guide.
Femoral Technique
- Position Femoral Pin Guide: The Pin Guide is positioned on the distal femur without removing osteophytes. It is captured by the anterior ridge of the femur, and alignment is assessed using the epicondylar and A/P axis reference lines.
- Drill and Pin: Anterior medial and lateral pin holes are drilled and pinned using the Universal Disposable Drill. Distal pin holes are drilled but not pinned.
- Place Distal Cut Guide and Cut Femur: The Pin Guide is removed, leaving anterior pins in place. The Persona® 0° Captured/Uncaptured Cutting Head is secured, and the distal resection is verified before making the cut.
- Place Persona 4-in-1 Femoral Cut Guide: The guide is secured, and 3.2mm Trocar-tipped pins are inserted. Resections are verified, and the femur is finished following Zimmer Persona instructions.
Tibial Technique
- Position Tibial Pin Guide: The meniscus is removed, and the Pin Guide is positioned on the tibia without removing osteophytes. Alignment is assessed using mechanical axis and proximal resection lines.
- Drill and Pin: Anterior lateral and medial pin holes are drilled, with only the lateral hole pinned initially.
- Establish Tibia Rotation: Proximal medial and lateral holes are drilled to establish tibia rotation.
- Secure Cut Guide and Cut Tibia: The Persona Tibial Cut Guide is secured, and resections are verified before making the tibial cut. Alignment is checked using the Alignment Adapter and Rod.
- Position Tibial Sizing Plate: The tibial sizing plate is aligned and pinned on the cut surface, and the surgery proceeds as per Zimmer Persona guidelines.
Notes
This document is intended for physicians and does not constitute medical advice. Each patient must be examined and advised individually. For detailed product information, refer to package inserts or contact a Zimmer representative.
Catalog excerpts
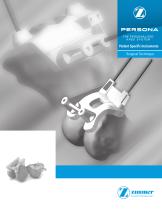
Patient Specific Instruments Surgical Technique
Open the catalog to page 1
Patient Specic Instruments Surgical Technique Introduction General Considerations • Zimmer® Patient Specic Instruments (PSI) are not designed for use with the Zimmer MIS Quad-Sparing™ Total Knee Procedure. Zimmer PSI should be used in conjunction with a femur rst technique. Verify stability and fixation of all pins. When securing the conventional cutting guides, avoid the use of spring pins as these may cause stress / unwanted shift on the cutting guide.
Open the catalog to page 3
Patient Specic Instruments Surgical Technique Persona® The Personalized Knee System Patient Specific Instruments Surgical Technique Table of Contents Femoral Technique Tibial Technique
Open the catalog to page 4
Femoral Technique Femoral Technique Position Femoral Pin Guide • Do not remove osteophytes from the femur. • Position the Pin Guide on the distal femur (Fig. 1). • Pin Guide will be captured by the anterior ridge of the femur. • The epicondylar axis and A/P axis reference lines on the Pin Guide can be used to assess alignment. • Apply posterior pressure to the Pin Guide and verify secure fit. Drill and Pin the Anterior Pin Holes • Drill and pin the anterior medial and lateral pin holes of the Pin Guide using the Universal Disposable Drill (2001-00-000) (Fig. 2). Drill Distal Pin Holes • Drill...
Open the catalog to page 5
Femoral Technique Place Distal Cut Guide and Cut Femur • Remove the Pin Guide by sliding it off the pins, leaving the anterior pins in the bone. • Secure the Persona® 0° Captured / Uncaptured Cutting Head (42-5099-010-00). • Verify the distal resection on the medial and lateral side with a resection guide. Check alignment if desired, and make the cut (Fig. 4). TECHNIQUE TIP When performing the cuts, excessive force (considering the pressure being applied to the guide) on the medial or lateral side of the cut guide could influence the amount of varus/valgus in the cut. If more fixation is required,...
Open the catalog to page 6
Tibial Technique Tibial Technique Position Tibial Pin Guide • Remove the meniscus. • Do not remove osteophytes from the tibia. Remove any soft tissues that may prevent proper placement of the Pin Guide. • Position the Pin Guide on the tibia (Fig. 7). • Ensure the posterior medial hook goes over the posterior ridge of the tibia. • The mechanical axis and proximal resection lines may be used to assess the alignment. Note: The tibia alignment may be verified by inserting the Tibia Alignment Adapter and Alignment Rod into the Tibia Pin Guide alignment holes (Fig. 8a & 8b). Drill and Pin Anterior...
Open the catalog to page 7
Tibial Technique Establish Tibia Rotation (Drill Proximal Holes) • Tibia rotation may be established through the Pin Guide per surgeon discretion. • Drill the proximal medial and lateral holes of the Pin guide (do not place pins). Drill deep enough to ensure visibility after the proximal resection (Fig. 11). Trabecular Metal™ Tibia Only (Fig. 12) 1. Gently insert a fixation pin into the floating posterior pinhole to use as a visual reference while drilling the lateral anterior rotational pin hole. 2. Drill the posterior pin hole, using as a visual reference the previously drilled anterior rotational...
Open the catalog to page 8
Tibial Technique Secure Cut Guide and Cut Tibia • Secure the Persona Tibial Cut Guide. If more fixation is required, insert a 3.2mm Trocar-tipped pin in the oblique hole on the cutting head. Verify resections using the resection guide. Make tibial cut (Fig. 15). • Use the appropriate right or left tibia cut guide. 3° Persona Left Cut Guide 7° Persona Left Cut Guide 3° Persona Right Cut Guide 7° Persona Right Cut Guide • Insert the Alignment Adapter into the Tibial Cut Guide, insert the Alignment Rod and check alignment (Fig. 16). Alignment Adapter When fixating the Cut Guide, excessive force...
Open the catalog to page 9
Tibial Technique Position Tibial Sizing Plate • Place tibial sizing plate on the cut surface. Align the first hole on the tibia plate to the hole on the tibia. Place the pin. Rotate the tibia plate until the second pin hole aligns with the remaining pre-drilled holes (Fig. 17). The sizing plate options are referenced in (Fig. 18) on the following page. In the event the drilled proximal holes are covered up following the proximal cut, clean the area. Alternatively, prior to removing the anterior pins, place the Pin Guide back over the anterior pins and locate the proximal holes through the tibial...
Open the catalog to page 10
THE PERSONALIZED KNEE SYSTEM Tibial Technique Persona TrabecularMetalTibialSizing Plate Left C 42-5398-064-01 Persona TrabecularMetalT\b\z\S\img Plate Right C 42-5398-064-02 Persona 7rabea//or/Mefo/TibialSizing Plate Left D 42-5398-067-01 Persona 7rabea//or/Mefo/TibialSizing Plate Right D 42-5398-067-02 Persona Cemented Tibial Sizing Plate Left C Persona Cemented Tibial Sizing Plate Right C Persona Cemented Tibial Sizing Plate Left D Persona Cemented Tibial Sizing Plate Right D Persona 7rabea//or/Mefo/TibialSizing Plate Left E 42-5398-071-01 Persona Persona Trabecular MetalT\b'\z\S\im% Plate...
Open the catalog to page 11
Note: Materialise and the Materialise logo are trademarks of Materialise NV This documentation is intended exclusively for physicians and is not intended for laypersons. Information on the products and procedures contained in this document is of a general nature and does not represent and does not constitute medical advice or recommendations. Because this information does not purport to constitute any diagnostic or therapeutic statement with regard to any individual medical case, each patient must be examined and advised individually, and this document does not replace the need for such examination...
Open the catalog to page 12All Zimmer Biomet catalogs and technical brochures
 Oxford® Partial Kne
60 Pages
 Distal Femoral Replacement
72 Pages
 ROSA ONE® Brain System
7 Pages
Archived catalogs
 MODULAR FEMORAL Revision System
14 Pages
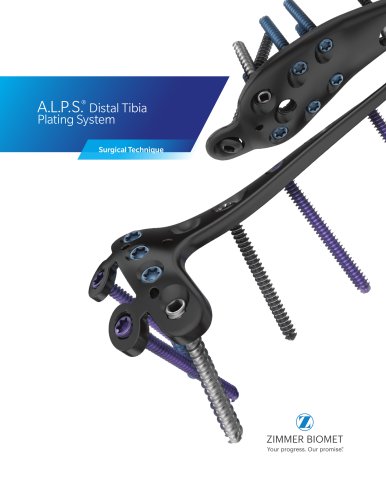 A.L.P.S.®
44 Pages
 Constrained Posterior Stabilized
12 Pages
 Persona PERSONALIZED KNEE
7 Pages
 Avenir® Femoral Hip System
12 Pages
 The CLS® Spotorno® Stem
16 Pages
 Alloclassic®Zweymüller®Stem
12 Pages
 ®Zimmer® Segmental System
6 Pages
 Zimmer Natural Nail System
8 Pages
 modern-cementing-technique
16 Pages
 CoAxial Spray Kit
8 Pages
 Biologics
24 Pages
 PowerPump DP System
2 Pages
 Sidus
Sidus40 Pages
 Ankle Fix System 4.0
8 Pages
 Anatomical Shoulder System
6 Pages
 NexGen® RH Knee
8 Pages
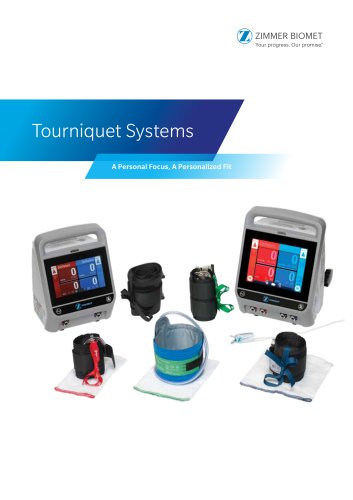
 tourniquet-systems-brochure
8 Pages
 Persona-Partial
12 Pages
 Fitmore Hip Stems
6 Pages
 NexGen High-Flex Implant
8 Pages
 Trabecular Metal ™Glenoid
4 Pages
 Anatomical Shoulder ™ System
6 Pages
 Zimmer ® PSI Shoulder
6 Pages
 ZImmer iASSIST
44 Pages
 Fitmore ® Hip Stem
24 Pages
 Persona Knee
6 Pages
 Trauma Solutions
10 Pages
 Colagen Repair Patch
2 Pages
 Fitmore® Hip Stem
6 Pages
 Zimmer® Segmental System
6 Pages



- Detection kit
- ZIMMER BIOMET bone plate
- ZIMMER BIOMET compression plate
- ZIMMER BIOMET metallic compression plate
- Immunoassay detection kit
- ZIMMER BIOMET locking compression plate
- Infectious disease detection kit
- Titanium compression plate
- Surgical system
- Distal compression plate
- Cutting electrosurgical system
- Tablet computer software
- Cassette detection kit
- Chromatographic immunoassay test kit
- Coagulation surgical system
- Agitator
- ELISA detection kit
- Proximal compression plate
- Benchtop agitator
- Planning software