Catalog excerpts
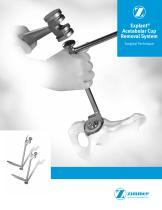
Explant® Acetabular Cup Removal System Surgical Technique
Open the catalog to page 1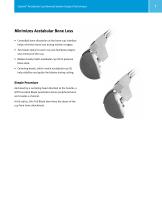
Explant® Acetabular Cup Removal System Surgical Techninque Minimizes Acetabular Bone Loss • Controlled bone dissection at the bone-cup interface helps minimize bone loss during revision surgery. • Two blade styles for each cup size facilitate progressive removal of the cup. • Blades closely match acetabular cup OD to preserve bone stock. • Centering heads, which match acetabular cup ID, help stabilize and guide the blades during cutting. Simple Procedure Anchored by a centering head attached to the handle, a stiff Truncated Blade penetrates dense peripheral bone and creates a channel. A...
Open the catalog to page 3
Explant® Acetabular Cup Removal System Surgical Techninque Select Instrument Size Determine the size of acetabular cup to be removed by determining its outside and inside diameters. Select the blade based on the outside diameter (OD) of the cup and the Pivot Head (22mm-36mm) based on the inside diameter (ID). Note: If the OD is in between the available blade sizes, select the next largest size. Alternatively, if the ID is in between the available Pivot Head sizes, select the next smallest size. If the shell to be explanted is a Large Diameter Head shell and the inside diameter (ID) is 38mm...
Open the catalog to page 4
Explant® Acetabular Cup Removal System Surgical Techninque Assemble Blades Thread the selected Pivot Heads or the Explant Adapter with Large Diameter Head Trial Heads onto each of the two handles. Ensure the Pivot Head or Adapter with Large Diameter Head Trial Head is threaded down tightly on the handle to prevent loosening during impaction. Slide the selected Truncated Blade and corresponding Full Blade over the bolt on each handle. Use the Torque Wrench with the hex adapter to secure the blade to the handle. Tighten until the Torque Wrench releases. This will ensure that the blade is...
Open the catalog to page 5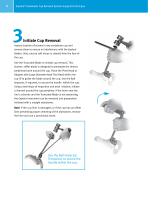
Explant® Acetabular Cup Removal System Surgical Techninque Assess location of screws in any acetabular cup and remove them to ensure no interference with the Explant blades. Also, ensure soft tissue is cleared from the face of the cup. Use the Truncated Blade to initiate cup removal. This shorter, stiffer blade is designed to penetrate the denser peripheral bone around the cup. Place the Pivot Head or Adapter with Large Diameter Head Trial Head within the cup ID to guide the blade around the cup. Use the Ball Impactor, if required, to secure the handle within the cup. Using a technique of...
Open the catalog to page 6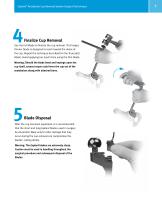
Explant® Acetabular Cup Removal System Surgical Techninque Use the Full Blade to finalize the cup removal. This longer, thinner blade is designed to reach toward the dome of the cup. Repeat the technique described for the Truncated Blade. Avoid applying too much force using the thin blade. Warning: Should the blade bend and impinge upon the cup itself, excess torque could lever the cup out of the acetabulum along with attached bone. Blade Disposal After the cup has been explanted, it is recommended that the short and long Explant blades used in surgery be discarded. Wear and/or other damage...
Open the catalog to page 7
6 Explant® Acetabular Cup Removal System Surgical Techninque Order Information 00-7000-020-00 Shell Removal Instrument Set - Small 00-7050-096-00 Small Osteotome Instrument Case 1 00-7053-002-00 Torque Wrench Adapter, Hex 3.5mm 1 00-7053-003-01 Curved Osteotome, Small Handle 2 00-7053-042-10 Truncated Blade, 42mm Hemisphere 1 00-7053-044-10 Truncated Blade, 44mm Hemisphere 1 00-7053-046-10 Truncated Blade, 46mm Hemisphere 1 00-7053-048-10 Truncated Blade, 48mm Hemisphere 1 00-7053-050-10 Truncated Blade, 50mm Hemisphere 1 00-7053-042-20 Full Blade, 42mm Hemisphere 1 00-7053-044-20 Full...
Open the catalog to page 8
This documentation is intended exclusively for physicians and is not intended for laypersons. Information on the products and procedures contained in this document is of a general nature and does not represent and does not constitute medical advice or recommendations. Because this information does not purport to constitute any diagnostic or therapeutic statement with regard to any individual medical case, each patient must be examined and advised individually, and this document does not replace the need for such examination and/or advice in whole or in part. Please refer to the package...
Open the catalog to page 12All Zimmer Biomet catalogs and technical brochures
-
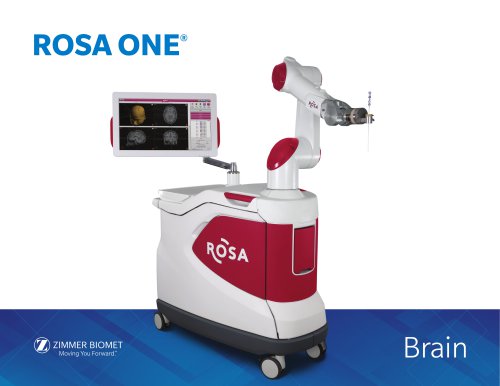
ROSA ONE® Brain System
7 Pages
-
MODULAR FEMORAL Revision System
14 Pages
Archived catalogs
-
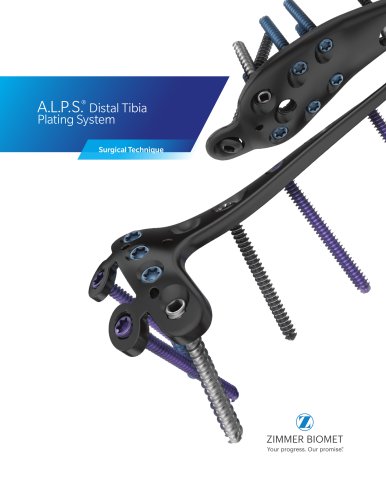
A.L.P.S.®
44 Pages
-
Constrained Posterior Stabilized
12 Pages
-
Persona PERSONALIZED KNEE
7 Pages
-
Avenir® Femoral Hip System
12 Pages
-
The CLS® Spotorno® Stem
16 Pages
-
Alloclassic®Zweymüller®Stem
12 Pages
-
®Zimmer® Segmental System
6 Pages
-
NexGen® RH Knee
8 Pages
-
Persona-Partial
12 Pages
-
Zimmer Natural Nail System
8 Pages
-
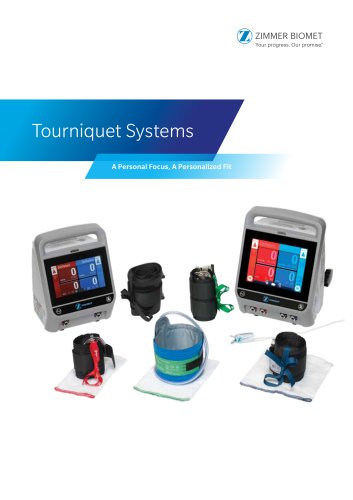
tourniquet-systems-brochure
8 Pages
-
modern-cementing-technique
16 Pages
-
CoAxial Spray Kit
8 Pages
-
Biologics
24 Pages
-
PowerPump DP System
2 Pages
-
Sidus
40 Pages
-
Ankle Fix System 4.0
8 Pages
-
Anatomical Shoulder System
6 Pages
-
Fitmore Hip Stems
6 Pages
-
NexGen High-Flex Implant
8 Pages
-
Trabecular Metal ™Glenoid
4 Pages
-
Anatomical Shoulder ™ System
6 Pages
-
Zimmer ® PSI Shoulder
6 Pages
-
Zimmer personna
12 Pages
-
ZImmer iASSIST
44 Pages
-
Fitmore ® Hip Stem
24 Pages
-
Persona Knee
6 Pages
-
Trauma Solutions
10 Pages
-
Colagen Repair Patch
2 Pages
-
Fitmore® Hip Stem
6 Pages
-
Zimmer® Segmental System
6 Pages


