
- Catalogs
- Zirkonzahn
- Brochure Prettau® Skin® veneer – step by step


Brochure Prettau® Skin® veneer – step by step

Brochure Prettau® Skin® veneer – step by step
Minimally invasive dentistry (MID) focuses on preserving healthy tooth tissue and preventing disease progression with minimal tissue loss. The aim is to maintain original healthy tissue, as natural tissue is biologically more valuable than restorations.
There is an increase in caries-free dentitions but also a rise in tooth substance loss due to abrasion, attrition, and erosion. With longer life expectancy, non-carious tooth loss has increased, necessitating simple, reversible, and defect-oriented approaches for tooth structure replacement.
The goal is to prevent or slow down tooth substance loss and restore teeth to their original state using additive procedures. Various veneers and adhesive bridges are used for minimally invasive restorations, focusing on aesthetics and function.
1. Comprehensive data collection and analysis of the initial situation.
2. Use of mock-ups and preparation guides for planning.
3. Correct execution of working steps involving all dental disciplines.
4. Lifelong aftercare to prevent further damage and assess restorations.
Documentation includes static and dynamic photographs and videos to capture the initial situation. Intraoral scans and digital records are used for diagnostics and communication between the patient, dentist, and technician.
Patient data is processed using software to align occlusion and design virtual teeth. A mock-up is created to meet aesthetic and functional expectations, allowing for adjustments before final restoration.
The mock-up is tested in the patient's mouth to assess aesthetics, function, and phonetics. It serves as a communication tool and helps determine necessary preparation areas.
Colour matching is crucial for aesthetic success. It involves using shade guides and considering environmental factors to ensure the restoration matches the natural tooth colour.
The mock-up results guide the necessity and degree of preparation, aiming for minimal intervention to achieve the desired outcome.
The document outlines the use of silicone guides and retraction cords for preparation control in dental procedures. Local anesthesia is applied based on the complexity of the preparation and patient sensitivity. Retraction cords, possibly sanitized with anesthetic gel, are used to isolate the working area, aiding in local anesthesia, drying, and gingival protection.
Key considerations include the necessity of pretreatment (periodontal, orthodontic, bleaching), tooth volume increase, veneer thickness, and dimensions. The optimal insertion direction is also discussed, with various options like horizontal, incisal/occlusal, and diagonal.
The document describes specific measures for a patient case, including the removal and preparation of veneers on teeth 21 and 11, and minimally invasive restoration on canines for symmetry and alignment.
Options include intraoral scanning or conventional impressions. Intraoral scanning is preferred for its accuracy and speed, with features like powder-free scanning and real-time color representation.
The process involves importing scan data into software for veneer design, setting parameters to avoid undercuts, and ensuring proper alignment in zirconia blanks for aesthetic and functional success.
The document details the milling process, emphasizing the importance of calibration and careful removal of veneers from zirconia blanks. Post-sintering, veneers are sandblasted and characterized for aesthetics.
The try-in process involves checking insertion direction, proximal contact, margin closure, and occlusion. An aesthetics checklist ensures symmetry, tooth axis, gingival margin, and other aesthetic factors are satisfactory.
The final cementation involves cleaning and etching the tooth surface, using a primer for chemical bonding, and ensuring the inclusion of MDP in the primer for effective adhesion.
Emphasizes the importance of oral hygiene and periodontal health for successful cementation, with recommendations for cleaning and isolating the working area.
The enamel surface should be etched with phosphoric acid gel for 10-15 seconds, followed by rinsing with water and drying with an air stream to enhance adhesion. The inner surface of the zirconia restoration is sandblasted using Al2O3 at specific conditions. If contaminated, the procedure should be repeated.
Mix Tokuyama Universal Bond A and B in a mixing bowl and apply it to the veneer and tooth surfaces. Ensure the application is within the specified time limits due to the presence of volatile solvents. Dry the surfaces with a low air stream.
Use a self-mixing syringe to apply the cement paste, place the restoration on the tooth, and remove excess paste. Light curing should be done for 2-4 seconds initially, followed by complete polymerization.
Estecem II is a dual-curing resin suitable for various prosthetic materials. It is important to avoid certain materials that can prevent adhesion. Ensure the paste and bond are at room temperature before use.
Includes cleaning and isolation of the working field, tooth preparation with phosphoric acid, veneer preparation, bond preparation and application, and final cementation steps. The process involves careful handling and timing to ensure optimal results.
The document provides a guideline for the workflow of Prettau® Skin® veneers, emphasizing the importance of practical experience and decision-making based on clinical and material factors. The selection of zirconia type and preparation degree are crucial for aesthetic and functional outcomes.
Discusses the possibilities for minimally invasive restorations using zirconia, highlighting the need for continuous education and training for dentists and dental technicians.
Catalog excerpts

PRETTAU® SKIN® ENAMEL PRETTAU ® SKIN ® VENEER
Open the catalog to page 1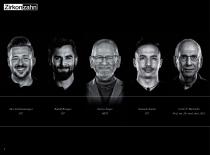
Alex Lichtmannegger Enrico Steger Samuele Zanini
Open the catalog to page 2
MINIMALLY INVASIVE DENTISTRY CLINICAL AND EPIDEMIOLOGICAL BACKGROUND The term “minimally invasive dentistry” (MID) has become in recent years a keyword in dentistry as well as in prosthetics and dental technology. Minimally invasive dentistry expresses an attitude: a “general respect for the original healthy tissue (tooth substance and soft tissues)”. This means that any restoration is of less biological value than the original healthy tissue. The aim is therefore tissue preservation, disease prophylaxis, interruption of the progression of already existing pathologies (e.g. caries) and tissue...
Open the catalog to page 3
WHAT HAS CHANGED? Among our patients, we observe an increased number of caries-free dentitions, but also an increased loss of healthy tooth substance due to abrasion (mechanical interaction of tooth and material), attrition (mechanical interaction between teeth) and erosion (chemical interaction, mostly caused by acids). Loss of healthy tooth structure is a common condition that occurs in different degrees in up to 97 % of the population as normal physiological process which increases throughout life. With longer life expectancy and the growing tendency to preserve teeth in old age, the incidence...
Open the catalog to page 4
WHY DO WE NEED MINIMALLY INVASIVE PROSTHETICS AND WHAT EXAMPLES DO WE KNOW? The healthy tooth, free of caries and restorations, represents the best starting situation for lifelong function regarding all aspects (structural and aesthetic), as long as natural tooth substance is not lost via physiological or pathological processes. It is therefore our primary goal to prevent or slow down such processes prophylactically or, in an advanced stage, to restore the tooth, as far as possible, to its original state by means of an additive procedure. Restorations such as veneer chips, incisal veneers, partial...
Open the catalog to page 5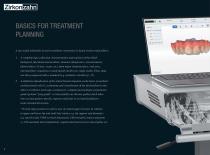
BASICS FOR TREATMENT PLANNING A successful minimally invasive prosthetic restoration is based on four main pillars: 1. A complete data collection, documentation and analysis of the initial biological, functional and aesthetic situation (diagnostics, measurements, photos/videos, X-rays, scans, etc.) from major elements (face, oral area, intermaxillary situation) to small details (tooth row, single tooth). These data are then compared with a standard (e.g. aesthetics checklist p. 37). 2. (direct or indirect mock-up), a temporary, a digital and analogue preparation guide (printed “prep guide” or...
Open the catalog to page 6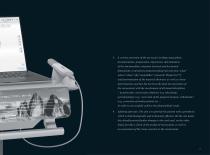
A correct execution of the necessary working steps (photo documentation, preparation, impression, determination of the intermaxillary situation [vertical and horizontal dimension], restoration production [material selection: what? where? when? why? monolithic? veneered? Dispersive®?] and determination of the material thickness as well as colour the restoration) with the involvement of all dental disciplines – in particular conservative dentistry (e.g. bleaching), periodontology (e.g. correction of the gingival margin), orthodontics (e.g. correction of tooth position) etc. – Lifelong aftercare....
Open the catalog to page 7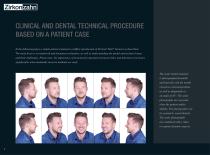
CLINICAL AND DENTAL TECHNICAL PROCEDURE BASED ON A PATIENT CASE ® Skin® Veneers) is described. The main focus is on teamwork and document evaluation, as well as understanding the dental and technical steps and their challenges. Please note: the importance of structured cooperation between clinic and laboratory increases The static initial situation is photographed frontally and laterally with the mouth closed in a relaxed position as well as diagonally at an angle of 45°. The same photographs are repeated when the patient smiles slightly. The photographs can be zoomed to reveal details. The static...
Open the catalog to page 8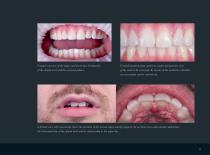
Frontal overview of the upper and lower jaw. Evaluation Frontal situation from canine to canine (perspective view of the dental arch and the occlusal planes. of the teeth to be restored). By means of the aesthetics checklist, an assessment can be carried out. A frontal view with relaxed lip shows the position of the incisal edges and lip support. An occlusal view adds another dimension: the horizontal line of the dental arch and its relationship to the upper lip.
Open the catalog to page 9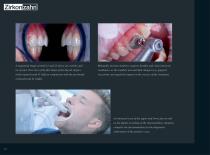
A tangential image of teeth 11 and 21 shows an overbite and Minimally invasive dentistry requires healthy and clean intraoral conditions, as the smallest uncontrolled changes (e.g. gingival of the natural tooth 11 (left) in comparison with the previously recession) can negatively impact on the success of the treatment. restored tooth 21 (right). An intraoral scan of the upper and lower jaw as well as the digital recording of the intermaxillary situation complete the documentation for the diagnostic elaboration of the patient’s case.
Open the catalog to page 10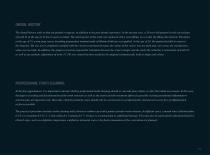
DENTAL HISTORY at the age of 15, a non-prep veneer (avoiding preparation trauma) made of lithium disilicate was applied. At the age of 24, the patient decided to reassess value was too high. In addition, the gingiva recession exposed the transition between the veneer margin and the tooth. He asked for a restoration of tooth 21, as well as an aesthetic adjustment of tooth 11. The two central incisors needed to be adapted symmetrically, both in shape and colour. PROFESSIONAL TOOTH CLEANING 0.2 % or octenident 0.1 %; 2 – 3 times daily for 1 minute) for 7 – 10 days is recommended as additional therapy....
Open the catalog to page 11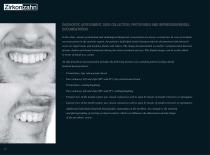
DIAGNOSTIC ASSESSMENT, DATA COLLECTION, PHOTO/VIDEO AND IMPRESSION/MODEL DOCUMENTATION In the clinic, dental, periodontal and radiological diagnostic assessments are always carried out. In case of aesthetic reconstructions in the anterior region, the patient’s individual initial situation must be documented with intraoral scans (or impressions and models), photos and videos. The image documentation is used for communication between patient, dentist and dental technician during the entire treatment process. The digital images can be easily edited in terms of detail (e.g. zoom). (natural head position):...
Open the catalog to page 12All Zirkonzahn catalogs and technical brochures
 Case gallery Prettau® 5
4 Pages
 Case gallery Prettau® Skin®
4 Pages
 Case gallery Prettau® Skin®
4 Pages
 Case gallery Prettau® Skin®
4 Pages
 Case gallery Prettau® Skin®
4 Pages
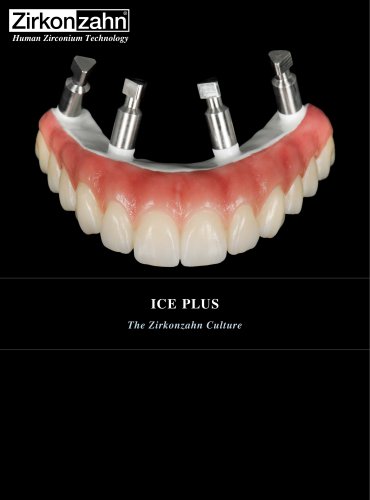 Insert ICE Plus
4 Pages
 Insert X-Ray Sphere
4 Pages
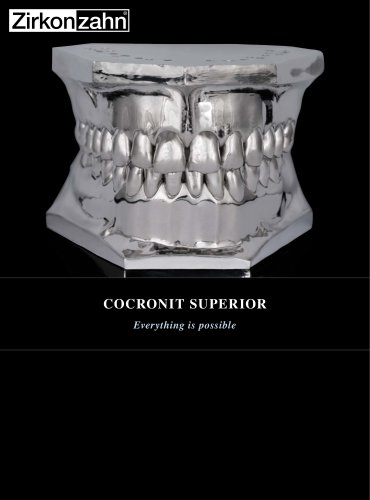 Insert Cocronit Superior
4 Pages
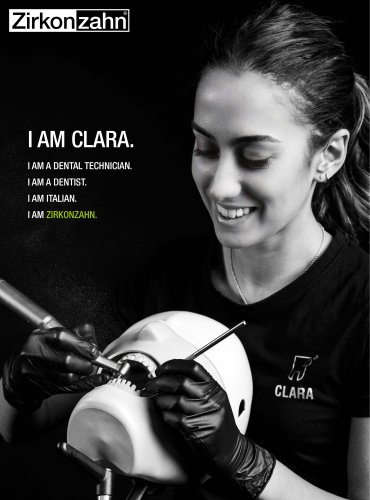 Insert Clara Zanini
4 Pages
 Case gallery Prettau® Skin®
4 Pages
 Insert Zirkonofen Turbo
4 Pages
 Insert anti-snoring device
4 Pages
 Insert Gingiva-Composites
4 Pages
 Brochure Fresco Ceramics
52 Pages
 Brochure PlaneSystem®
28 Pages
 Insert Zirkonofen 600/V4
4 Pages
 Fresco Ceramics Application
6 Pages
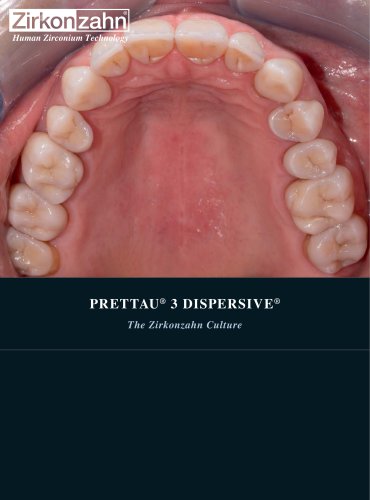 Prettau® 3 Dispersive®
4 Pages
 Brochure Detection Eye
20 Pages
 Brochure JawAligner
28 Pages
 Brochure PlaneSystem®
24 Pages
 Flyer PlaneAnalyser II
1 Page
 Flyer Head Tracker
1 Page
 Brochure CAD/CAM System
88 Pages
 Insert M6 Blank Changer
5 Pages
 Case gallery Bartplatte
4 Pages
 Brochure Zirkonzahn thinks big
12 Pages
 Brochure Shade Guide
52 Pages
 Insert Prettau® Line
4 Pages
 Case gallery Fresco Ceramics
4 Pages
 Brochure Zirkonofen Turbo
36 Pages
 Case gallery Prettau® 2
4 Pages
 Implant-supported components
100 Pages
 Case gallery Raw-Abutment®
4 Pages
 Insert Software
6 Pages
 Case gallery Bite Splint
4 Pages
 Brochure My Laboratory
32 Pages
 Brochure Zirkonzahn
68 Pages
 Brochure Military School
32 Pages
 Brochure Sintering Furnaces
28 Pages
 Brochure Patients
24 Pages
 Brochure Material diversity
116 Pages



Archived catalogs


- Zirkonzahn dental material
- Zirkonzahn dental restoration material
- Implant abutment
- Titanium implant abutment
- Straight implant abutment
- Dental surgery instrument kit
- Dental burr
- Zirkonzahn resin dental material
- Visualization software
- Zirkonzahn dental prosthesis dental material
- Internal implant abutment
- Zirkonzahn heating oven
- Modeling dental material
- Diamond burr
- Zirkonzahn dental crown material
- Zirkonzahn biocompatible dental material
- Dental bridge material
- Benchtop oven
- Angled implant abutment
- Zirkonzahn dental laboratory dental material